Ansible TowerまたはAWXのジョブテンプレート作成までの初期設定の流れを説明します。「Ansible Towerの初期操作(1/3) プロジェクトの作成まで」「Ansible Towerの初期操作(2/3) インベントリの作成まで」に基づいてプロジェクトの作成が終わっている事が前提条件です。様々な運用形態に対応できるようGUI, CLI, APIの3通りの設定手順をまとめます。
認証情報の設定
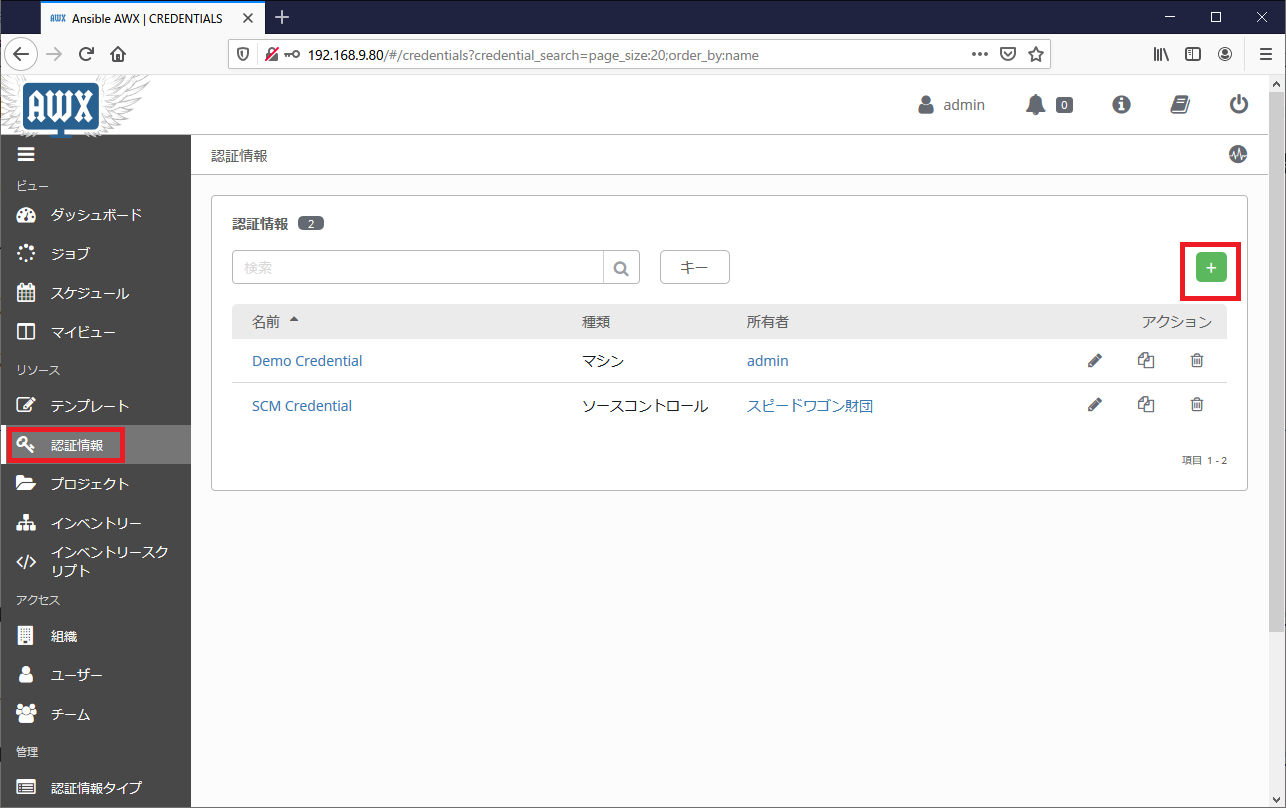
ジョブテンプレートで操作対象機器へログインする時の認証情報を定義します。
「認証情報」の画面に遷移し、「+(追加)」ボタンを押下します。
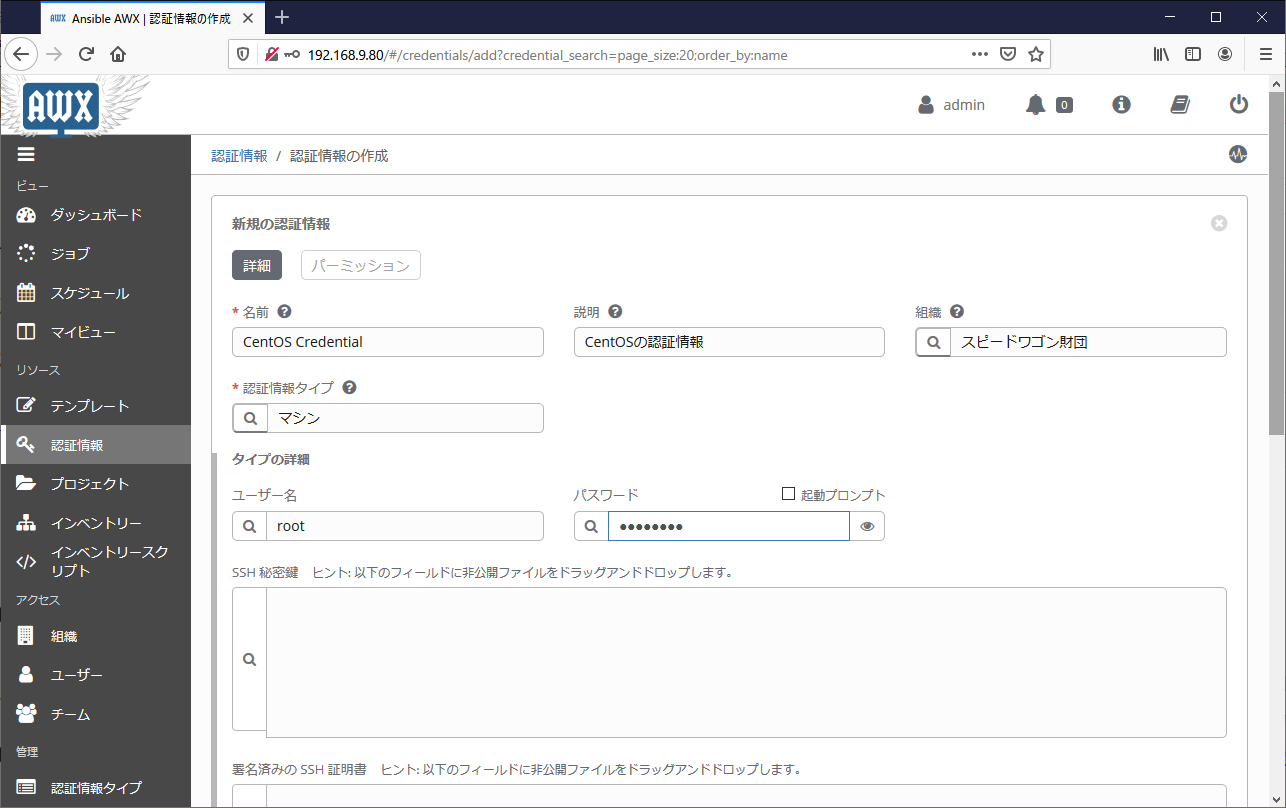
機器に対する認証情報を設定する場合は「認証情報タイプ」を「マシン」にします。必要な情報を入力し「保存」を押下します。
この操作をGUIを使わず、CLIで操作する場合は以下の通りです。
CLI操作
awx credentials create \
  --name "CentOS Credential" \
  --description "CentOS認証情報" \
  --organization "スピードワゴン財団" \
  --credential_type "Machine" \
  --input '{"username": "root","password":"P@ssw0rd"}'
APIで操作する場合は以下の通りです。
API操作
ORGANIZATION_ID=$(curl -u admin:P@ssw0rd \
  http://localhost/api/v2/organizations/ | \
  jq  '.results[] | select(.name == "スピードワゴン財団")' | jq ".id")

CREDENTIAL_TYPE_ID=$(curl -u admin:P@ssw0rd \
  http://localhost/api/v2/credential_types/ | \
  jq  '.results[] | select(.name == "Machine")' | jq ".id")

curl -XPOST -u admin:P@ssw0rd \
  --header "Content-Type: application/json" \
  -d @- http://localhost/api/v2/credentials/ << EOF
{
  "name": "CentOS Credential",
  "description": "CentOS認証情報",
  "organization": ${ORGANIZATION_ID},
  "credential_type": ${CREDENTIAL_TYPE_ID},
  "input": {
    "username":"root",
    "password":"P@ssw0rd"
  }
}
EOF
ジョブテンプレートの作成
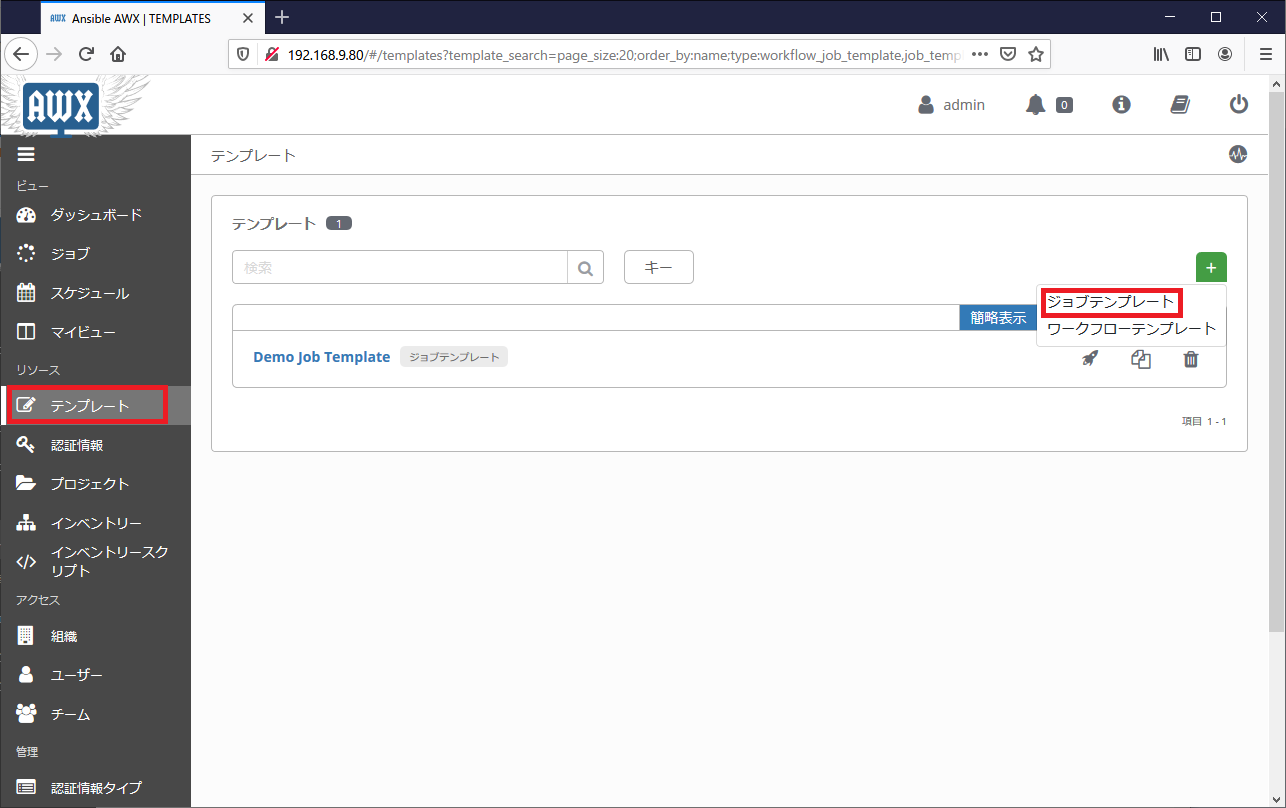
「テンプレート」の画面に遷移し、「+(追加)」ボタンを押下します。
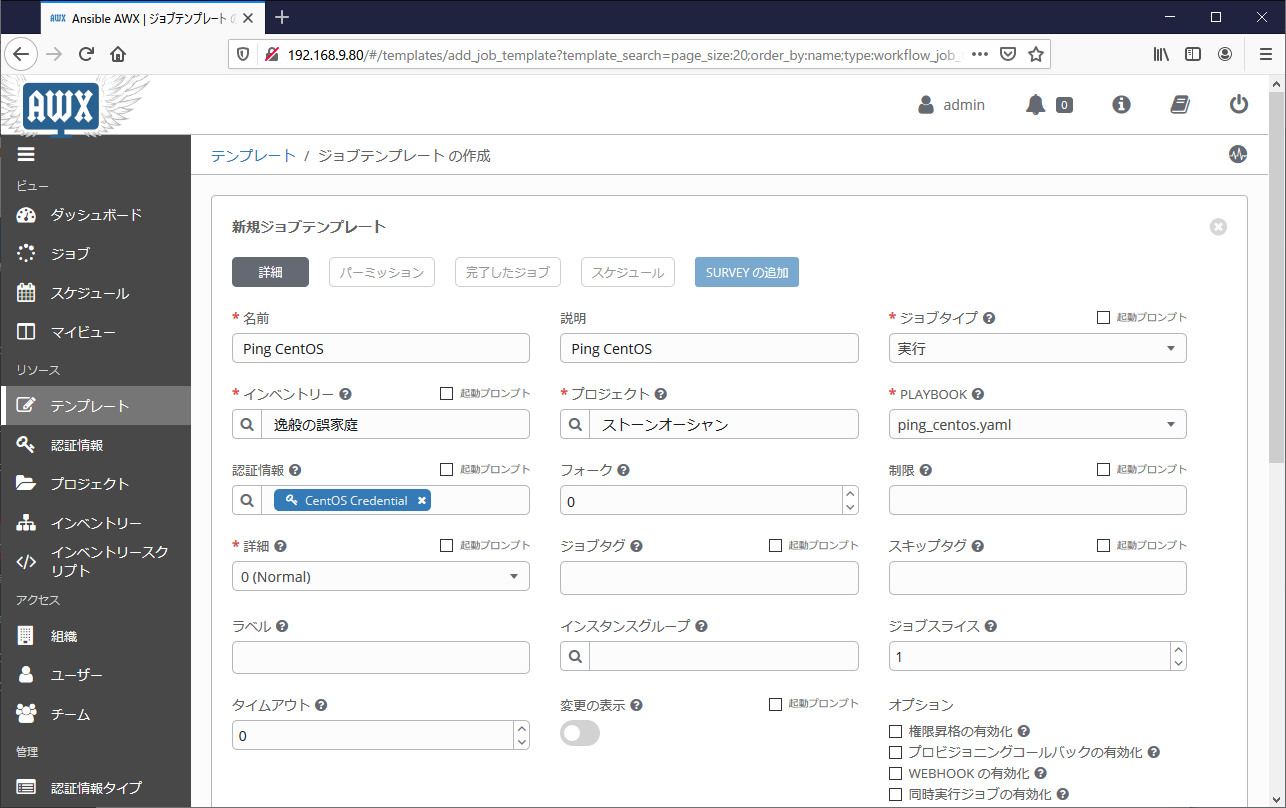
必要な情報を入力し「保存」を押下します。同様の操作を繰り返し、動作確認のためにホストを2つ以上作成しておきましょう。
この操作をGUIを使わず、CLIまたはAPIで操作する場合は以下の通りです。
まずジョブテンプレートを作成します。「インベントリ」などは名前ではなくidで指定します。
CLI操作
awx job_templates create \
  --name "Ping CentOS" \
  --description "Ping CentOS" \
  --job_type "run" \
  --inventory "逸般の誤家庭" \
  --organization "スピードワゴン財団" \
  --project "ストーンオーシャン" \
  --playbook "ping_centos.yaml"
API操作
ORGANIZATION_ID=$(curl -u admin:P@ssw0rd \
  http://localhost/api/v2/organizations/ | \
  jq  '.results[] | select(.name == "スピードワゴン財団")' | jq ".id")
INVENTORY_ID=$(curl -u admin:P@ssw0rd \
  http://localhost/api/v2/inventories/ | \
  jq  '.results[] | select(.name == "逸般の誤家庭")' | jq ".id")
PROJECT_ID=$(curl -u admin:P@ssw0rd \
  http://localhost/api/v2/projects/ | \
  jq  '.results[] | select(.name == "ストーンオーシャン")' | jq ".id")

curl -XPOST -u admin:P@ssw0rd \
  --header "Content-Type: application/json" \
  -d @- http://localhost/api/v2/job_templates/ << EOF
{
  "name": "Ping CentOS",
  "description": "Ping CentOS",
  "job_type": "run",
  "inventory": ${INVENTORY_ID},
  "organization": ${ORGANIZATION_ID},
  "project": ${PROJECT_ID},
  "playbook": "ping_centos.yaml"
}
EOF
ジョブテンプレートと認証情報を紐づけます。CLIを使用する場合は、「–credential」の後に認証情報を指定し、一番最後の引数にジョブテンプレートを指定します。
CLI操作
awx job_templates associate --credential "CentOS Credential" "Ping CentOS"
APIを使用する場合は、URLに「ジョブテンプレート」のidを指定し、HTTP REQUEST BODYに「認証情報」のidを指定します。
API操作
JOB_TEMPLATE_ID=$(curl -u admin:P@ssw0rd \
  http://localhost/api/v2/job_templates/ | \
  jq  '.results[] | select(.name == "Ping CentOS")' | jq ".id")
CREDENTIAL_ID=$(curl -u admin:P@ssw0rd \
  http://localhost/api/v2/credentials/ | \
  jq  '.results[] | select(.name == "CentOS Credential")' | jq ".id")

curl -XPOST -u admin:P@ssw0rd \
  --header "Content-Type: application/json" \
  -d @- http://localhost/api/v2/job_templates/${JOB_TEMPLATE_ID}/credentials/ << EOF
{
  "id": ${CREDENTIAL_ID}
}
EOF
ジョブテンプレートと認証情報の紐づけを解除する操作は以下の通りです。
CLI操作
awx job_templates disassociate --credential "CentOS Credential" "Ping CentOS"
API操作
curl -XPOST -u admin:P@ssw0rd \
  --header "Content-Type: application/json" \
  -d @- http://localhost/api/v2/job_templates/${JOB_TEMPLATE_ID}/credentials/ << EOF
{
  "id": ${CREDENTIAL_ID},
  "disassociate" : ${CREDENTIAL_ID}
}
EOF
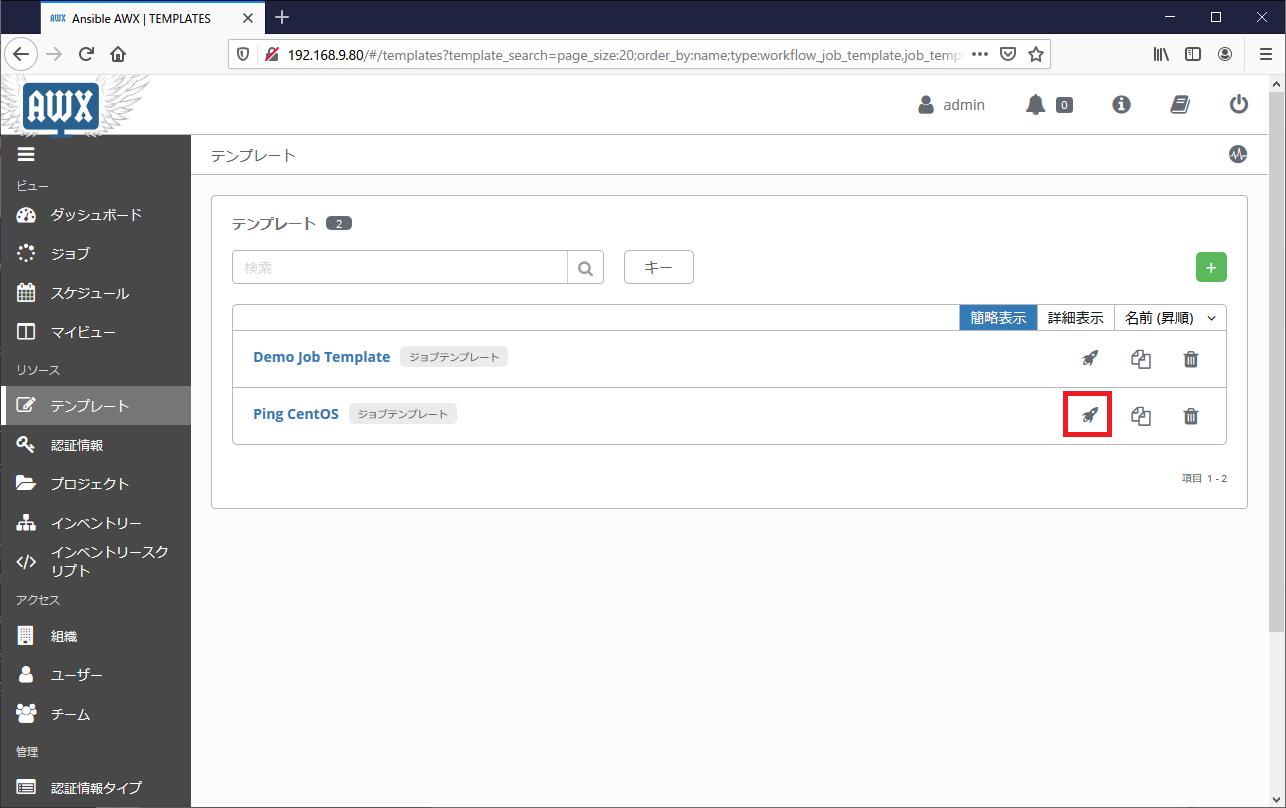
ジョブテンプレートの実行
ジョブテンプレートの一覧画面にて、ロケットのようなアイコンを押下するとジョブを実行できます。
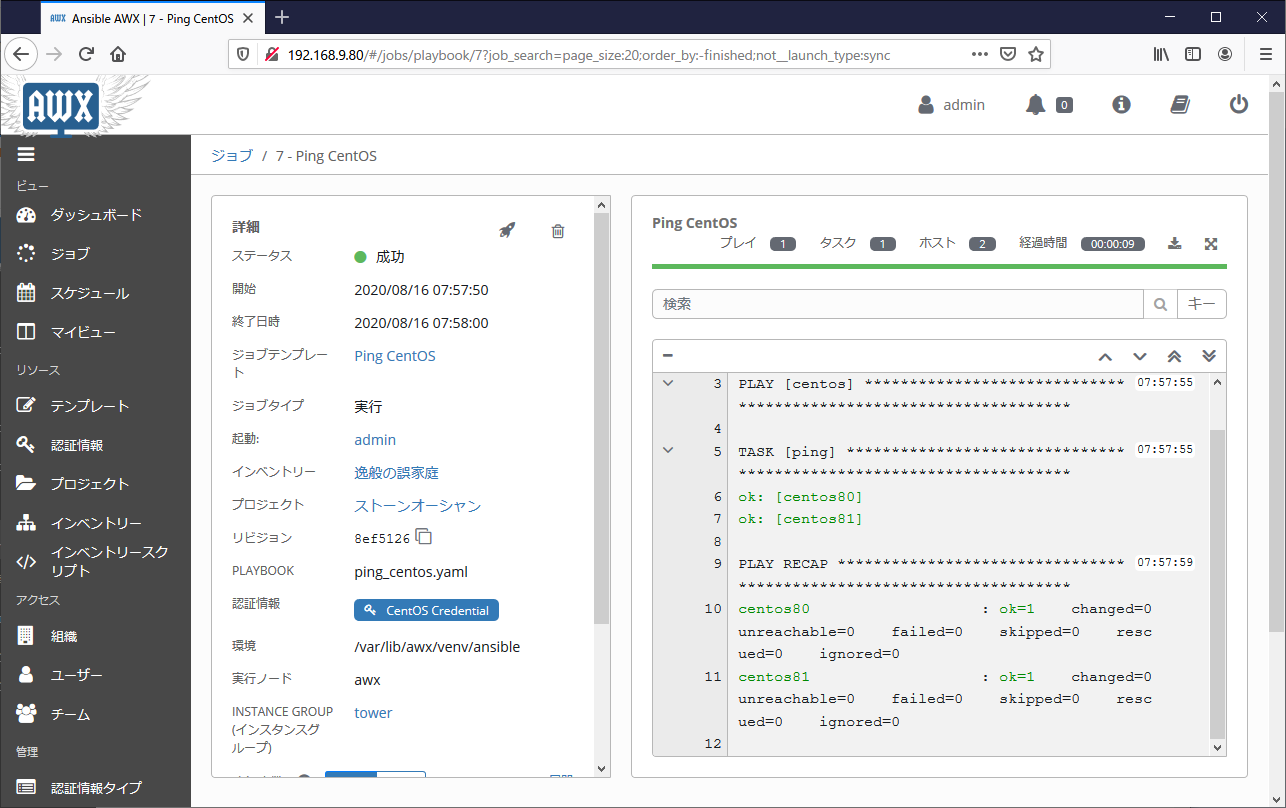
しばらく待つとジョブの実行結果が表示されます。
この操作をGUIを使わず、CLIまたはAPIで操作する場合は以下の通りです。実行が開始されると、ジョブに対するidが採番されるので、これをメモに控えます。
CLI操作
# JOB_TEMPLATE_ID=$(awx job_templates list -f jq --filter '.results[] | select(.name == "Ping CentOS")' | jq ".id")
# awx job_templates launch ${JOB_TEMPLATE_ID}
{
     "job": 10,
     "ignored_fields": {},
     "id": 10,
     "type": "job",
     "url": "/api/v2/jobs/10/",
     "summary_fields": {
          "organization": {
               "id": 5,
               "name": "\u30b9\u30d4\u30fc\u30c9\u30ef\u30b4\u30f3\u8ca1\u56e3",
               "description": "Speedwagon Foundation"

  <omitted>
API操作
# JOB_TEMPLATE_ID=$(curl -u admin:P@ssw0rd \
    http://localhost/api/v2/job_templates/ | \
    jq  '.results[] | select(.name == "Ping CentOS")' | jq ".id")
# curl -XPOST -u admin:P@ssw0rd \
    http://localhost/api/v2/job_templates/${JOB_TEMPLATE_ID}/launch/ | jq
{
  "job": 13,
  "ignored_fields": {},
  "id": 13,
  "type": "job",
  "url": "/api/v2/jobs/13/",

  <omitted>
ジョブidを指定すると、ジョブの実行結果を閲覧する事ができます。
CLI操作
# awx jobs stdout 10
SSH password:

PLAY [centos] ******************************************************************

TASK [ping] ********************************************************************
ok: [centos81]
ok: [centos80]

PLAY RECAP *********************************************************************
centos80                   : ok=1    changed=0    unreachable=0    failed=0    skipped=0    rescued=0    ignored=0
centos81                   : ok=1    changed=0    unreachable=0    failed=0    skipped=0    rescued=0    ignored=0
API操作
# curl -u admin:P@ssw0rd  http://localhost/api/v2/jobs/12/stdout/?format=txt
SSH password:

PLAY [centos] ******************************************************************

TASK [ping] ********************************************************************
ok: [centos81]
ok: [centos80]

PLAY RECAP *********************************************************************
centos80                   : ok=1    changed=0    unreachable=0    failed=0    skipped=0    rescued=0    ignored=0
centos81                   : ok=1    changed=0    unreachable=0    failed=0    skipped=0    rescued=0    ignored=0
ジョブ実行結果のAPIはデフォルトではHTML出力となるため、ターミナル上では非常に見づらい出力となります。出力形式はクエリパラメタformatで適宜変更できますので、以下の中から見やすいパラメタを選択ください。
| 表示形式 |
指定 |
| Browsable API |
?format=api |
| HTML |
?format=html |
| Plain Text |
?format=txt |
| Plain Text with ANSI color codes |
?format=ansi |
| JSON structure |
?format=json |
| Downloaded Plain Text |
?format=txt_download |
| Downloaded Plain Text with ANSI color codes |
?format=ansi_download |