MongoDBはNoSQLのひとつでドキュメント指向(JSON)データベースです。このページではMongoDB ServerとMongoDB Shellのインストール方法をまとめます。
前提
公式ドキュメント
参考になる公式ドキュメントを以下に示します。
- Install MongoDB
- Install MongoDB Community Edition on Red Hat or CentOS
- Install MongoDB Community Edition on Windows
動作確認済環境
- Rocky Linux 8.6
- MongoDB Server 6.0.2
- Windows 10
Redhat系Linuxへのインストール
インストールと起動
MongoDBのリポジトリを登録します。
cat << 'EOF' > /etc/yum.repos.d/mongodb-org-6.0.repo
[mongodb-org-6.0]
name=MongoDB Repository
baseurl=https://repo.mongodb.org/yum/redhat/$releasever/mongodb-org/6.0/x86_64/
gpgcheck=1
enabled=1
gpgkey=https://www.mongodb.org/static/pgp/server-6.0.asc
EOF
MongoDBのパッケージ群をインストールします。この操作により、データベース本体だけでなくmongoshコマンドなどのクライアントツールもインストールされます。
dnf install -y mongodb-org
MongoDBを起動します。
systemctl start mongod.service
systemctl enable mongod.service
簡易疎通確認
mongoshコマンドでMongoDBへ接続できます。syntaxは以下の通りです。
mongosh <データベース名>
操作例を以下に示します。データベース名を省略した場合はtestデータベースに接続されます。
[root@linux010 ~]# mongosh
Current Mongosh Log ID: 634bb7efd385650d87c96d8a
Connecting to:    mongodb://127.0.0.1:27017/?directConnection=true&serverSelectionTimeoutMS=2000&appName=mongosh+1.6.0
Using MongoDB:    6.0.2
Using Mongosh:    1.6.0

For mongosh info see: https://docs.mongodb.com/mongodb-shell/


To help improve our products, anonymous usage data is collected and sent to MongoDB periodically (https://www.mongodb.com/legal/privacy-policy).
You can opt-out by running the disableTelemetry() command.

------
   The server generated these startup warnings when booting
   2022-10-16T16:49:53.020+09:00: Access control is not enabled for the database. Read and write access to data and configuration is unrestricted
   2022-10-16T16:49:53.021+09:00: /sys/kernel/mm/transparent_hugepage/enabled is 'always'. We suggest setting it to 'never'
   2022-10-16T16:49:53.021+09:00: vm.max_map_count is too low
------

------
   Enable MongoDB's free cloud-based monitoring service, which will then receive and display
   metrics about your deployment (disk utilization, CPU, operation statistics, etc).

   The monitoring data will be available on a MongoDB website with a unique URL accessible to you
   and anyone you share the URL with. MongoDB may use this information to make product
   improvements and to suggest MongoDB products and deployment options to you.

   To enable free monitoring, run the following command: db.enableFreeMonitoring()
   To permanently disable this reminder, run the following command: db.disableFreeMonitoring()
------

test>
切断するにはexitと入力します。Ctrl+C 2回でも切断可能です。
test> exit
[root@linux010 ~]#
Windowsへのインストール
MongoDB ServerとMongoDB Compassのインストール
msiファイルのダウンロード
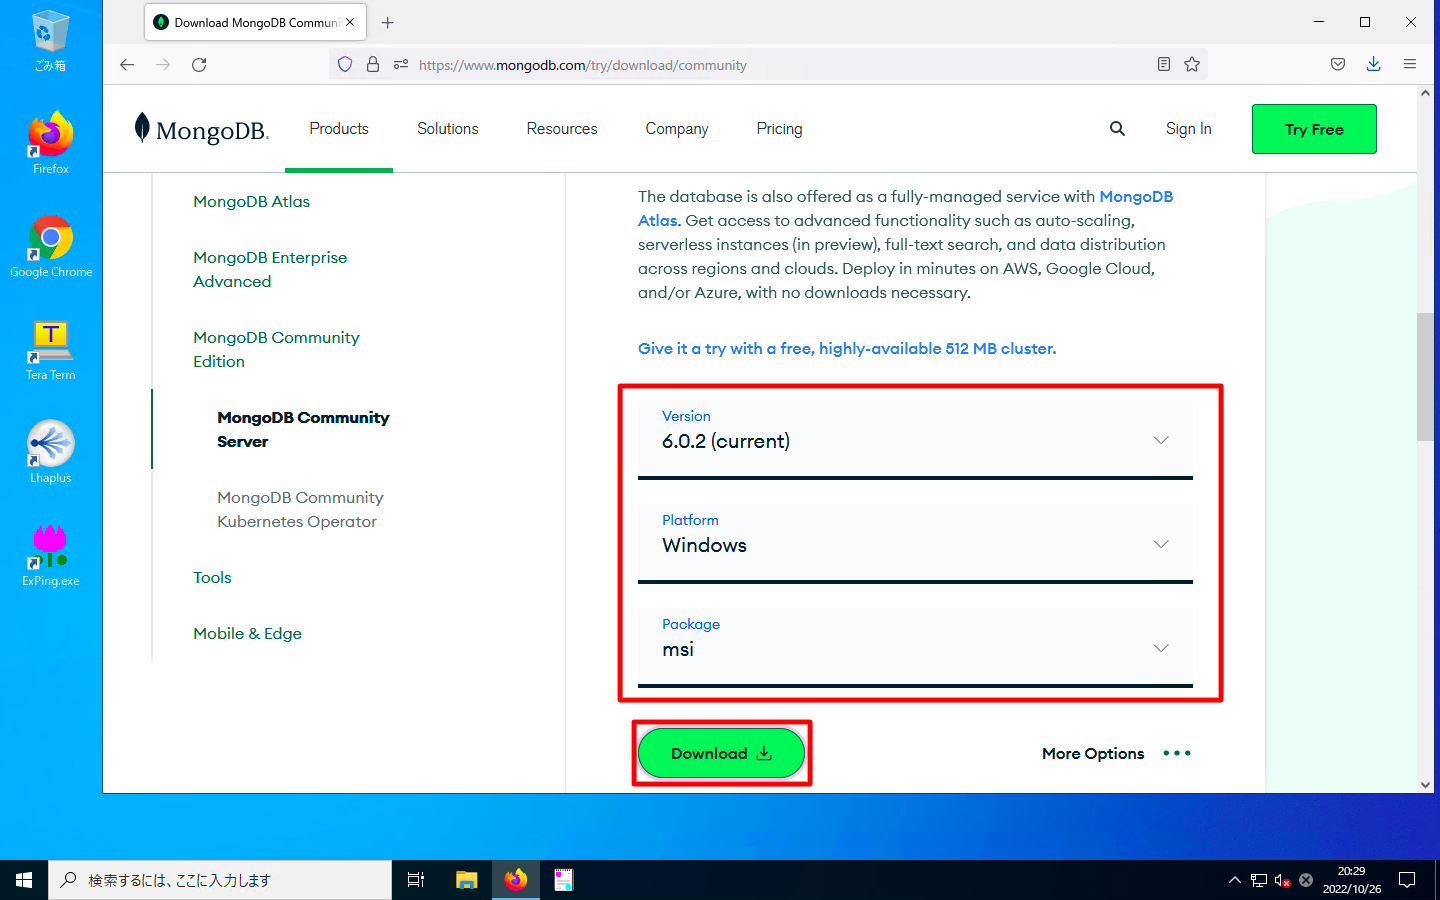
「MongoDB Community Editionのダウンロードサイト」をブラウザで開きます。
「Version」「Platform」「Package」を選択した状態で、「Download」を押下します。
MongoDB ServerとMongoDB Compassのインストール
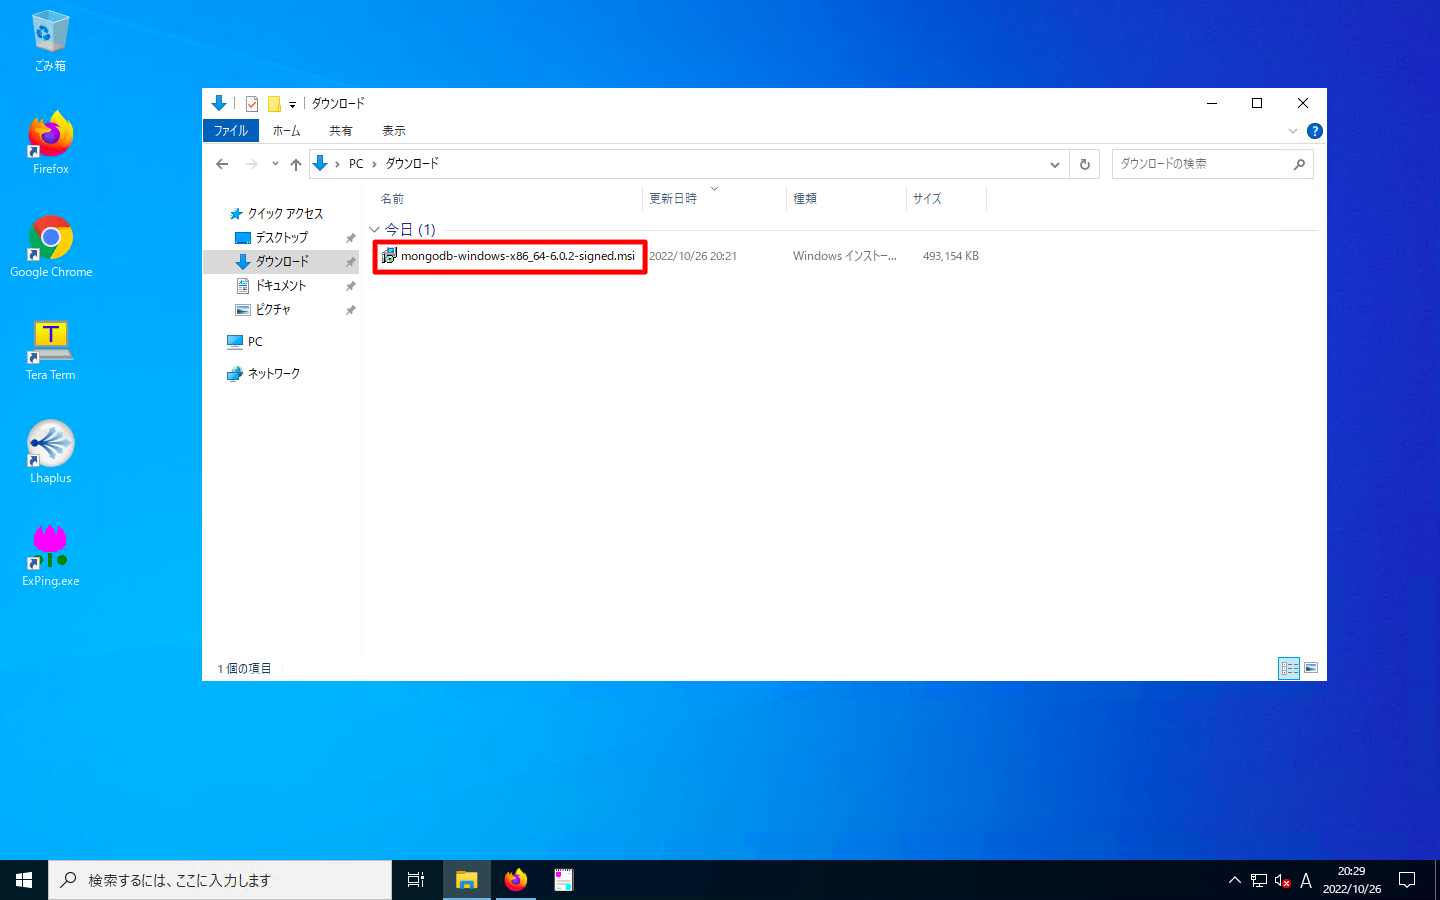
ダウンロードしたmsiファイルをダブルクリックで実行します。
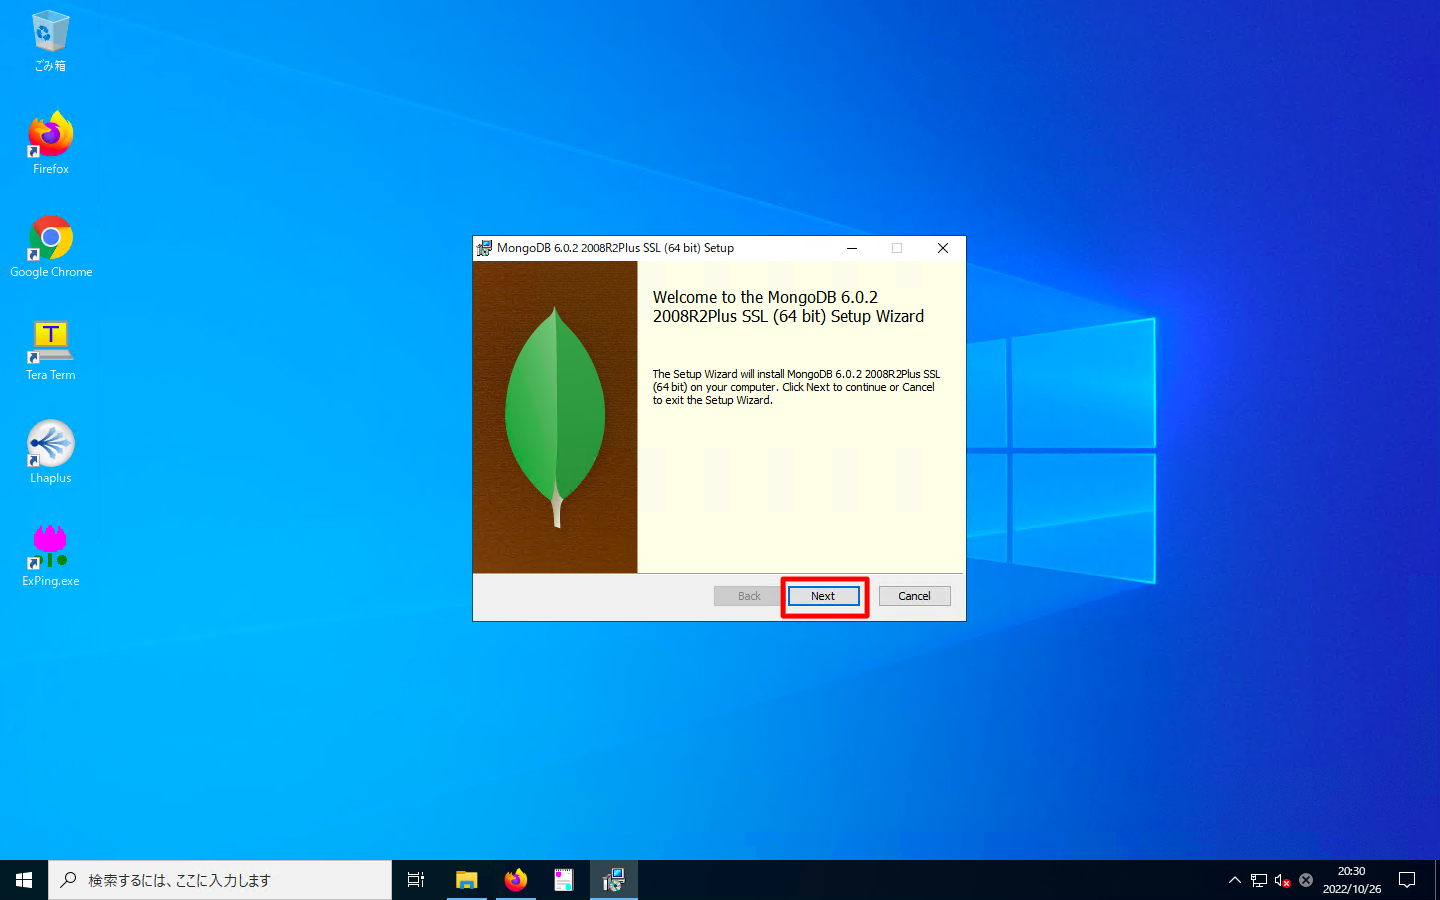
基本的にウィザードに沿って「Next」の押下連続でインストール完了します。以下、注意点のみに絞って説明します。
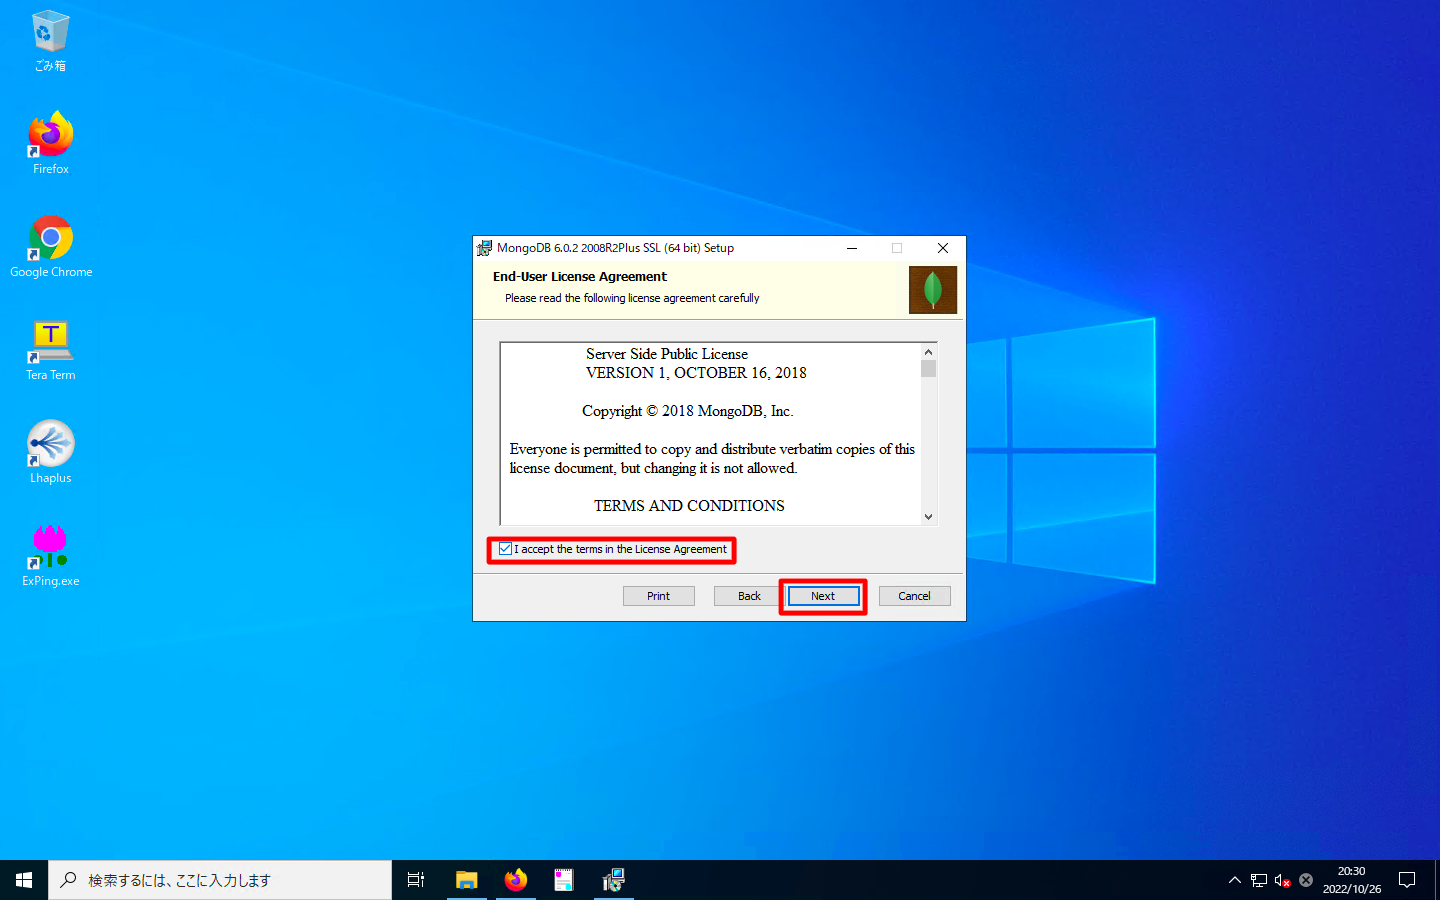
「I accept the term in the License Agreement」にチェックを入れ、「Next」を押下します。
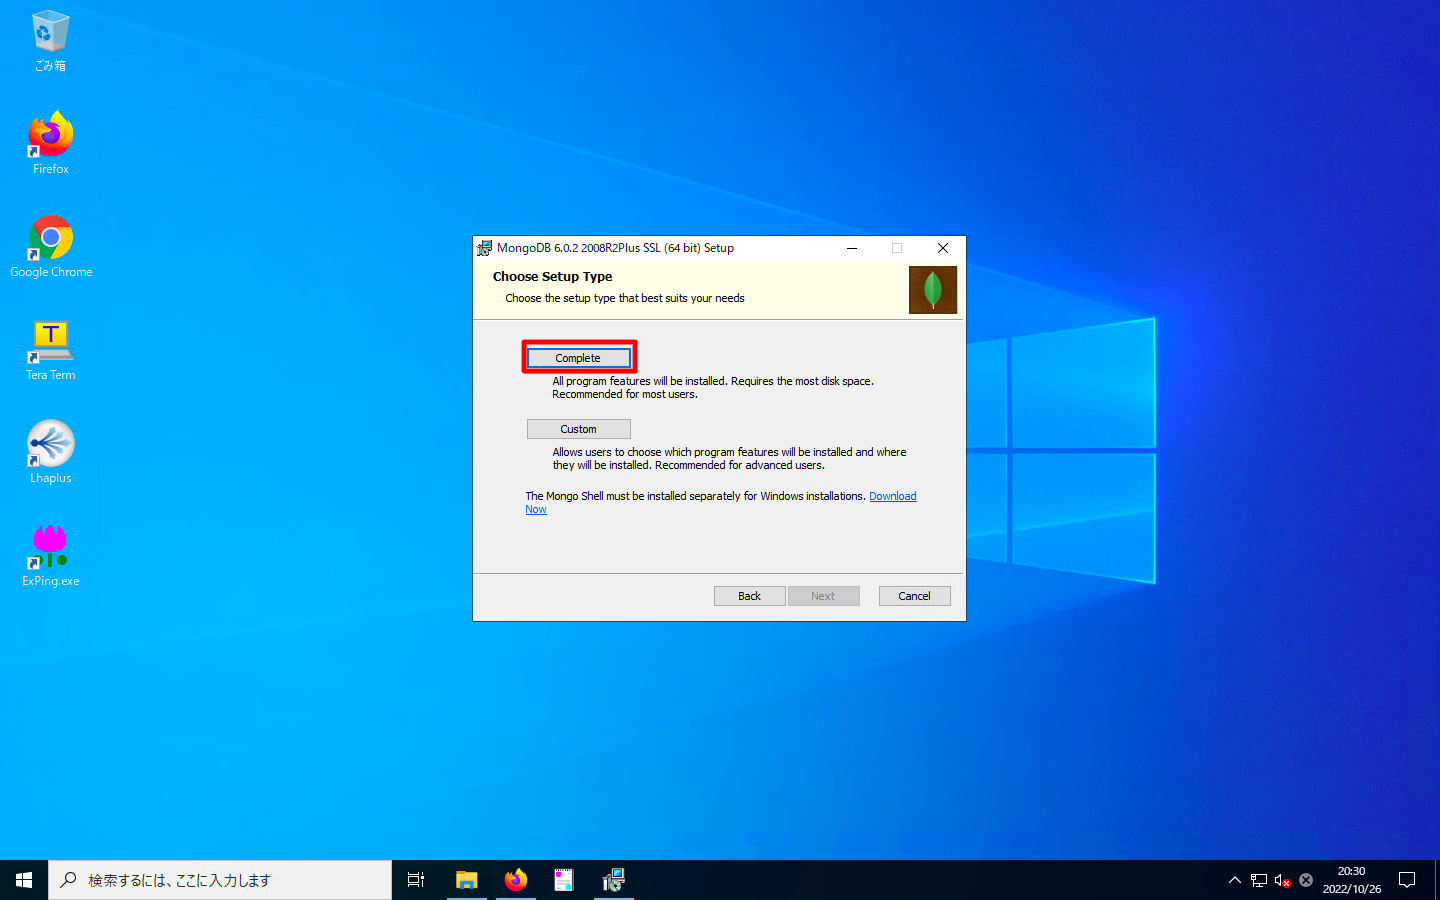
全てのコンポーネントをインストールするかカスタムインストールするかを選びます。全てのコンポーネントをインストールする場合は、「Complete」を押下します。
画面下部の注意書きの通り、Windows版MongoDBサーバにはコマンドラインツールのMongo Shellは含まれていません。Mongo Shellを使いたい方は別途のインストール操作が必要です。
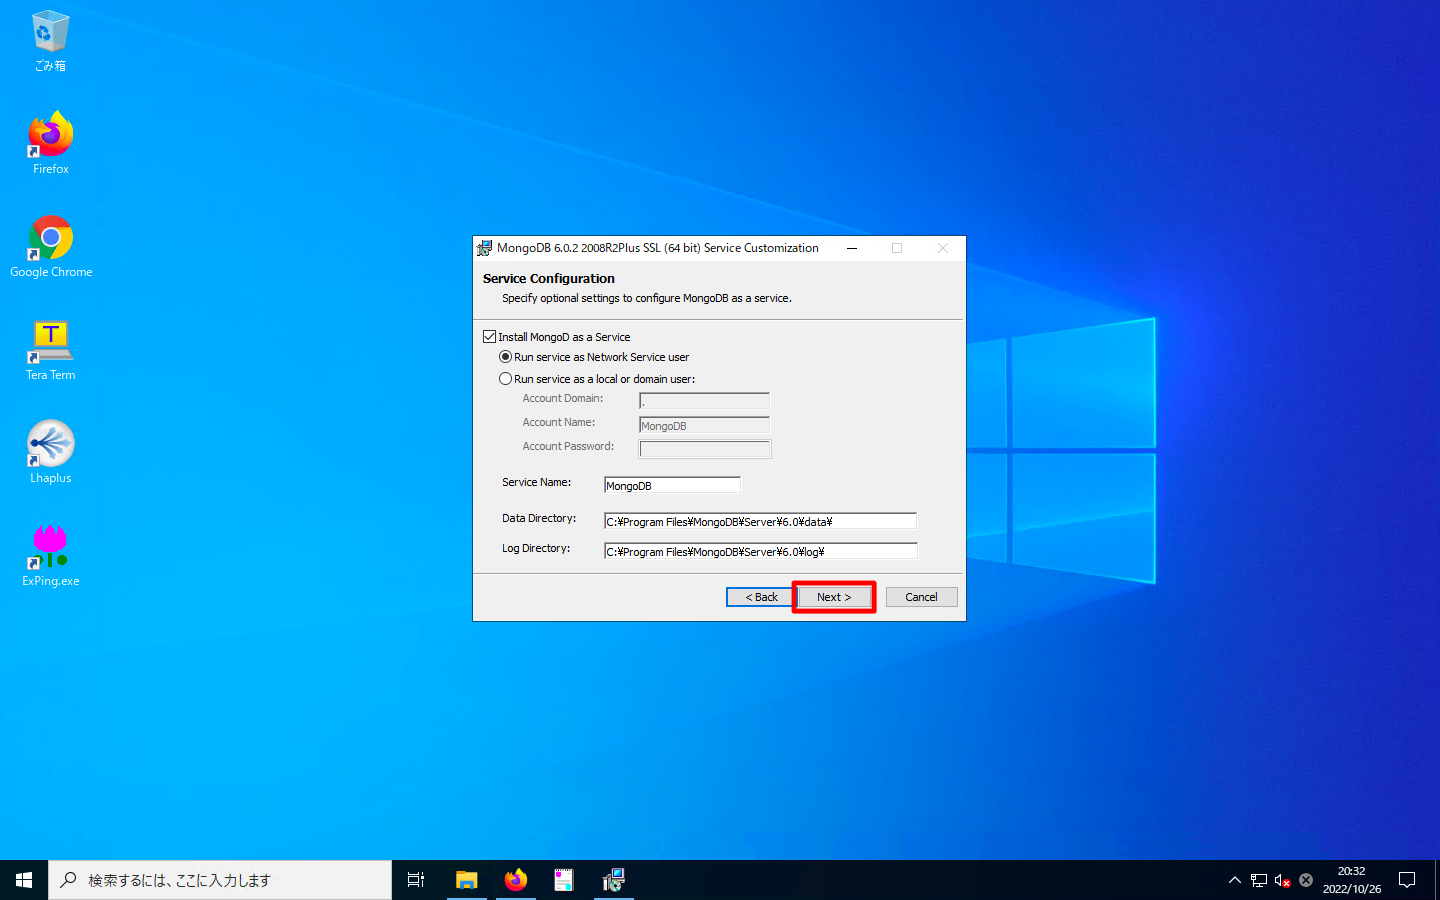
「サービスとしてインストールするか」「MongoDBの実行ユーザは誰か」「インストール先のディレクトリはどこか」などの設定画面です。特段の拘りがない場合はデフォルト設定のまま、「Next」を押下します。
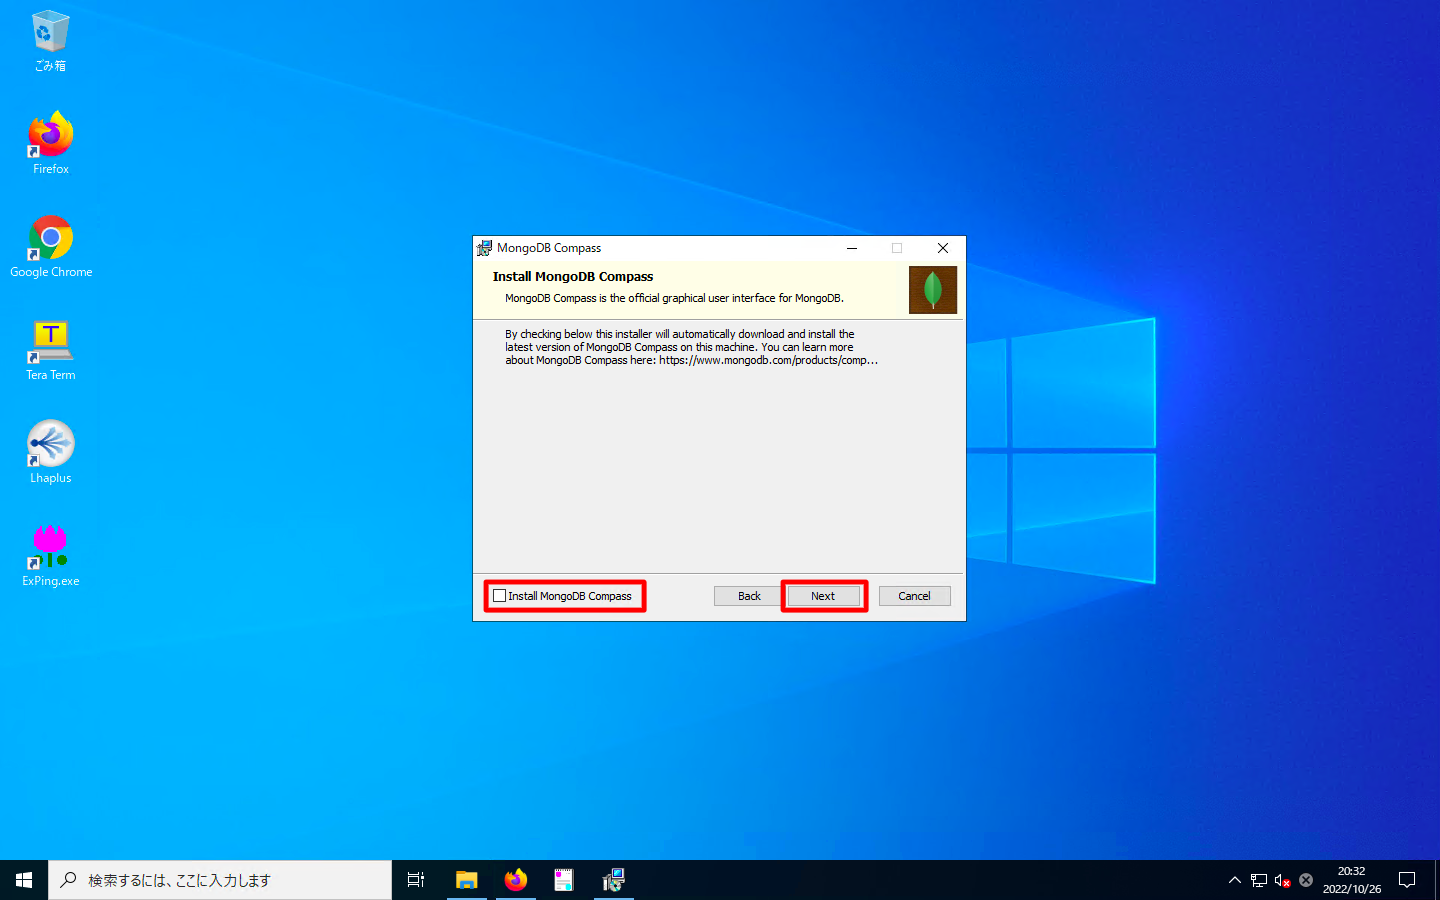
GUI操作ルーツのMongoDB Compassをインストールするかどうかを聞かれます。環境にも依存しますが、私の環境ではMongoDB Compassのインストールには10分から20分程度を要しました。お急ぎの方は、画面下の「Install MongoDB Compass」のチェックボックスを外すと、MongoDB Compassのインストールを止める事ができます。
MongoDB Compassをインストールするかどうかを決定したら、「Next」を押下します。
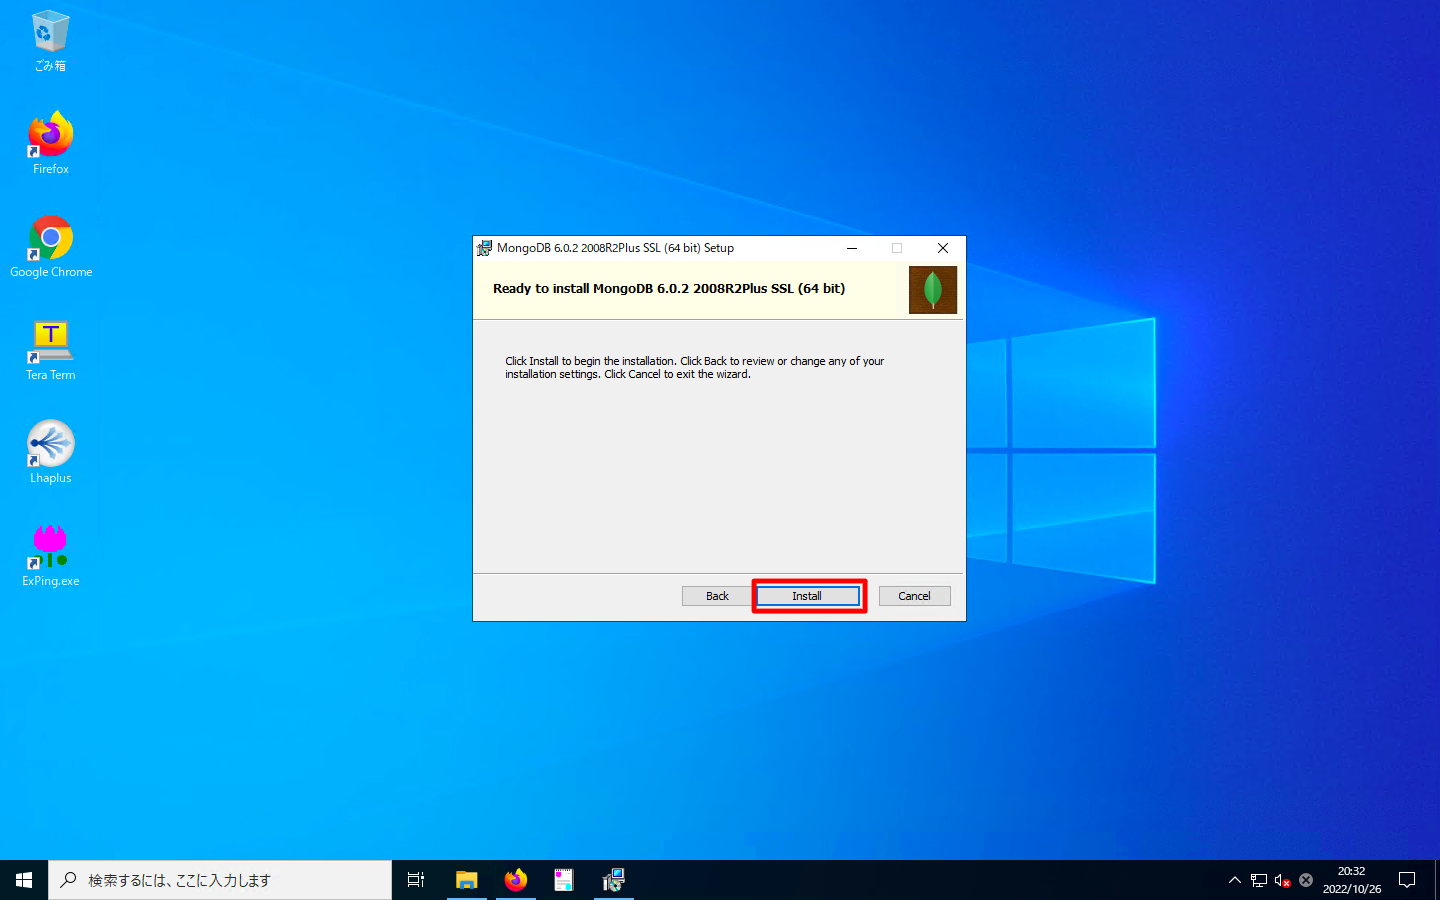
「Install」を押下します。
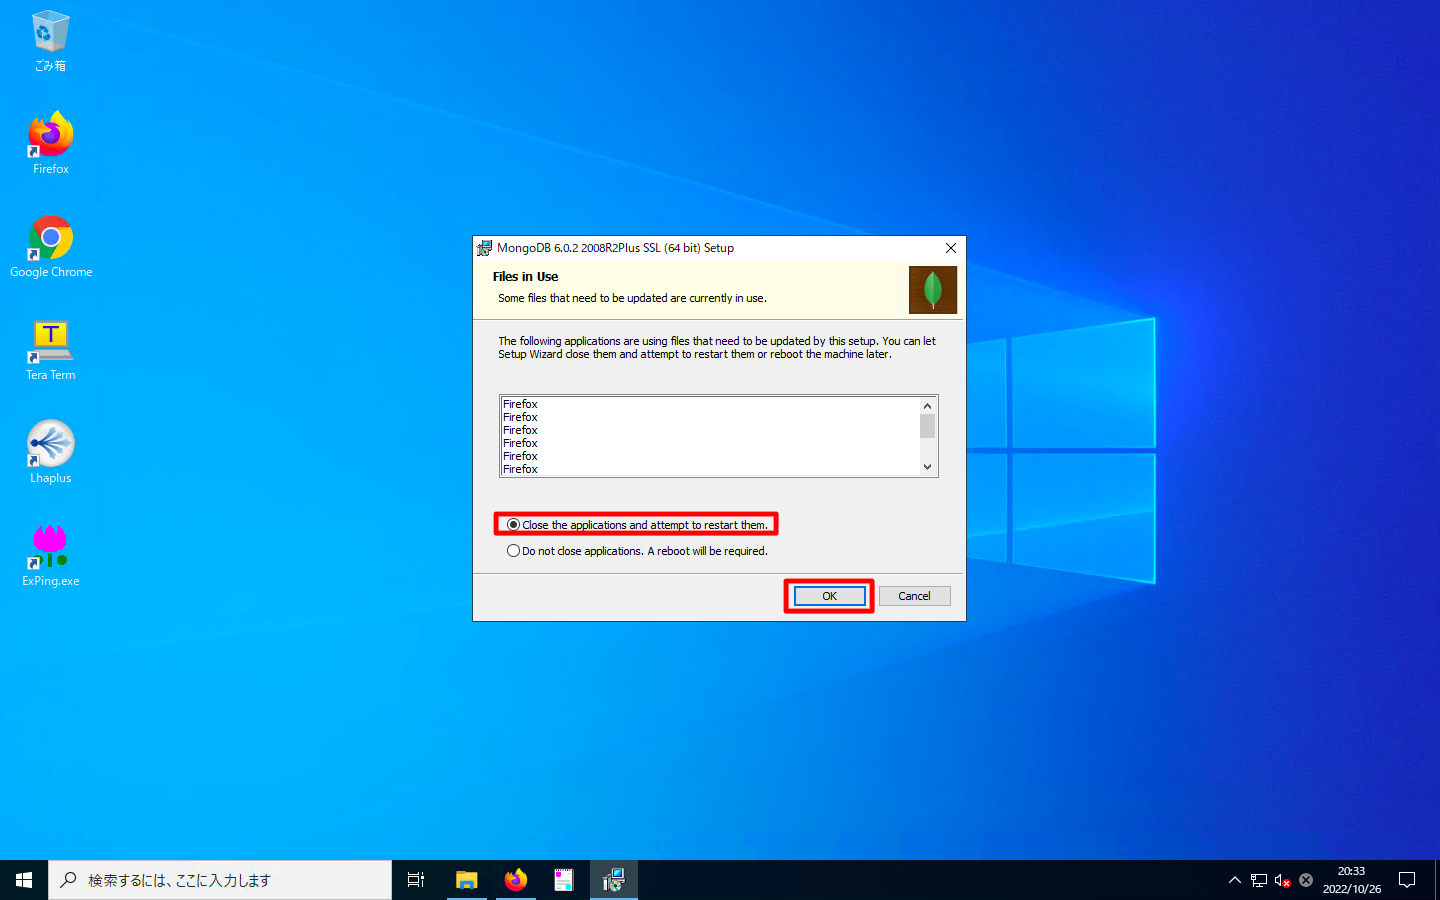
場合によっては「アプリケーションの再起動」または「OS再起動」を求められる事もあります。「Close the applications and attempt to restart」を選んだ場合は、インストーラーが自動的に再起動を試みてくれます。
以下スクリーンショットではFirefoxしか表示されていませんが、場合によってはVMware Toolsなどの重要なアプリケーションの再起動を求められる事もあります。商用環境などでは十分注意ください。
「Close the applications and attempt to restart」を選んだ状態で、「Next」を押下します。
場合によってはインストーラーによるアプリケーションの再起動が失敗する事があります。失敗した場合は手作業操作で再起動または停止をした後で、「OK」を押下します。

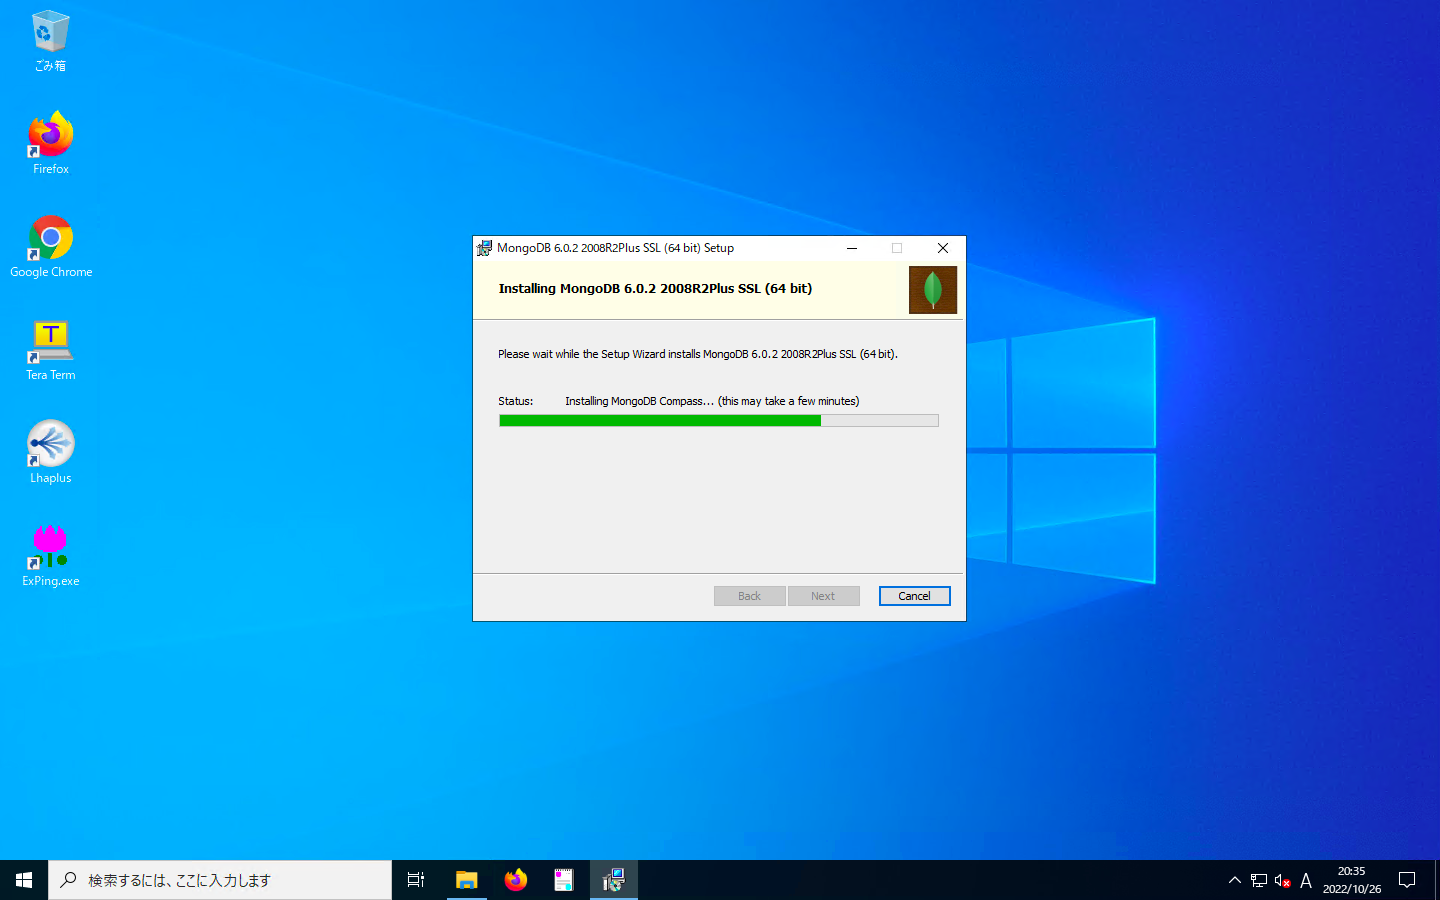
MongoDB Compassをインストールする場合は、このメッセージで止まります。メッセージ上では「this may take a few minutes」と書かれていますが、低スペック仮想マシンでは20分程度かかる事もあります。
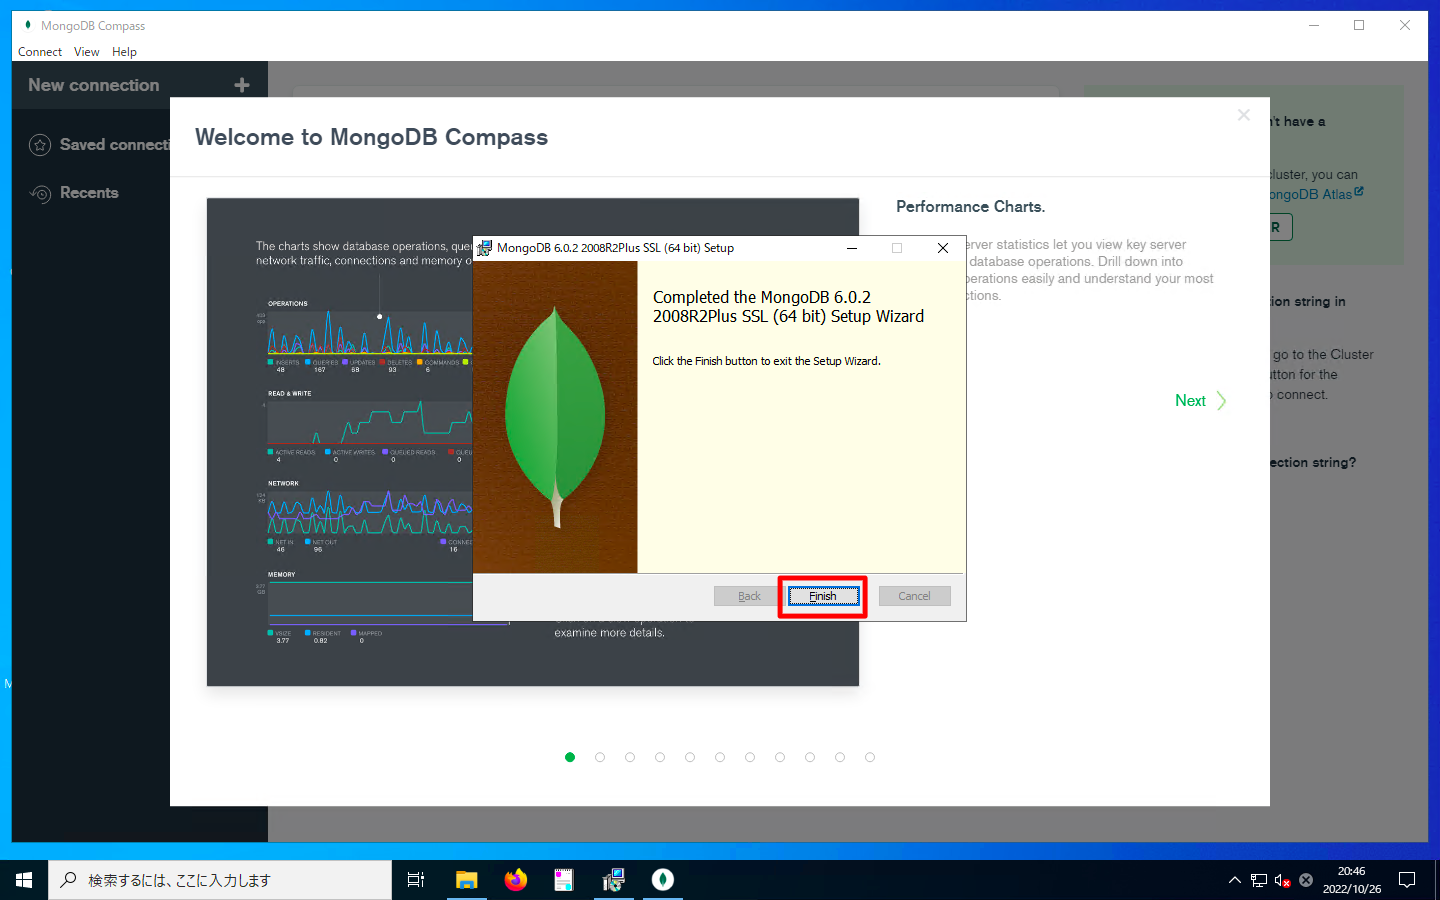
インストールが完了すると以下のように表示されます。もし、MongoDB Compassをインストールした場合は、MongoDBのインストール完了と同時に、MongoDB Compassが起動されます。
「Finish」を押下してください。
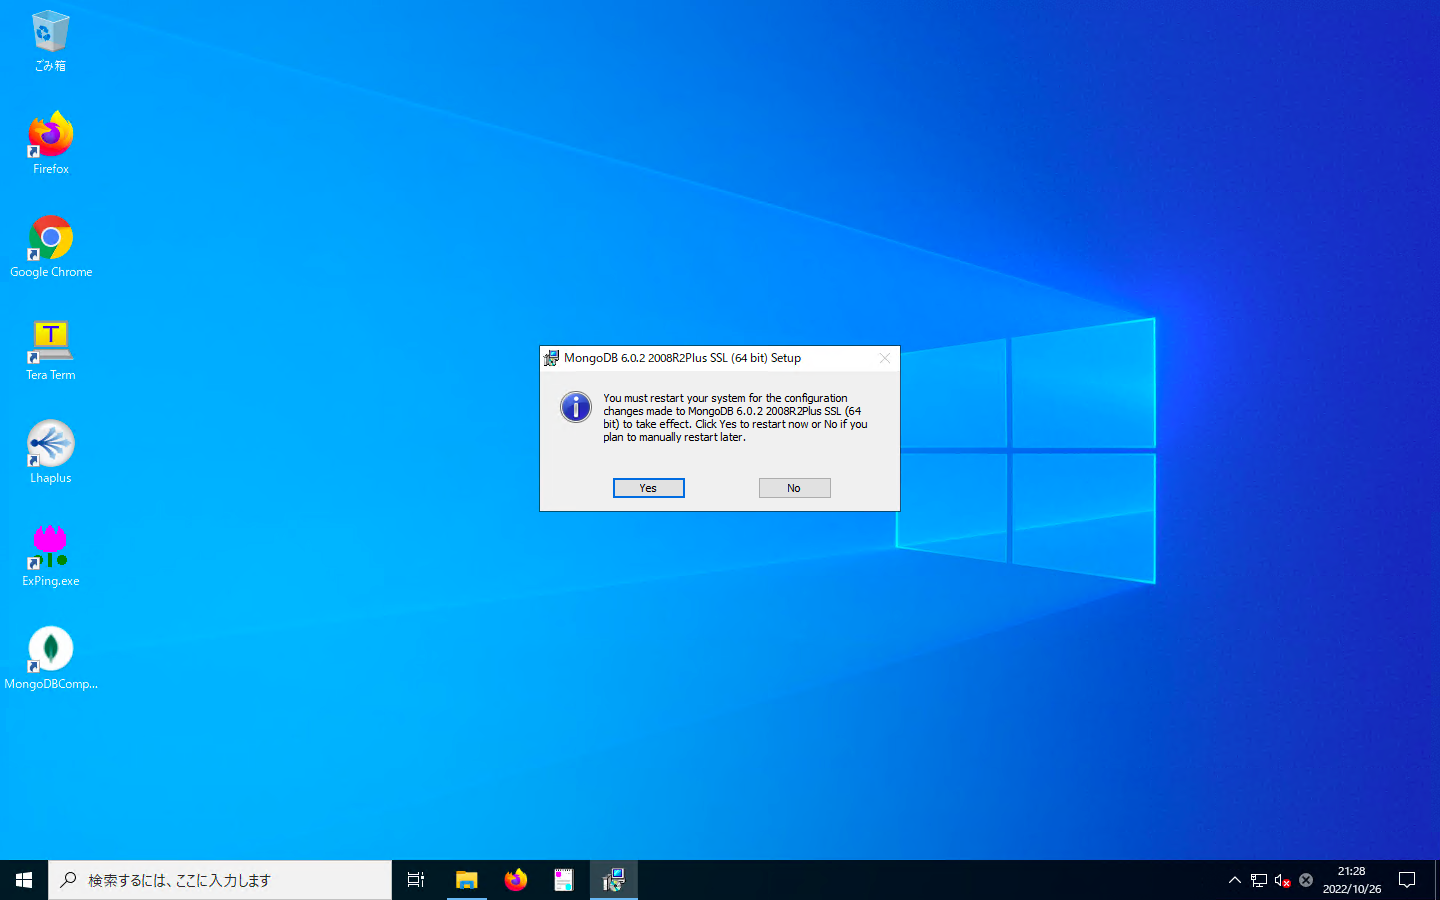
OSの種別次第では、MongoDBのインストール後に再起動を求められます。「Yes」を押下した場合は、いますぐ再起動します。
MongoDB Serverの起動確認
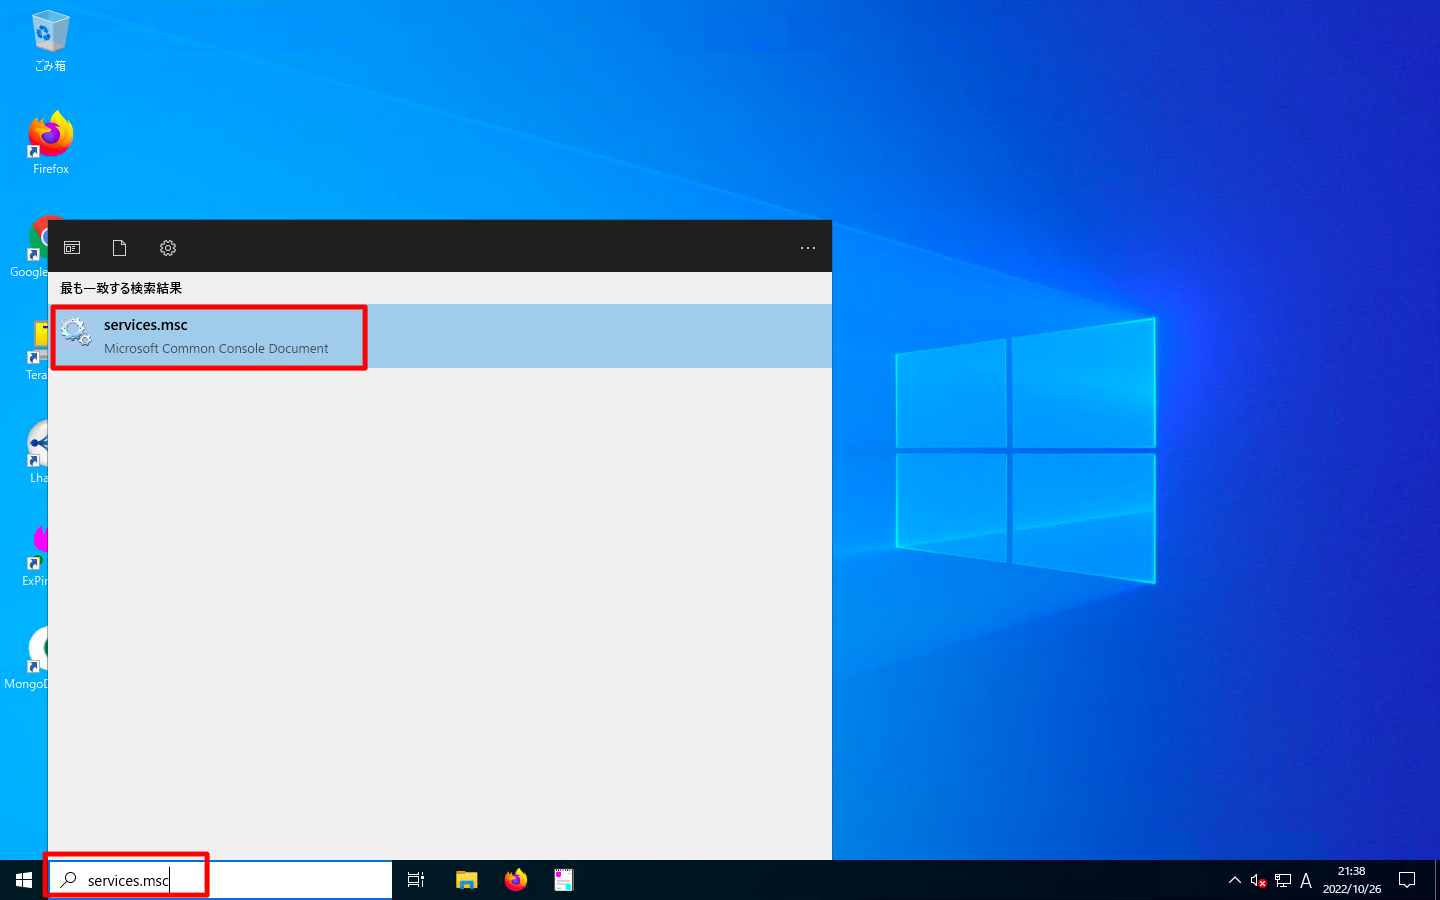
検索窓に「services.msc」または「サービス」と入力し、「サービス」を起動します。
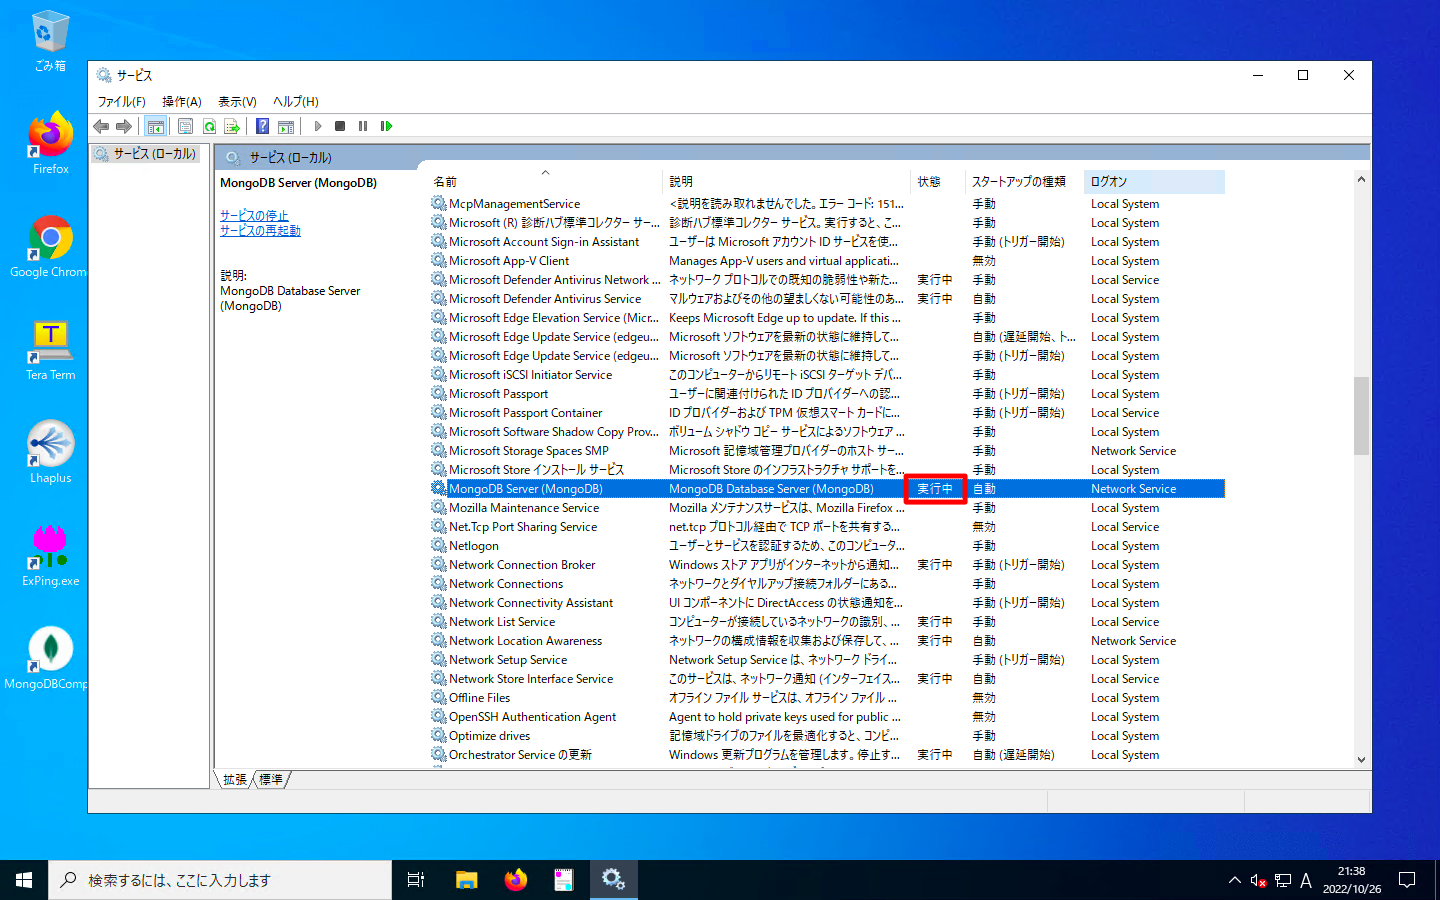
「MongoDB Server」が「実行中」と表示される事を確認します。
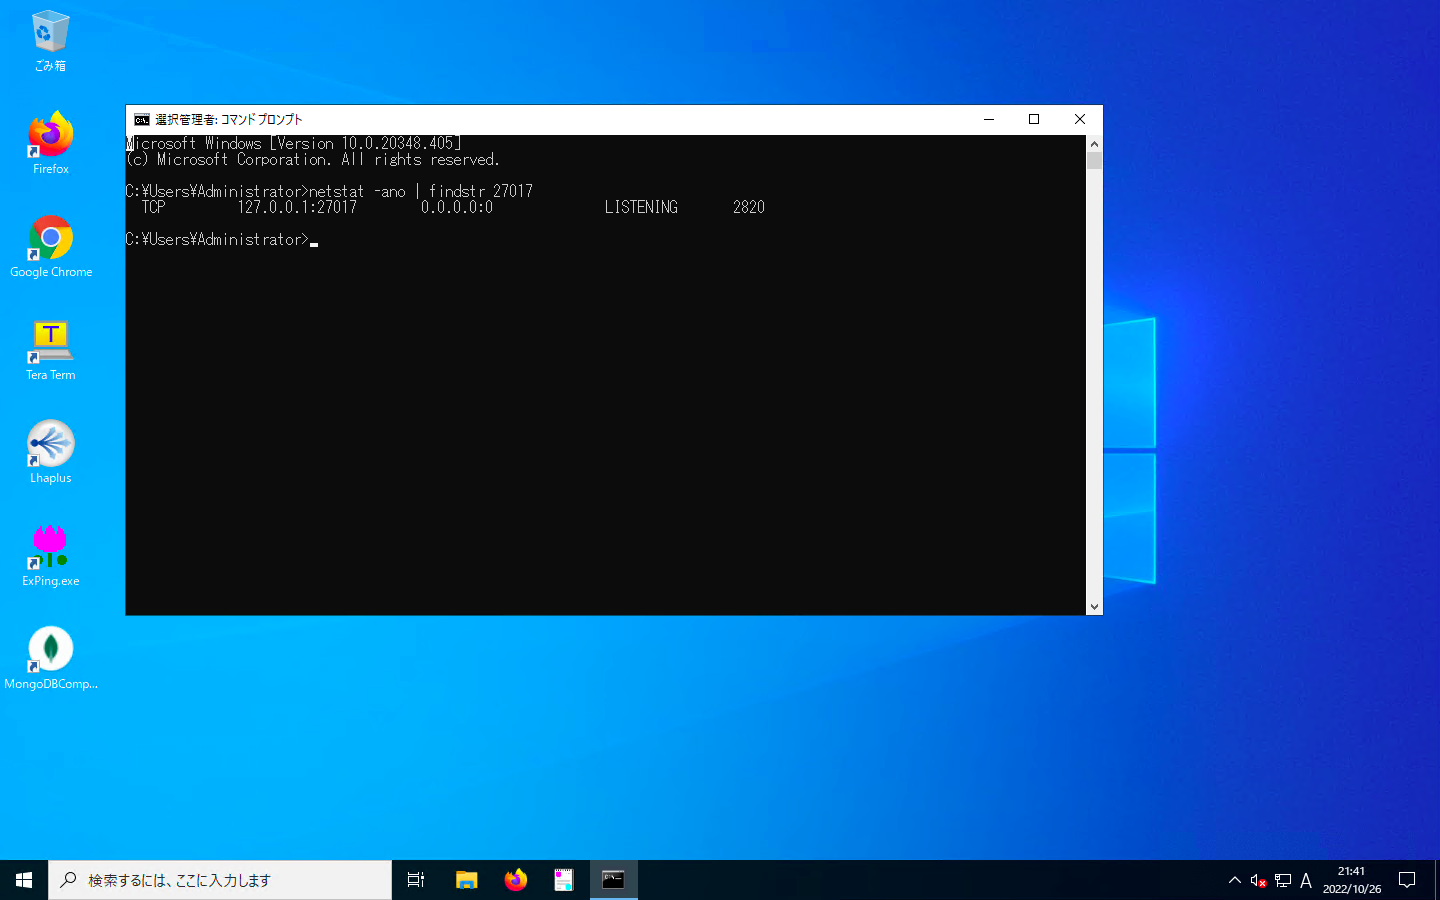
MongoDBはデフォルトでtcp27017でListenします。コマンドプロンプトを起動し、tcp27017でListenしている状態である事を確認します。
C:\Users\Administrator>netstat -ano | findstr 27017
  TCP         127.0.0.1:27017        0.0.0.0:0              LISTENING       2820

C:\Users\Administrator>
MongoDB Compassによる簡易疎通確認
MongoDB Compassをインストールしている方は、MongoDB Compassを用いてMongoDB Serverへの簡単な疎通をテストしてみましょう。
検索窓に「MongoDBCompass」と入力し、「MongoDBCompass」を起動します。

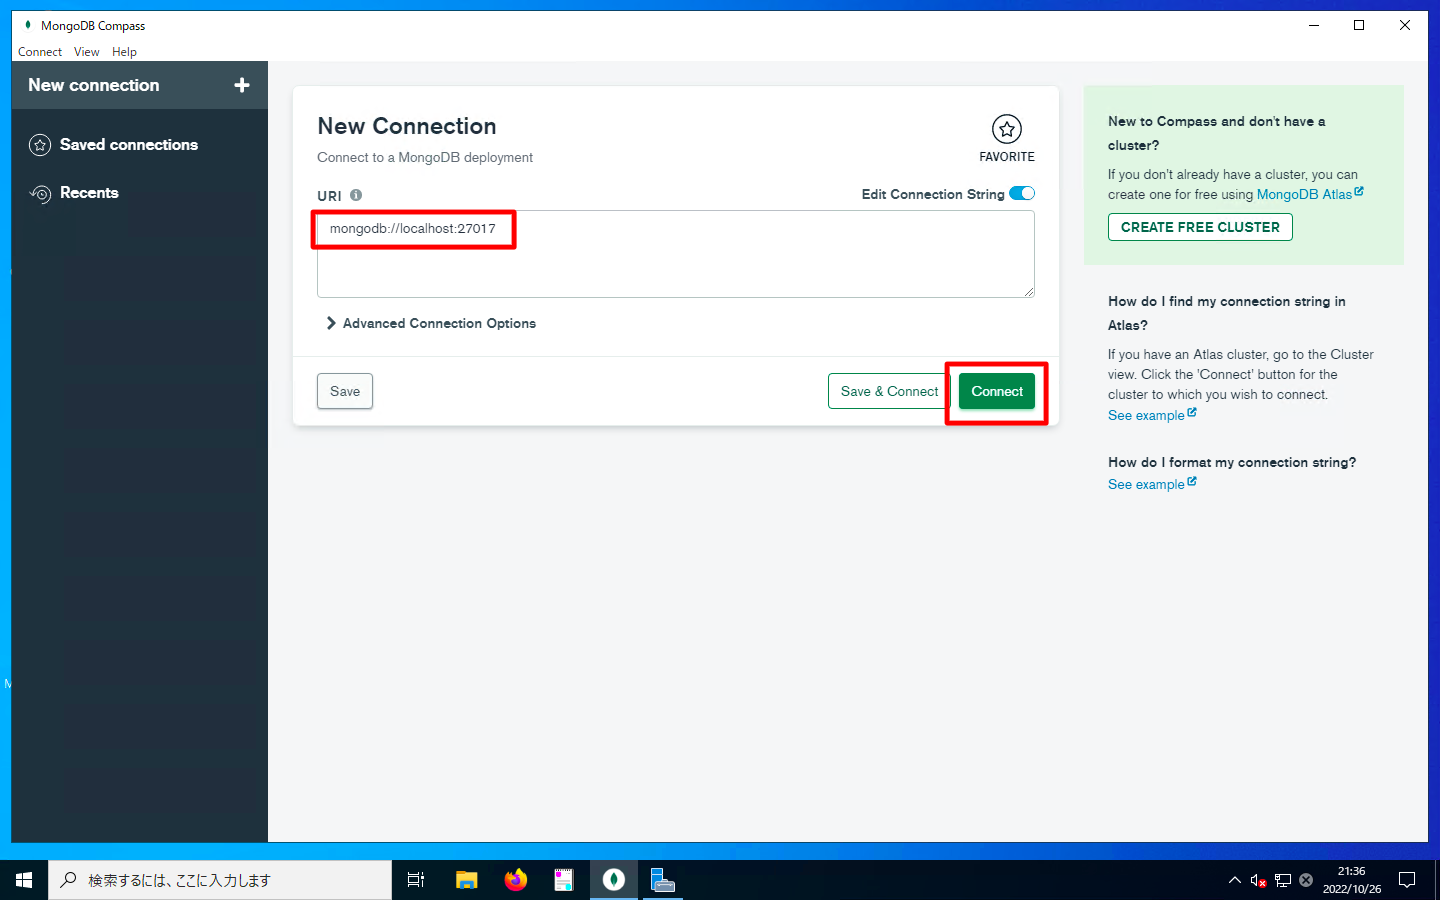
Connectionの設定を求められる画面でURIがデフォルト設定の「mongodb://localhost:27017」である事を確認します。MongoDB Serverがデフォルト設定である場合は、このURIで接続可能です。
確認後、「Connect」を押下します。
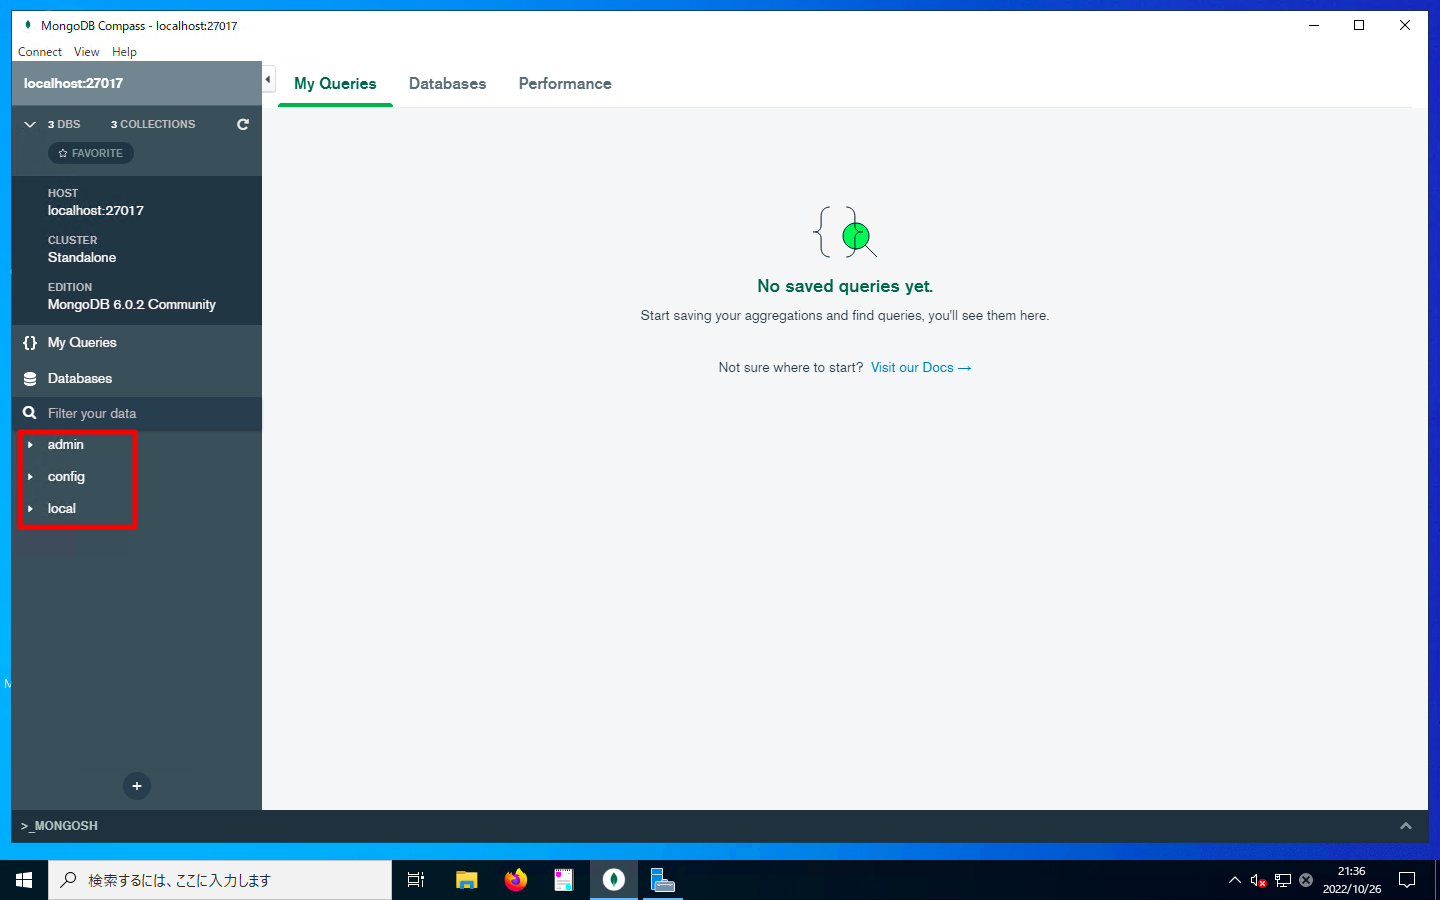
以下のような画面が現れれば接続に成功した事を意味します。デフォルトの状態では、admin,config,localの3つのデータベースが存在します。
MongoDB Shellのインストール
msiファイルのダウンロード
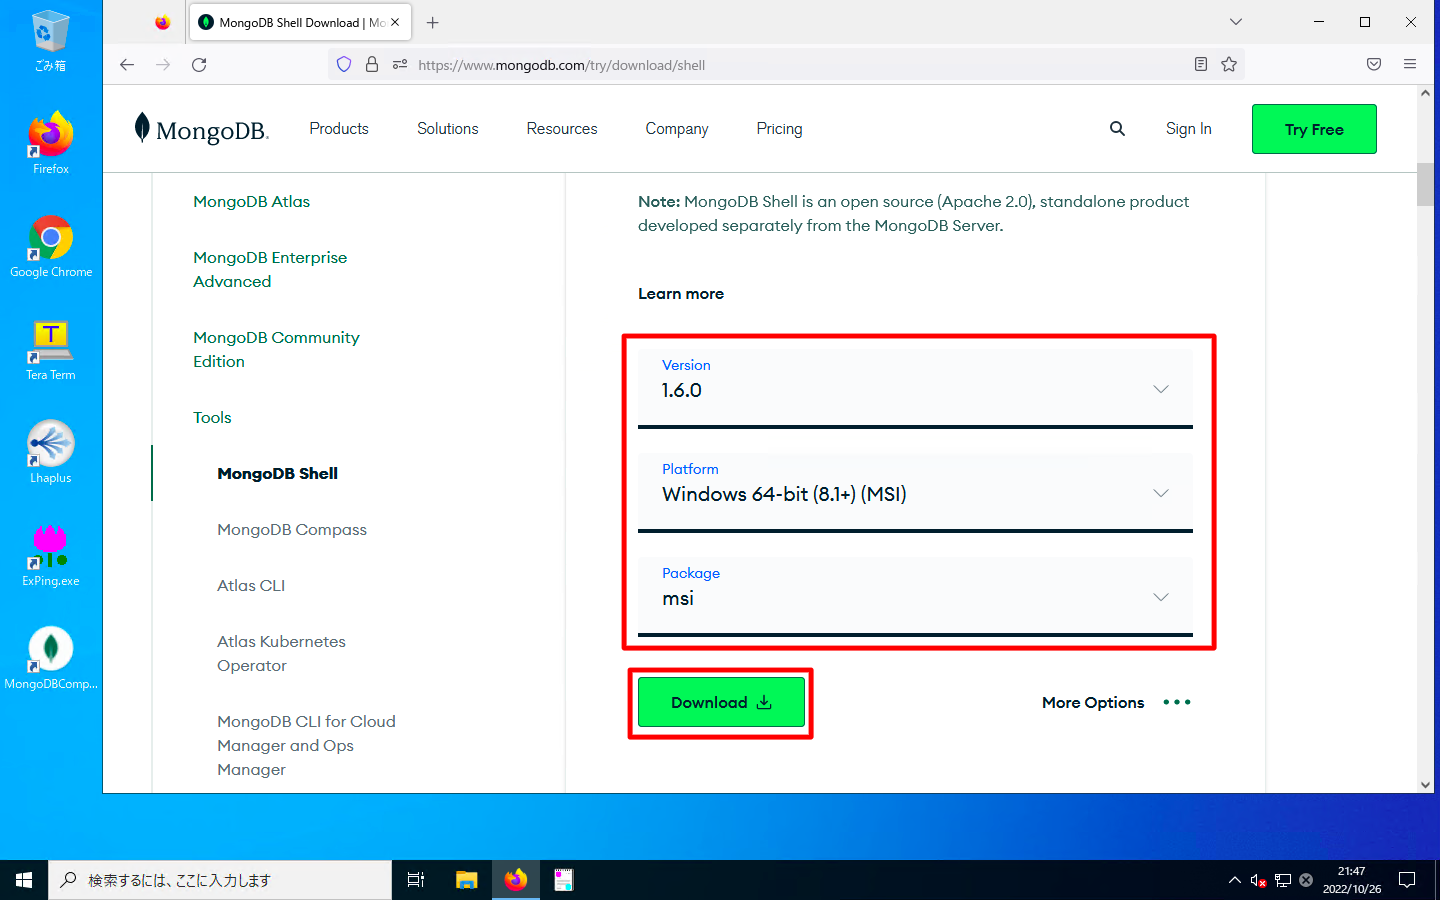
「MongoDB Shellのダウンロードサイト」をブラウザで開きます。
「Version」「Platform」「Package」を選択した状態で、「Download」を押下します。
デフォルトの場合はzip版のダウンロードになります。もし、msiファイルによるダウンロードをしたい場合は、「Platform」を「Windows 64bit (8.1+) (MSI)」に変更するとmsiファイルをダウンロードできるようになります。
MongoDB Shellのインストール
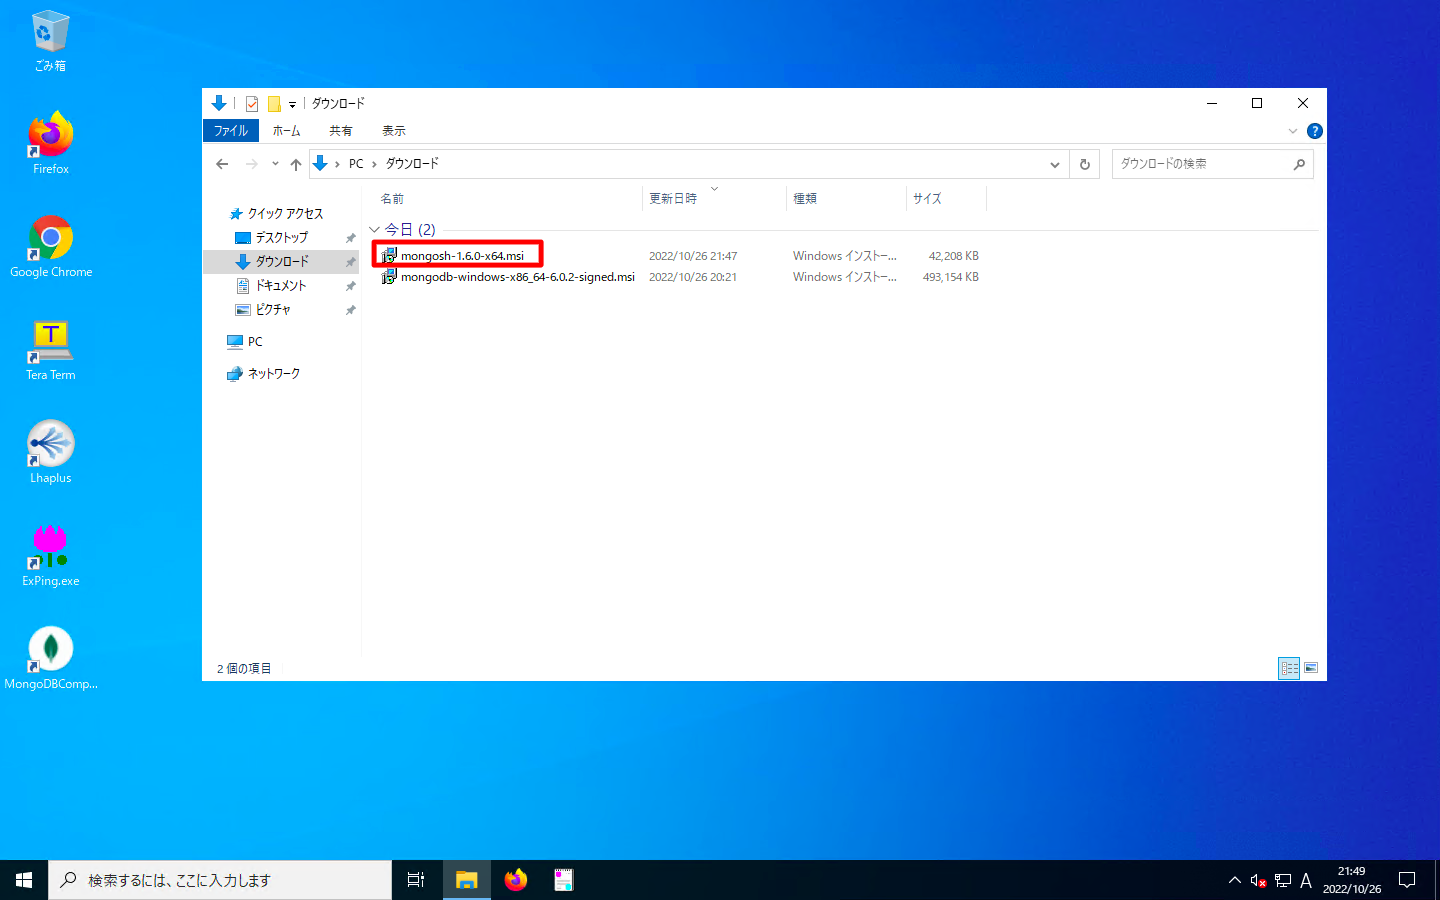
ダウンロードしたmsiファイルをダブルクリックで実行します。
基本的にウィザードに沿って「Next」の押下連続でインストール完了します。以下、注意点のみに絞って説明します。

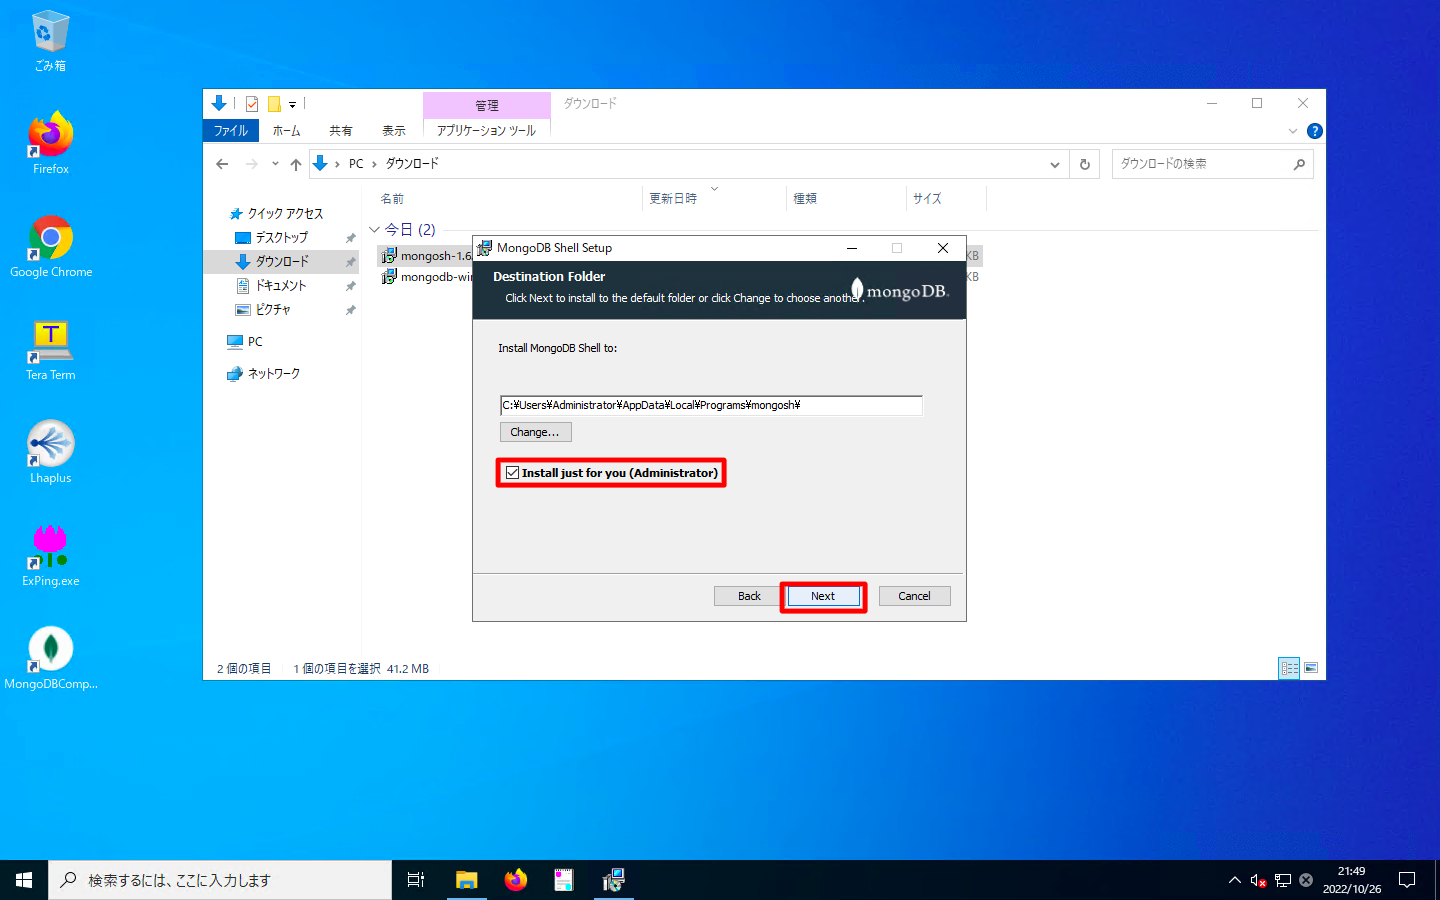
全ユーザにインストールするか、今現在操作中のユーザにインストールするかのチェックボックスがあります。もし、全ユーザにインストールしたいならば「Install Just for you」のチェックを外します。確認後、「Next」を押下します。
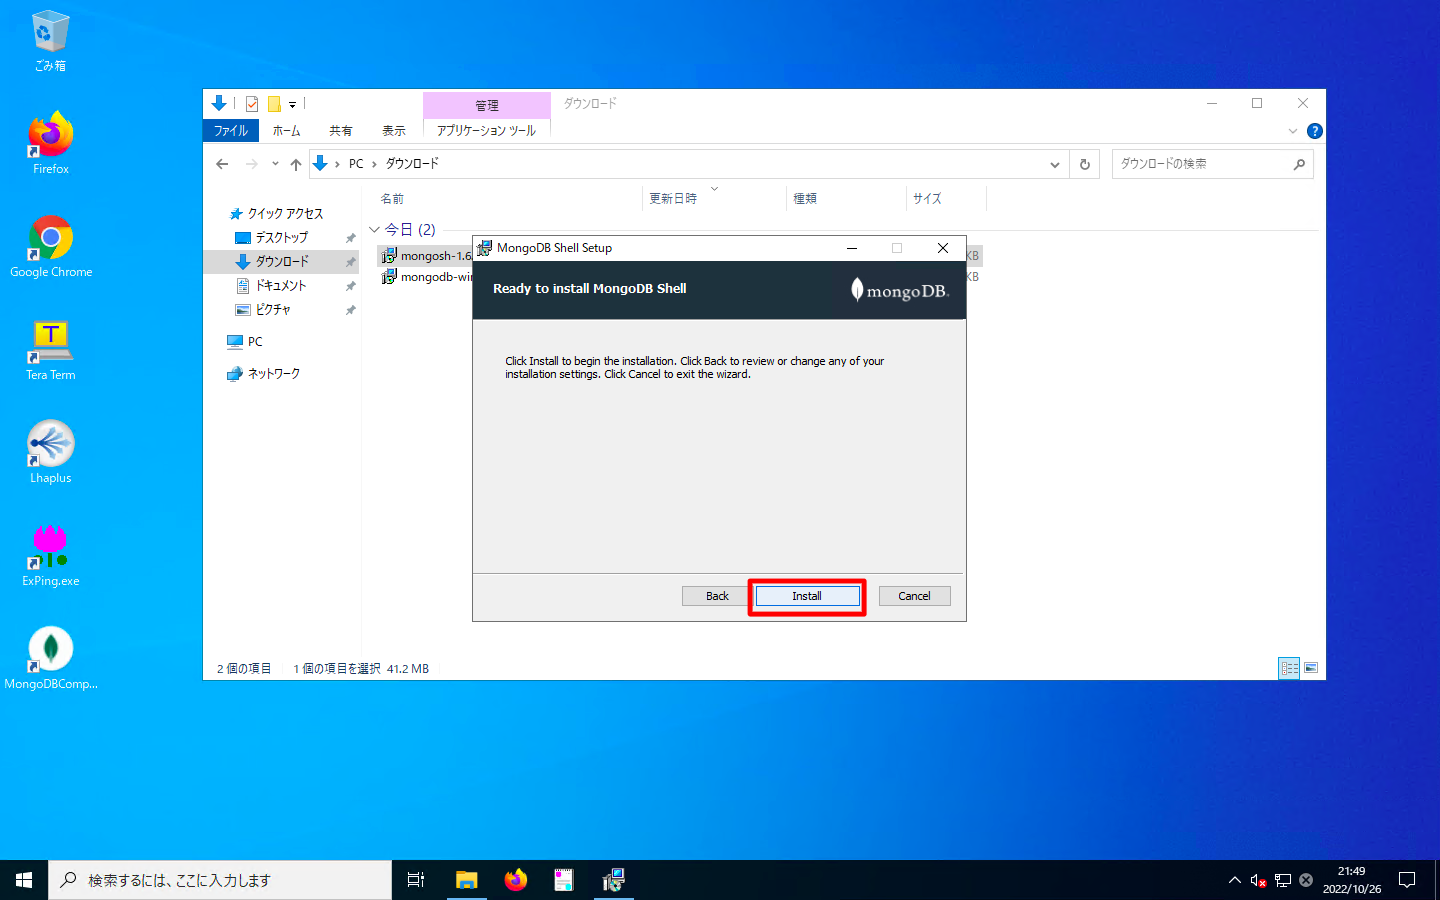
「Install」を押下します。
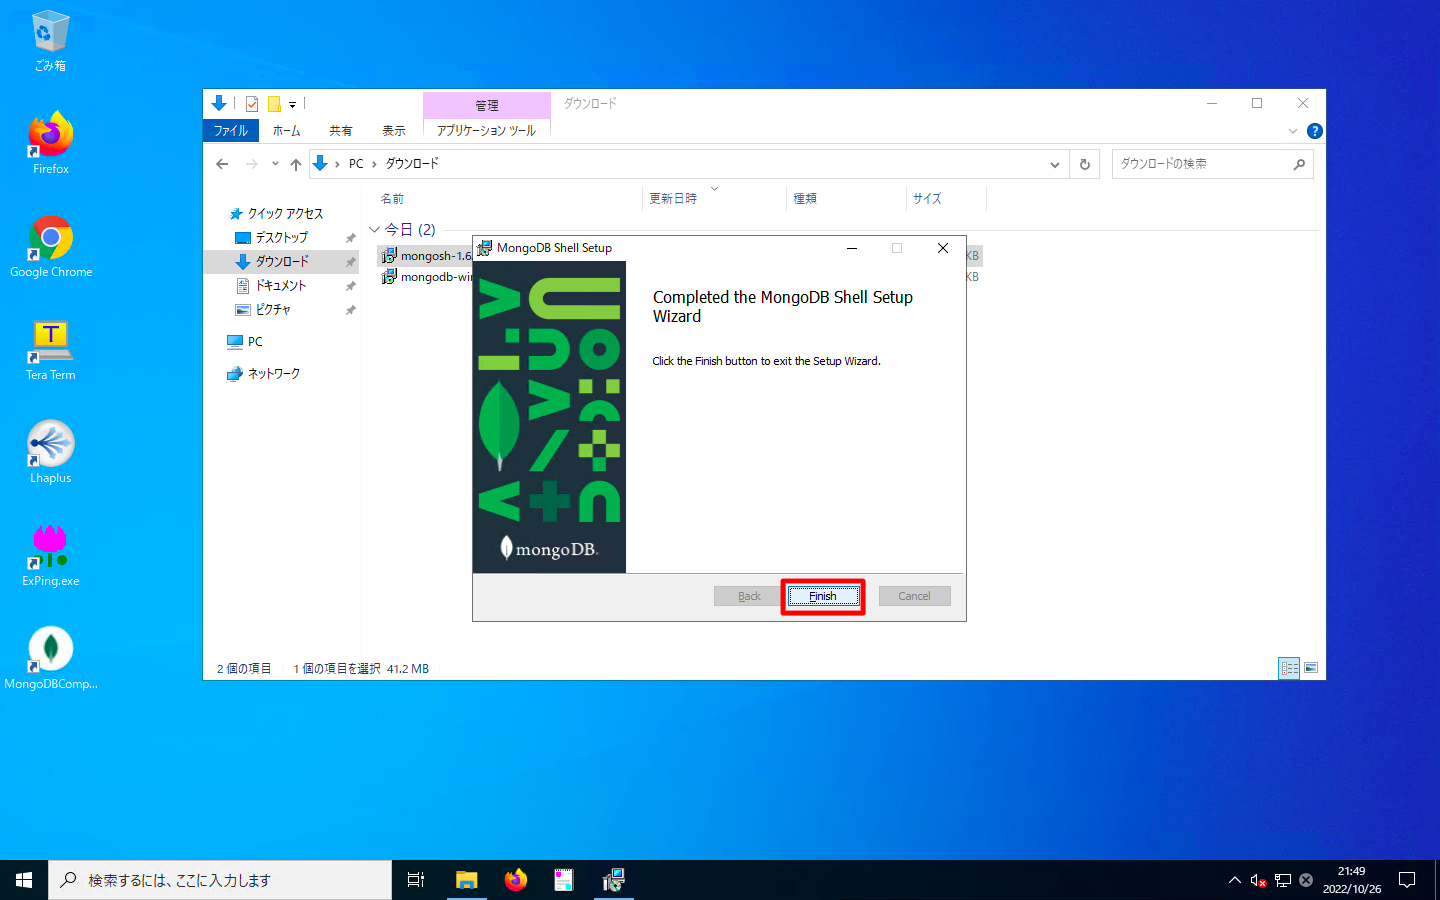
「Finish」を押下します。
MongoDB Shellによる簡易疎通確認
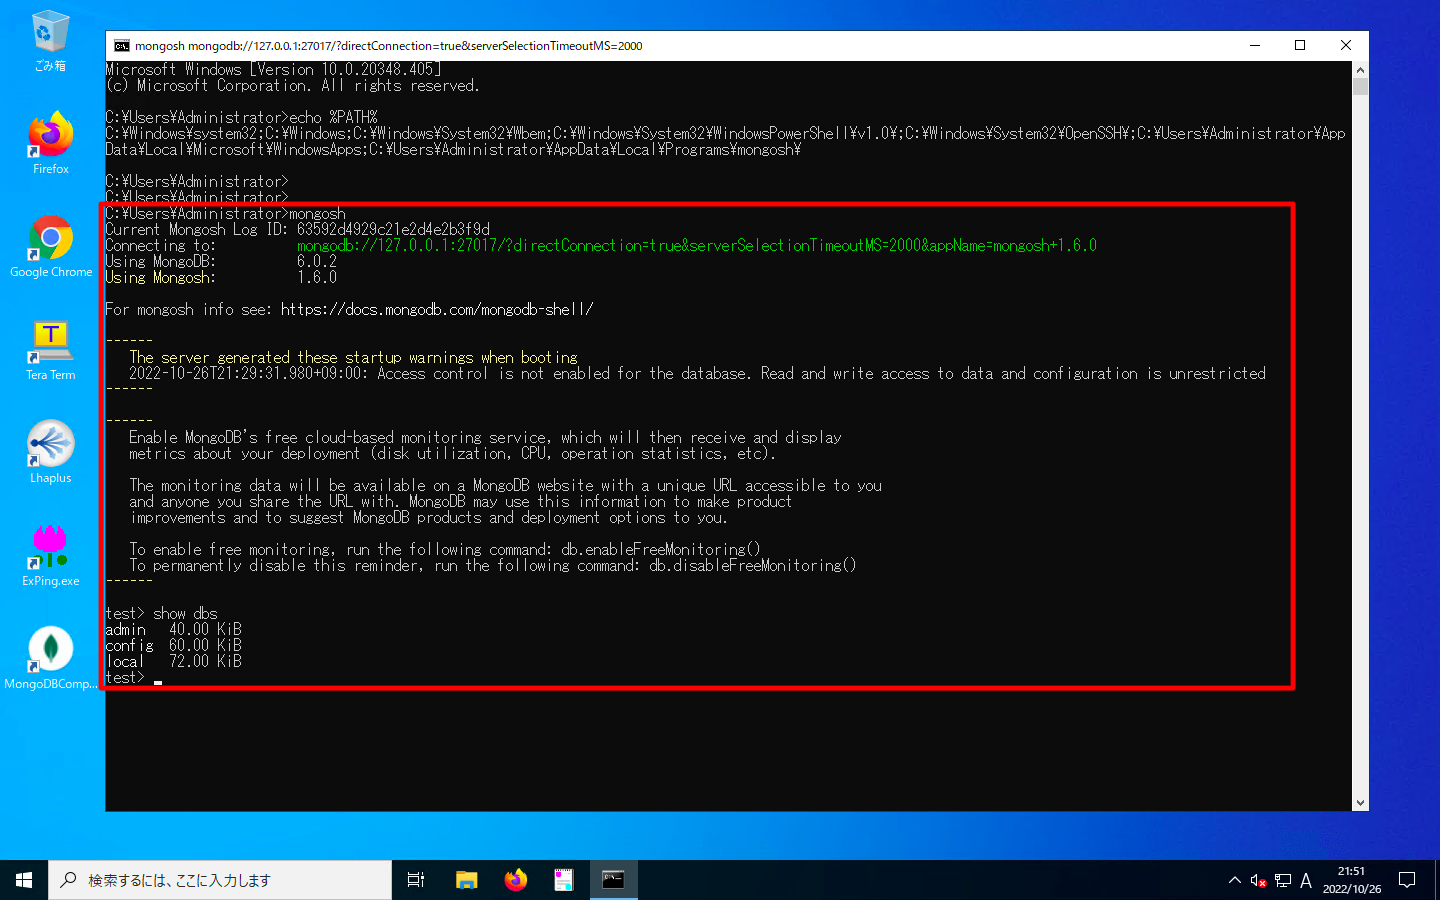
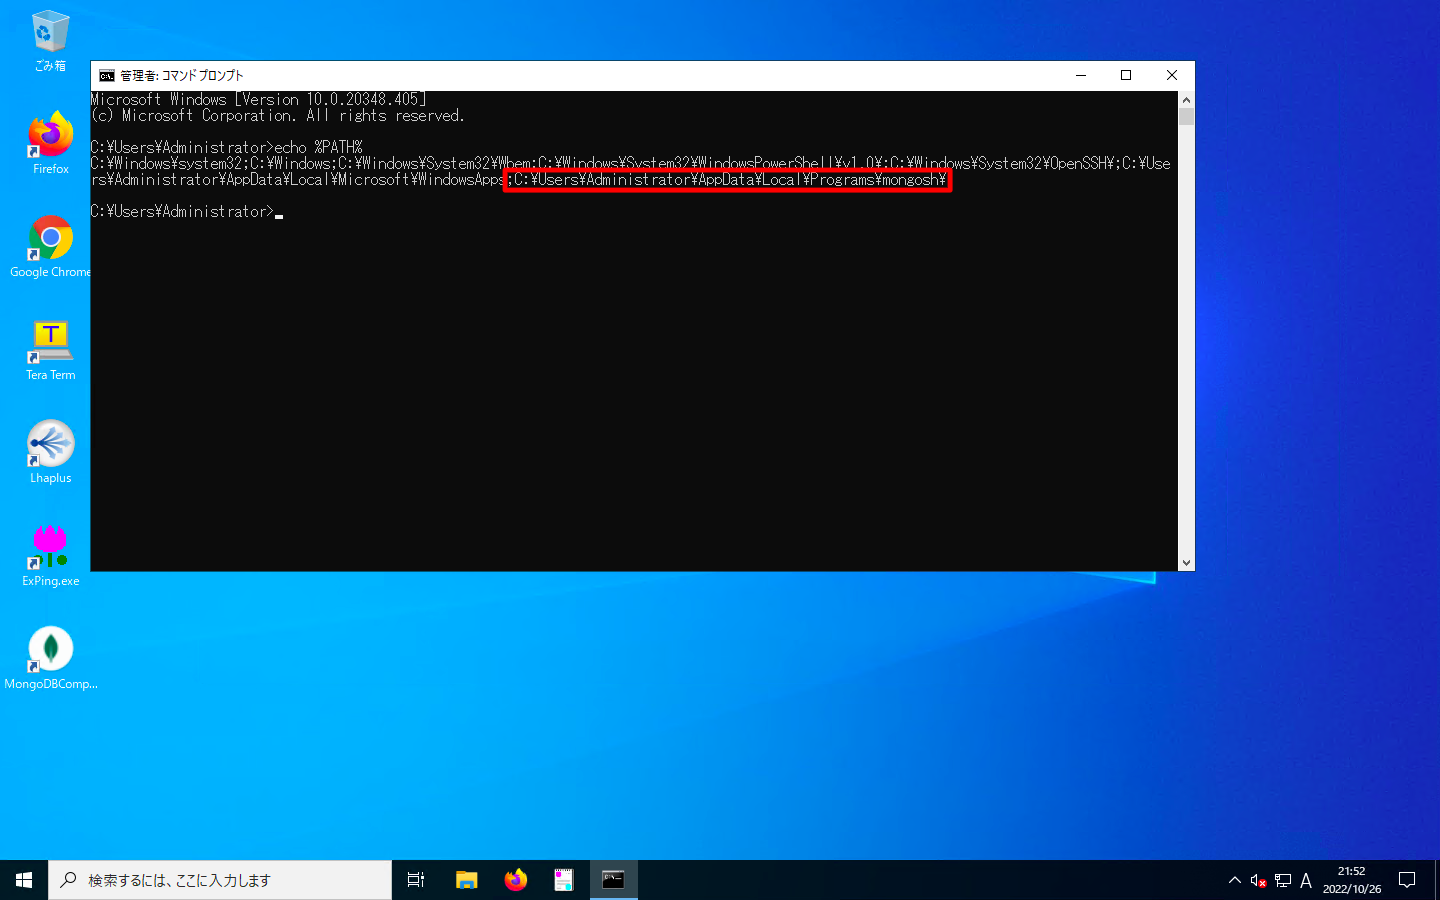
前述のウィザードに沿ってMongoDB Shellをインストールすると、以下のように自動的に環境変数PATHが設定されます。ですので、mongoshコマンドはフルパスで指定しなくても実行可能です。
C:\Users\Administrator>echo %PATH%
C:\Windows\system32;C:\Windows;C:\Windows\System32\Wbem;C:\Windows\System32\WindowsPowerShell\v1.0\;C:\Windows\System32\OpenSSH\;C:\Users\Administrator\AppData\Local\Microsoft\WindowsApps;C:\Users\Administrator\AppData\Local\Programs\mongosh\

C:\Users\Administrator>
以下のようにmongoshコマンドを実行し、MongoDB Serverに接続な事を確認します。
C:\Users\Administrator>mongosh
Current Mongosh Log ID: 63592d4929c21e2d4e2b3f9d
Connecting to:          mongodb://127.0.0.1:27017/?directConnection=true&serverSelectionTimeoutMS=2000&appName=mongosh+1.6.0
Using MongoDB:          6.0.2
Using Mongosh:          1.6.0

For mongosh info see: https://docs.mongodb.com/mongodb-shell/

------
   The server generated these startup warnings when booting
   2022-10-26T21:29:31.980+09:00: Access control is not enabled for the database. Read and write access to data and configuration is unrestricted
------

------
   Enable MongoDB's free cloud-based monitoring service, which will then receive and display
   metrics about your deployment (disk utilization, CPU, operation statistics, etc).

   The monitoring data will be available on a MongoDB website with a unique URL accessible to you
   and anyone you share the URL with. MongoDB may use this information to make product
   improvements and to suggest MongoDB products and deployment options to you.

   To enable free monitoring, run the following command: db.enableFreeMonitoring()
   To permanently disable this reminder, run the following command: db.disableFreeMonitoring()
------

test> show dbs
admin   40.00 KiB
config  60.00 KiB
local   72.00 KiB
test>