
Microsoft AzureはBlob, File, Queue, Table, Data Lakeなどの複数のストレージのマネージドサービスを提供しています。このページではオブジェクトストレージの機能を提供するAzure Blob Storageの操作方法を説明します。
Blobストレージの作成
リソースグループの作成
以下のコマンドでリソースグループを作成します。
az group create --name myResourceGroup --location japaneast
ストレージアカウントの作成
Azure Blob Storageを使うには、まずストレージアカウントを作成します。ストレージアカウントを作成すると、Blob, File, Queue, Table, Data Lakeなどのストレージが使用可能になります。
以下にストレージアカウント作成の操作例を示します。ストレージアカウント名はAzureで一意な名前を指定する必要がありますので、「sample01」のような他の人が使ってそうな名前は使用できません。また、小文字英数字で3文字以上24文字以下と制約条件は厳しめです。
az storage account create \
    --name gokatei01 \
    --resource-group myResourceGroup \
    --location japaneast \
    --sku Standard_LRS
コンテナの作成
ストレージアカウントにコンテナと呼ばれる入れ物を作成します。コンテナを作成すると、コンテナの中にBlob(Binary Large OBject)を格納できるようになります。操作例は以下の通りです。
az storage container create \
    --account-name gokatei01 \
    --name container01
Azure Storage Explorerによる操作
Azure Storage Explorerのインストール
Windows OSの場合
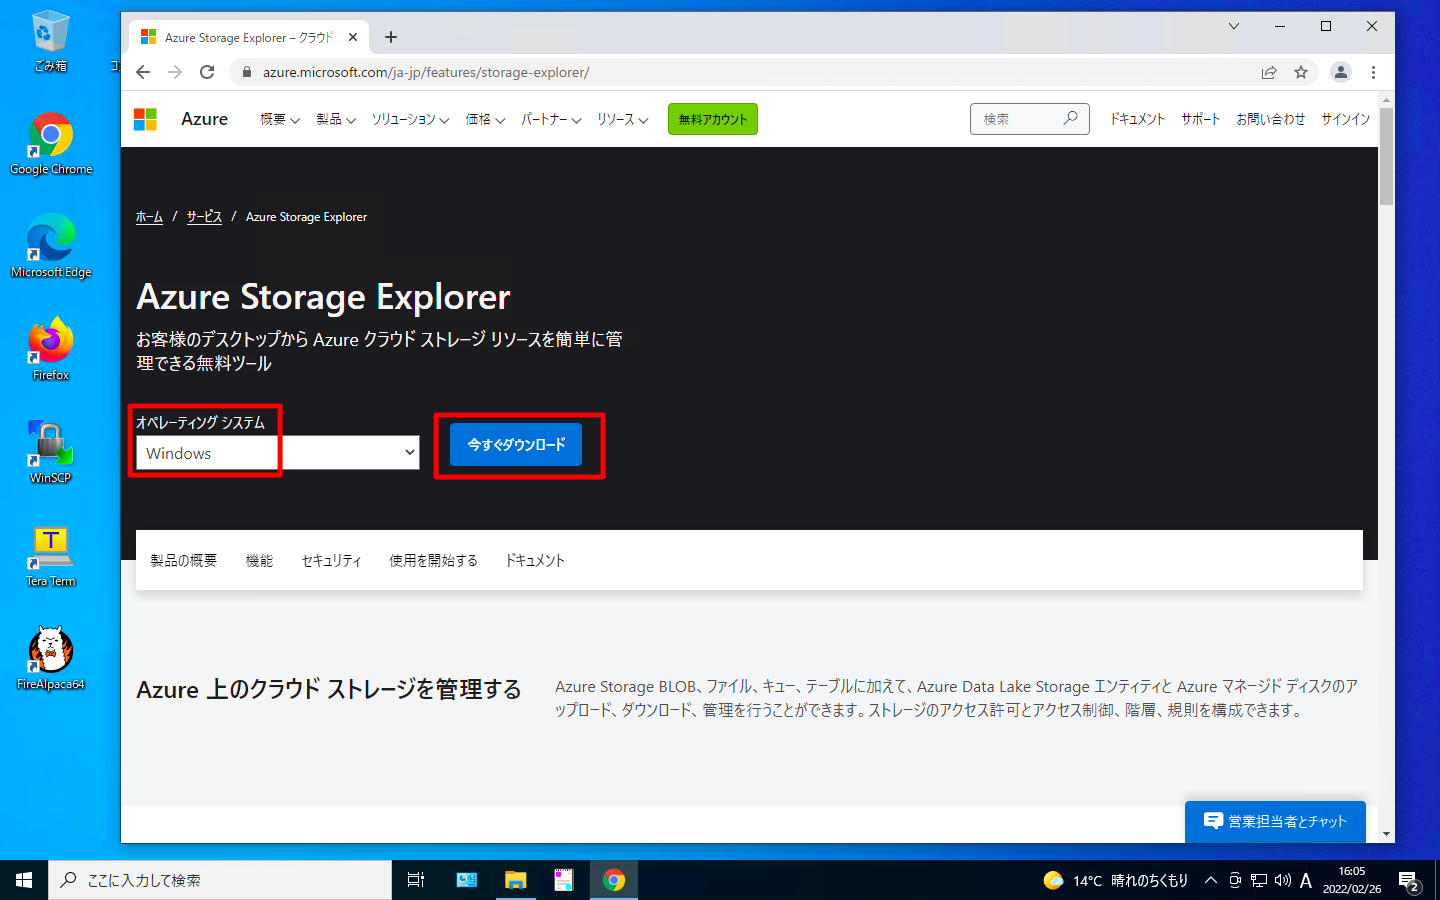
「Azure Storage Explorerのダウンロードページ」をブラウザで開き、「今すぐダウンロード」を実行します。
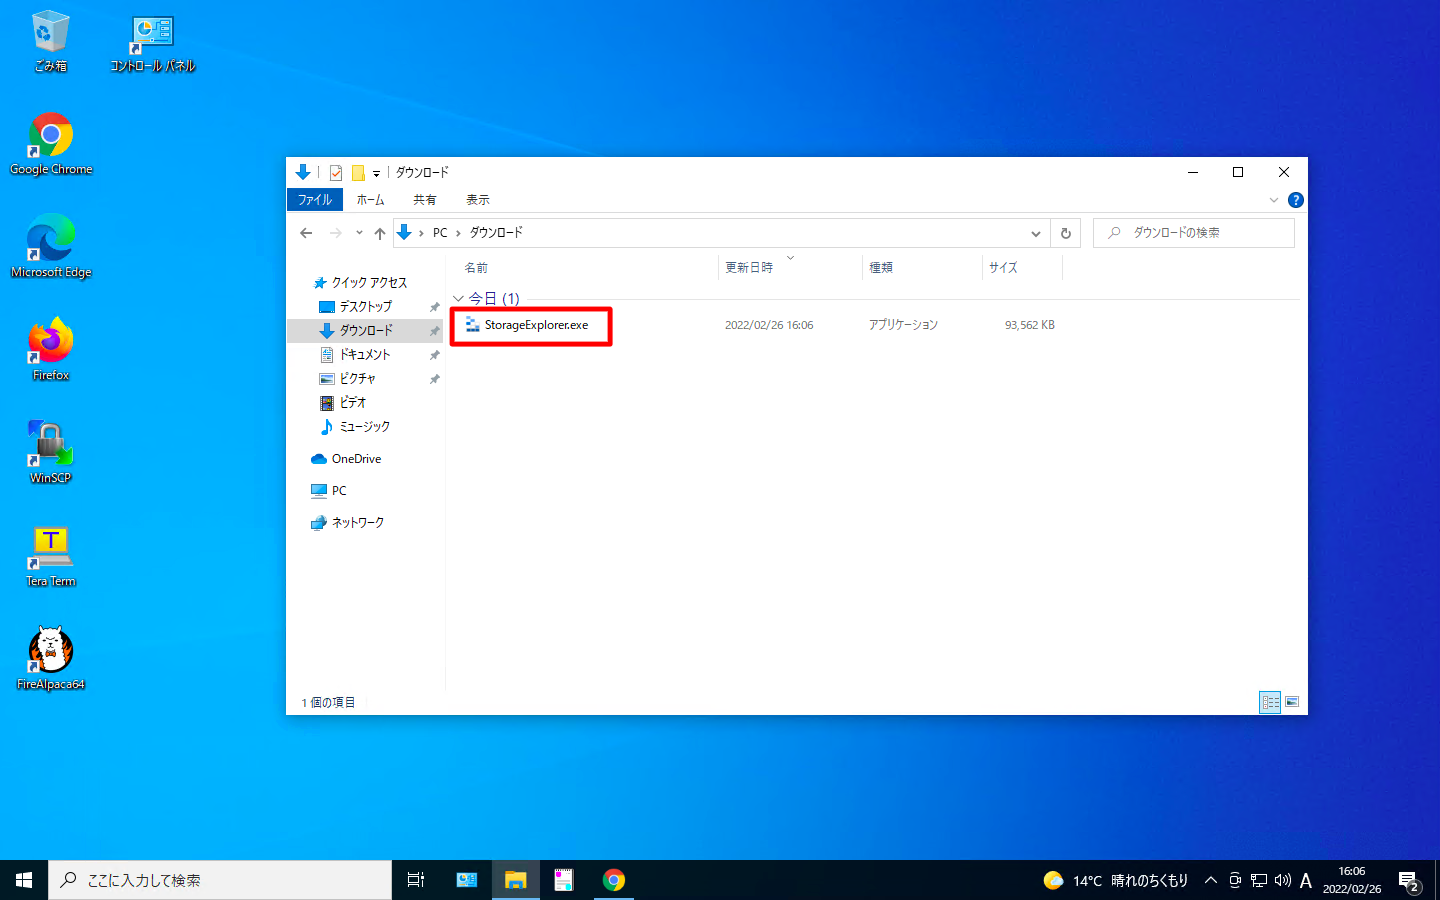
ダウンロードしたexeファイルを実行します。
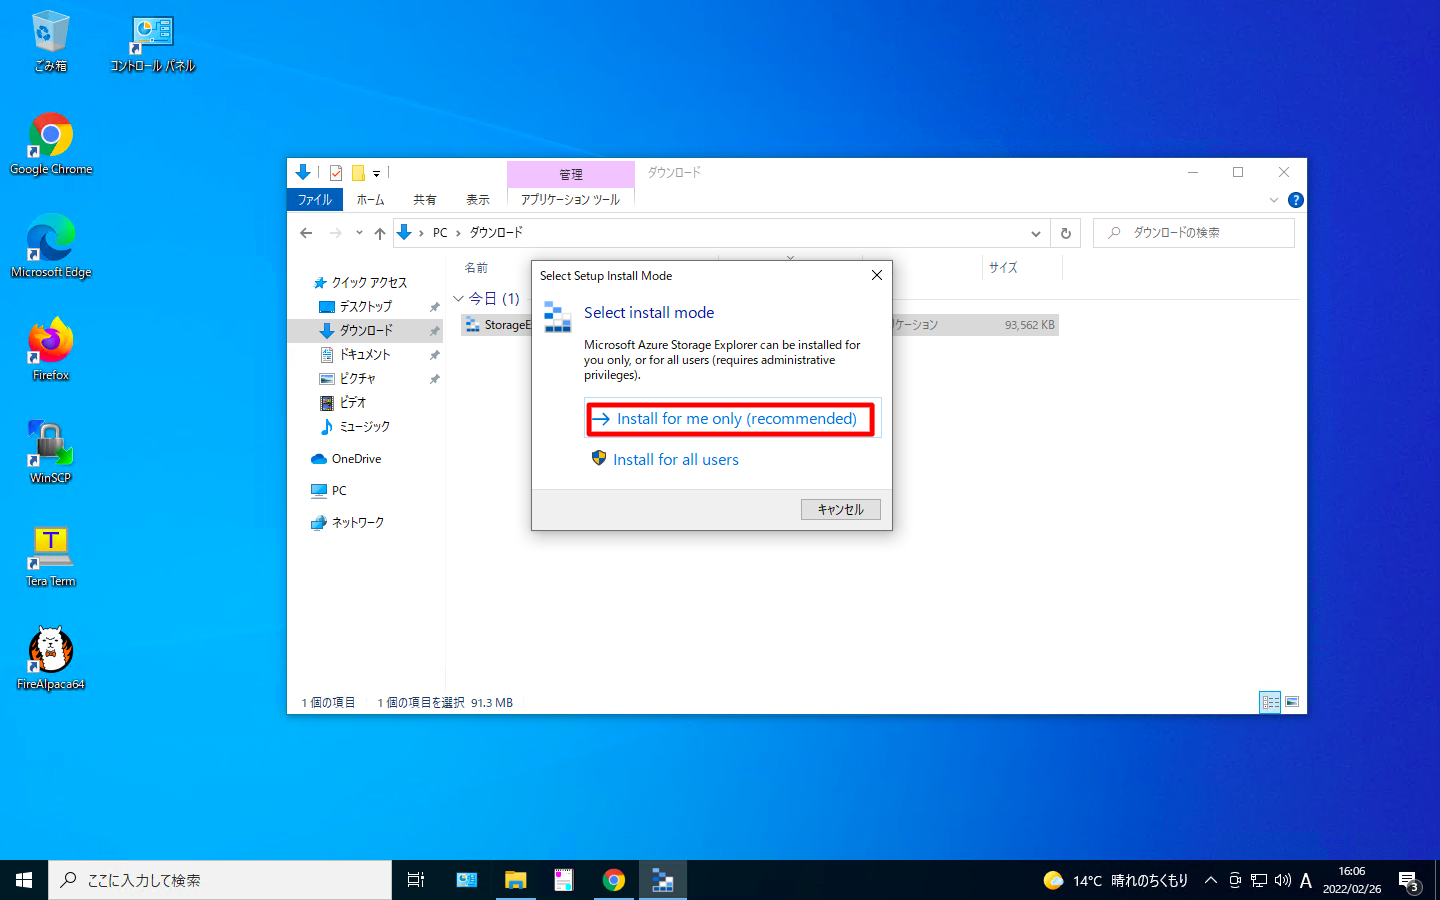
「自分だけにインストールするか(推奨)」「全員にインストールするか」を選びます。
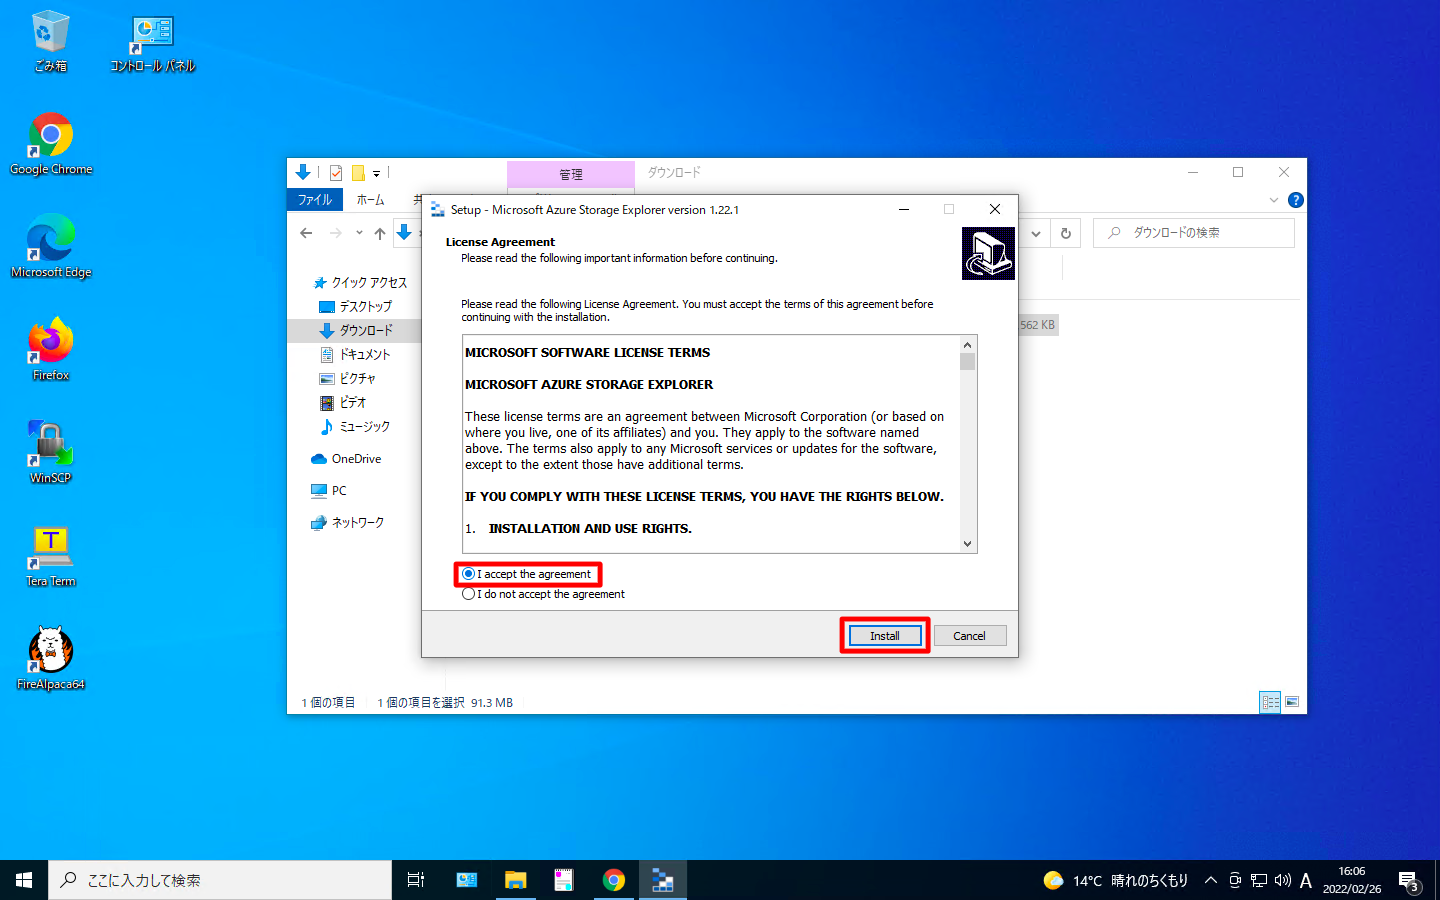
「I accept the agreement」を選択し、「Install」を押下します。
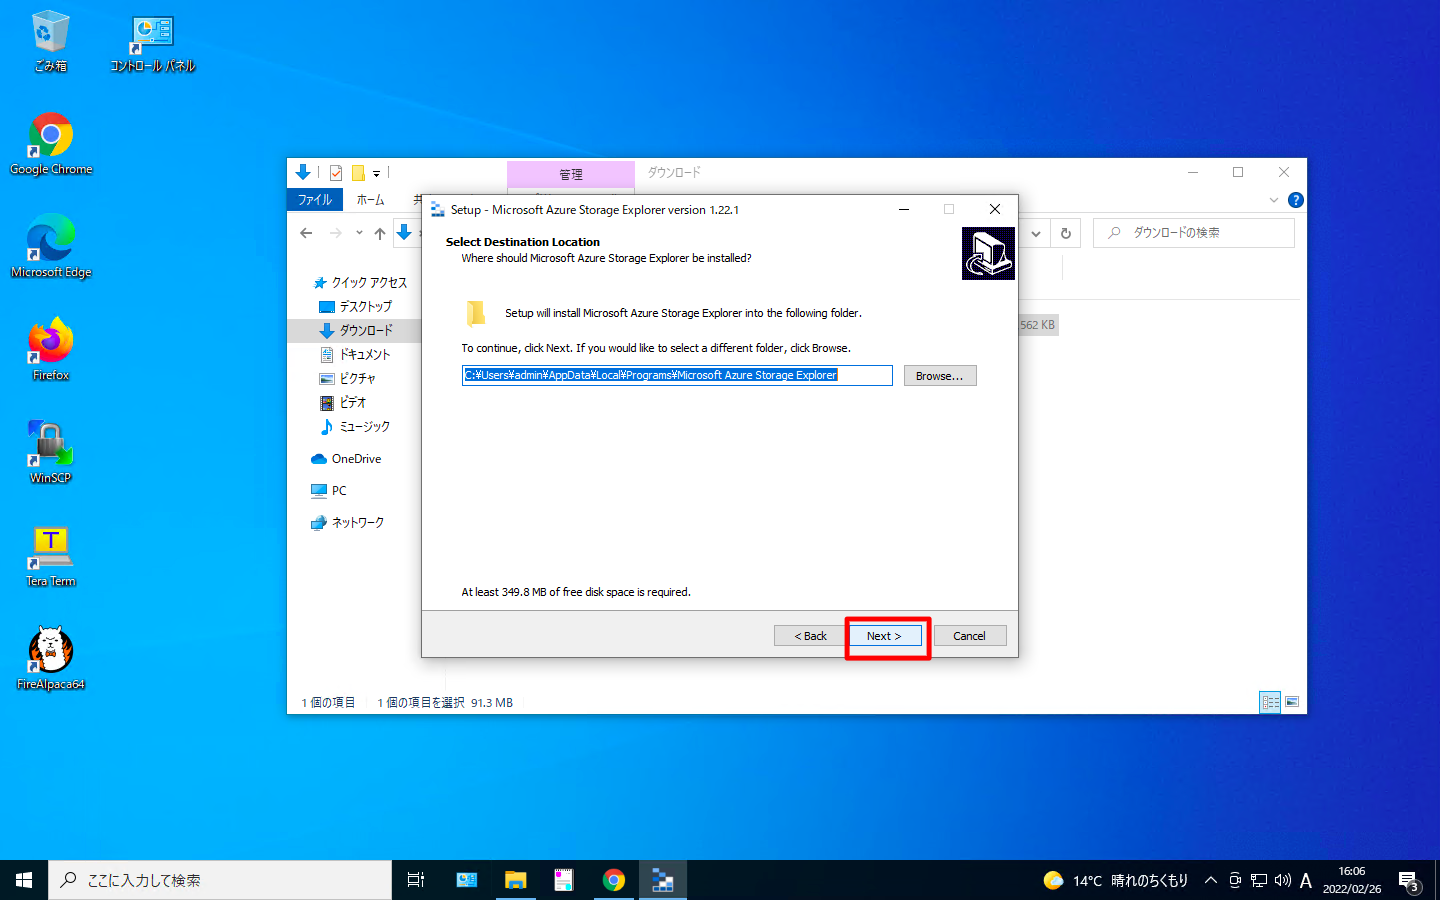
「Next」を押下します。
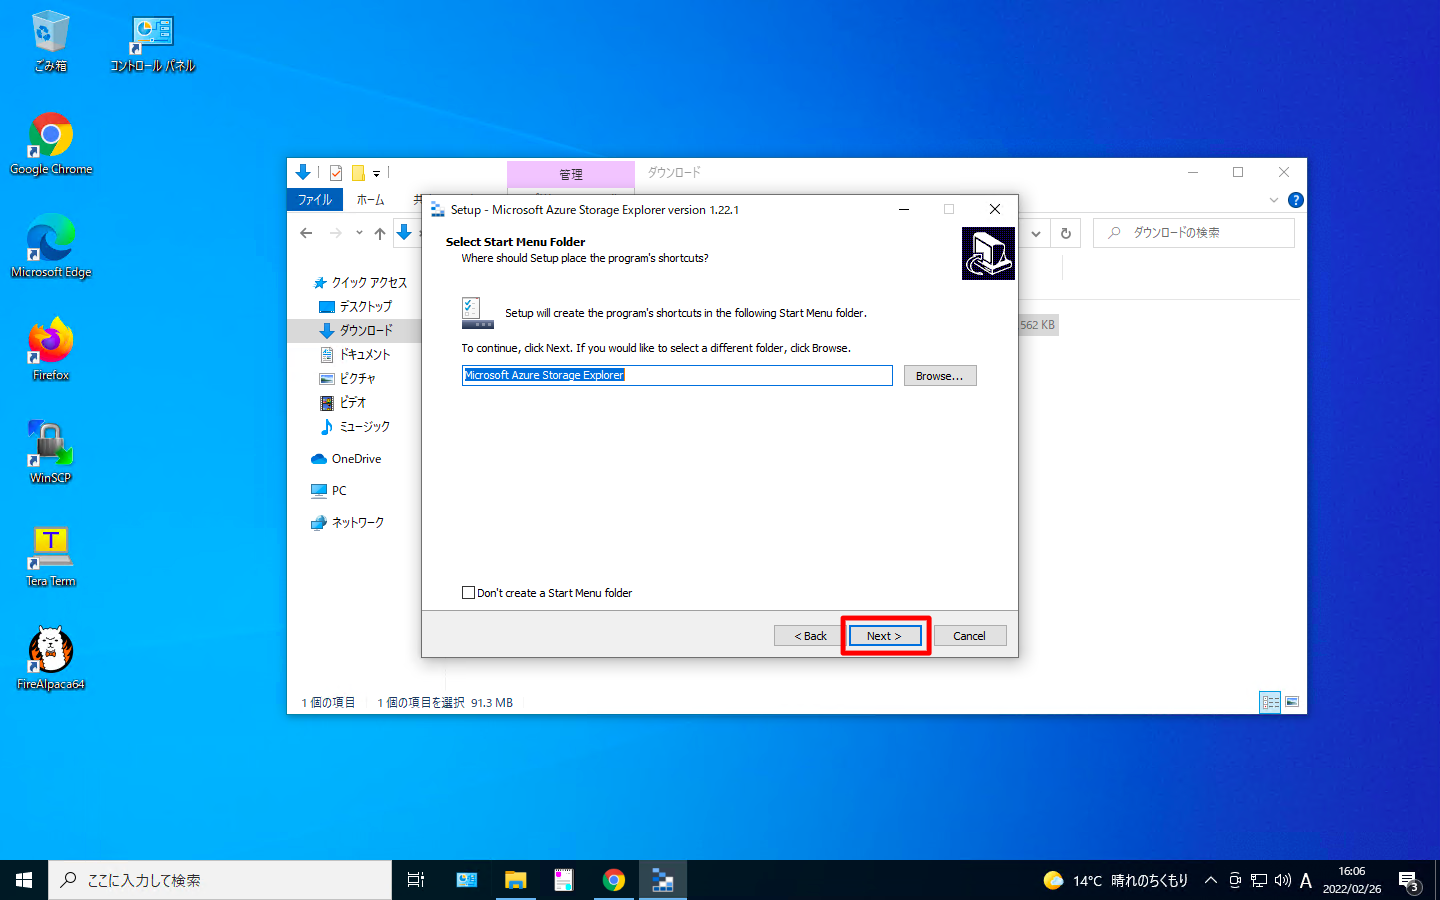
「Next」を押下します。
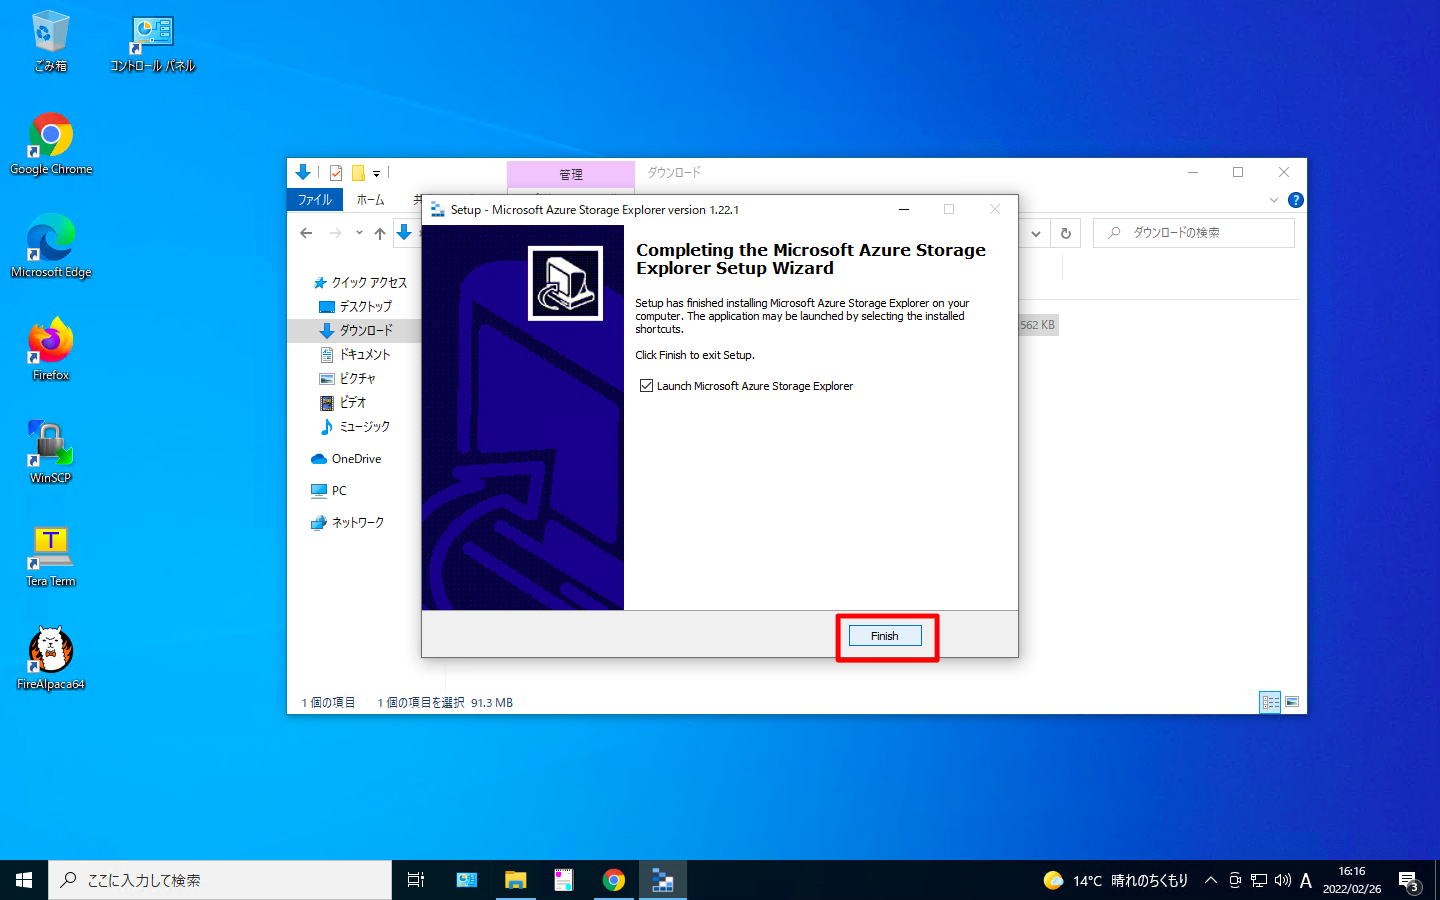
「Finish」を押下します。
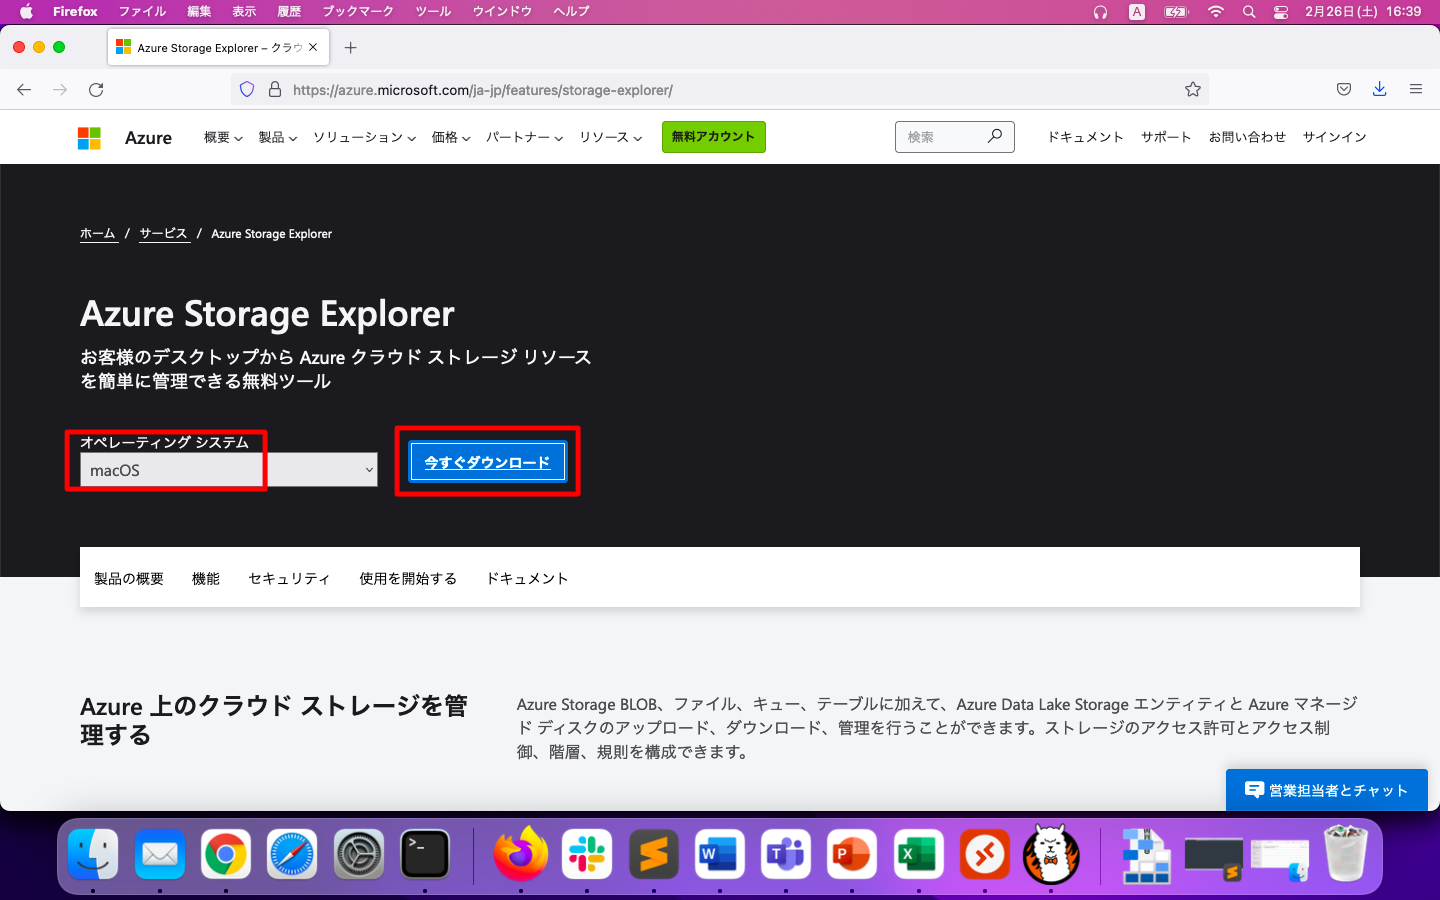
MacOSの場合
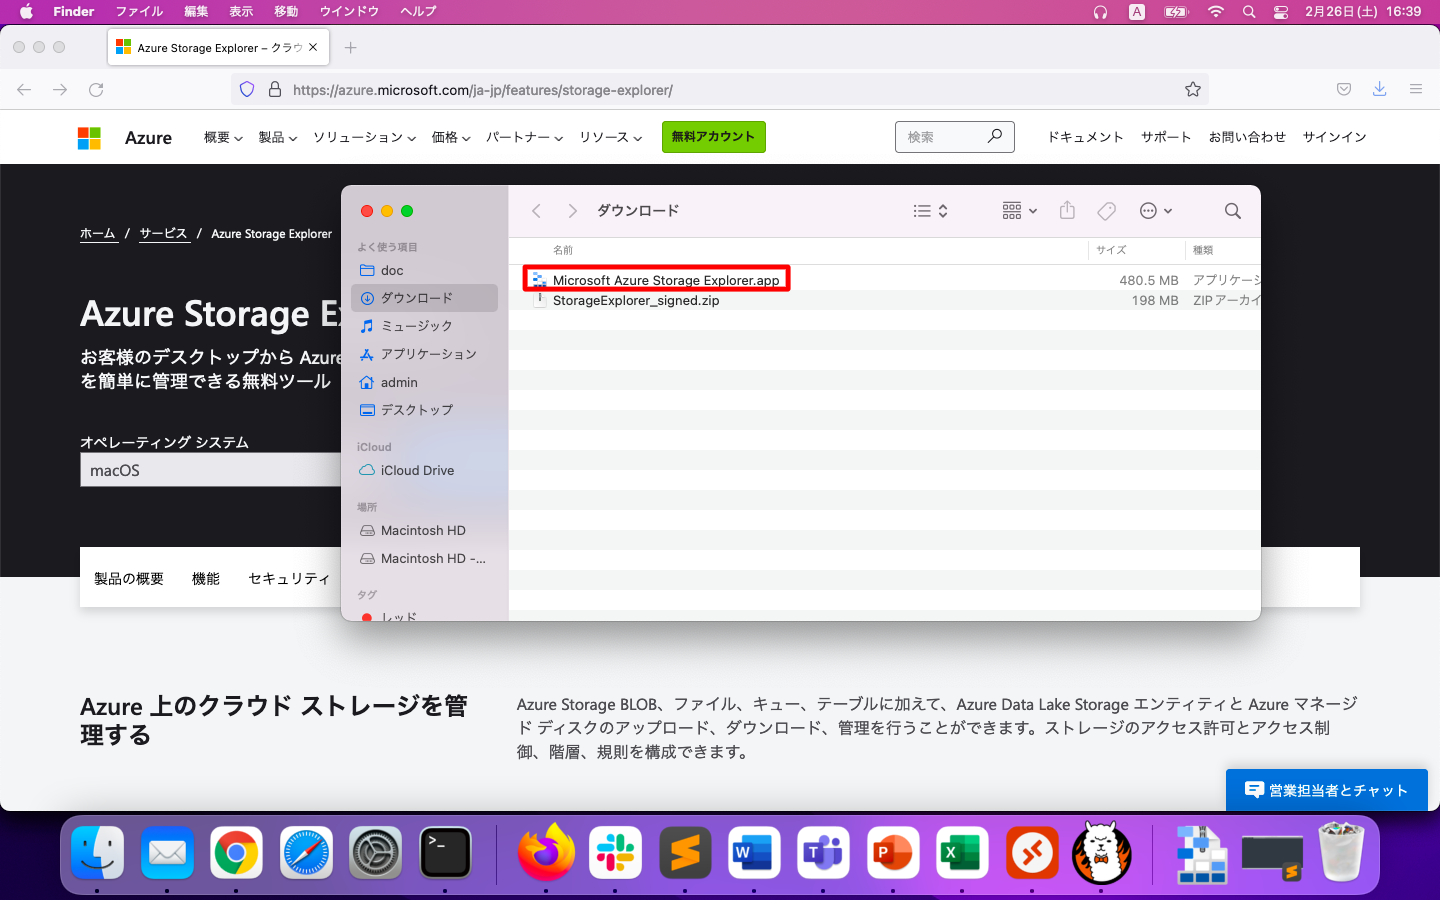
「Azure Storage Explorerのダウンロードページ」をブラウザで開き、「今すぐダウンロード」を実行します。
ダウンロードしたzipファイルを展開すると、その中にappファイルが入っています。このappファイルを実行します。
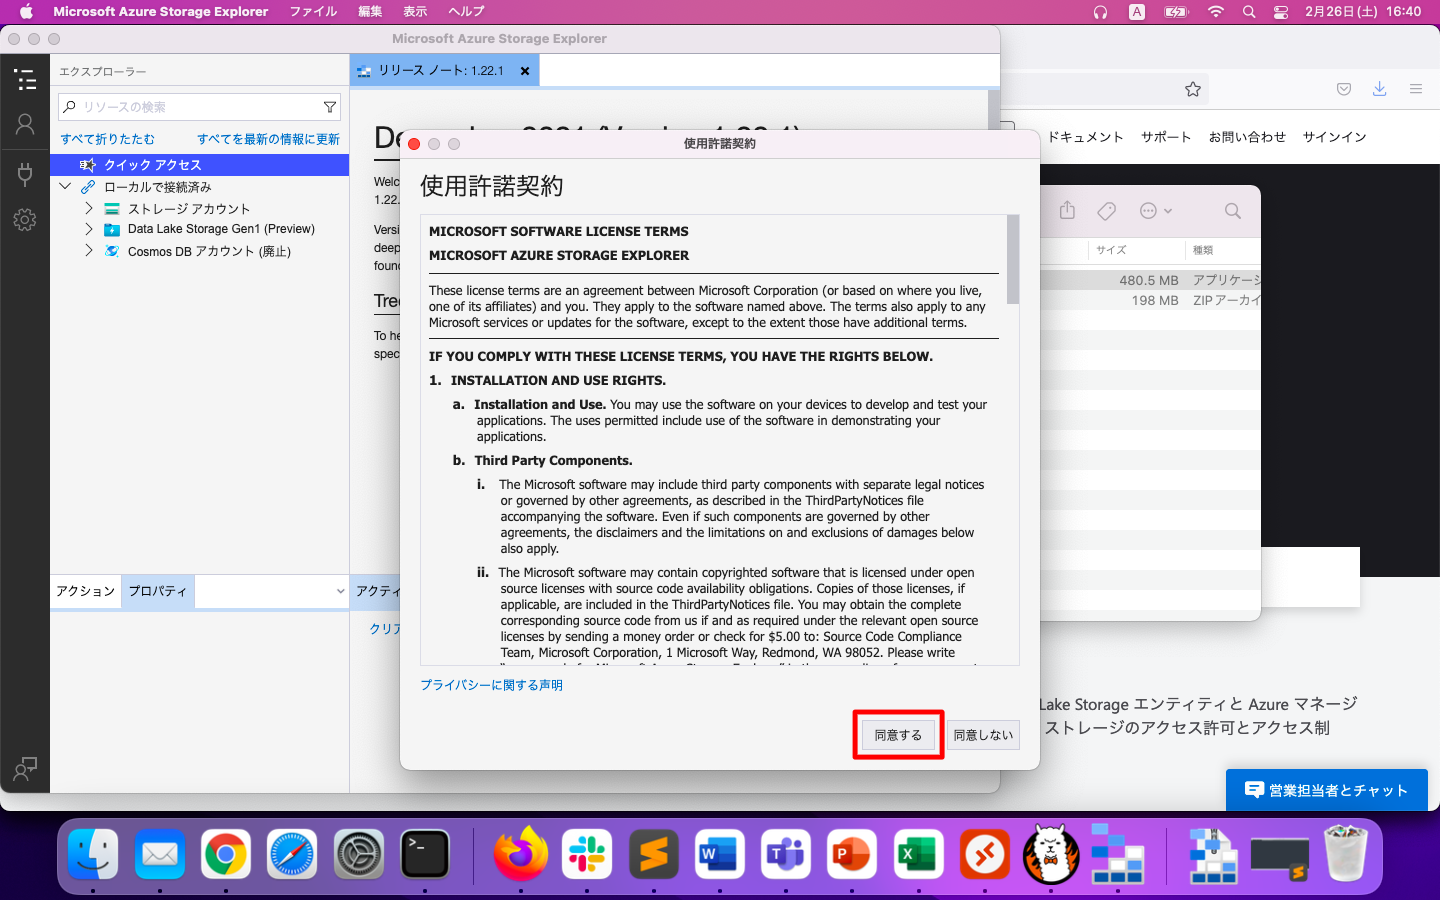
初回実行時のみ使用許諾契約への同意を求められます。
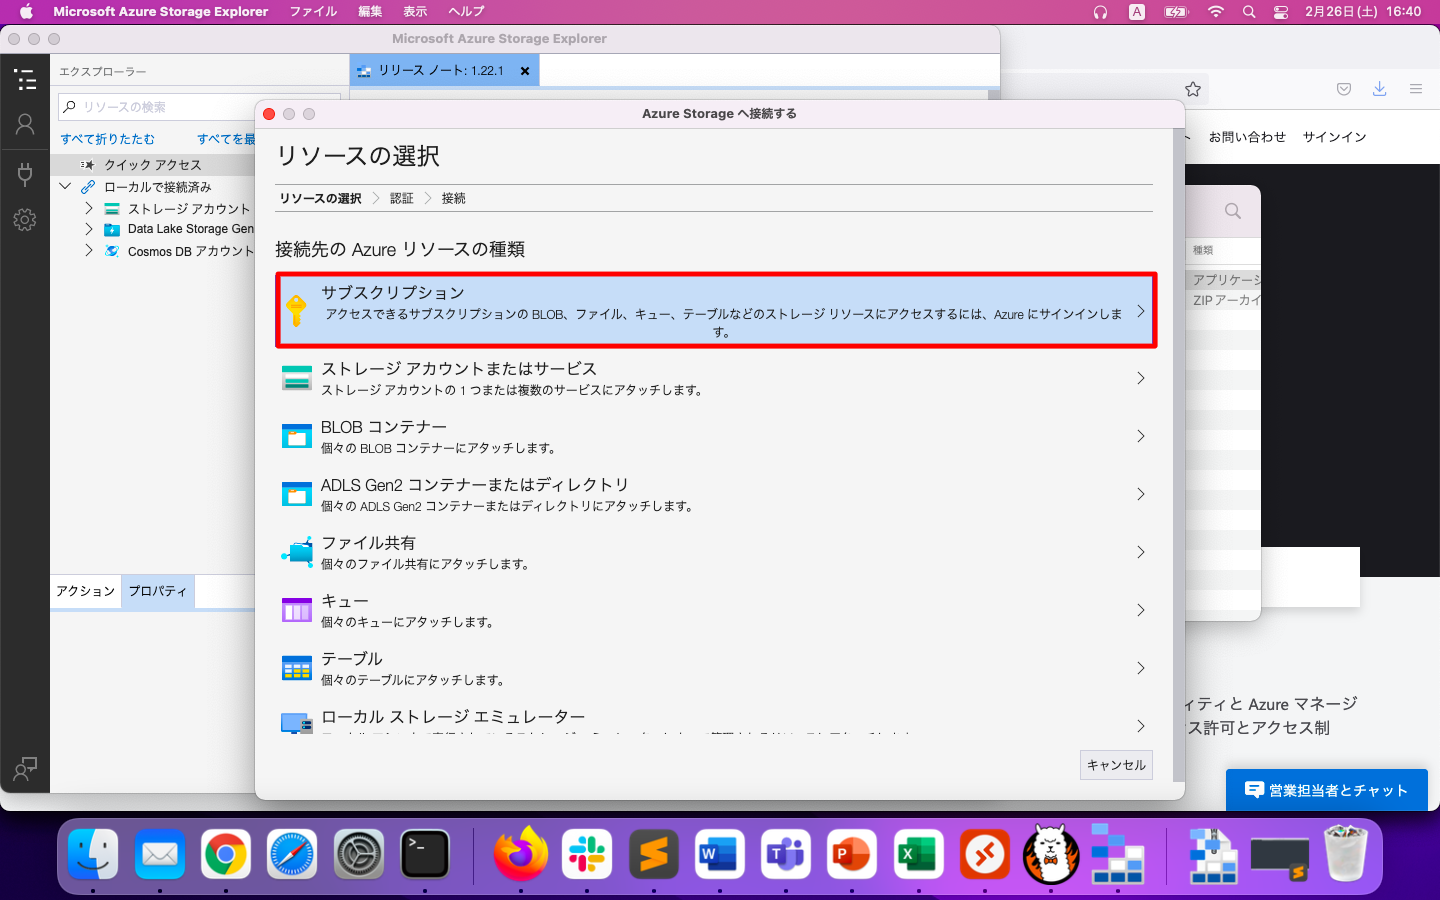
Azure Storage Explorerの認証情報入力
Azureへの接続方法を聞かれます。サブスクリプションを選ぶと、そのAzureアカウントに紐づいたストレージを全て操作する事ができます。
Shared Access Signatures(SAS)を使用すれば限定的なアクセスを実現する事もできますが、ここでは説明を省略します。
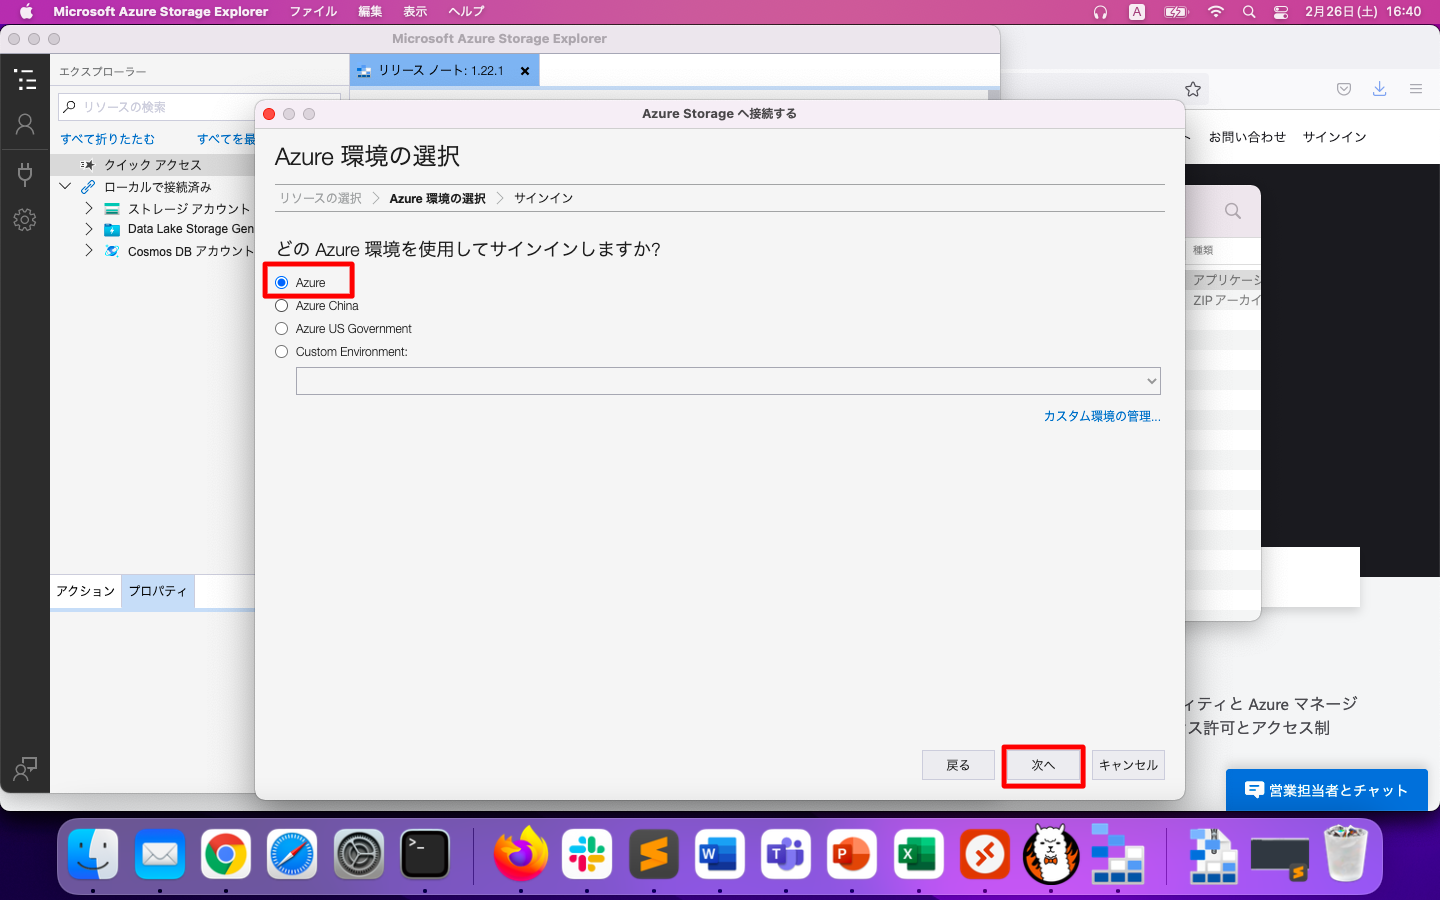
「Azure」を選択し、「次へ」を押下します。
ブラウザが立ち上がり、認証情報を求められます。
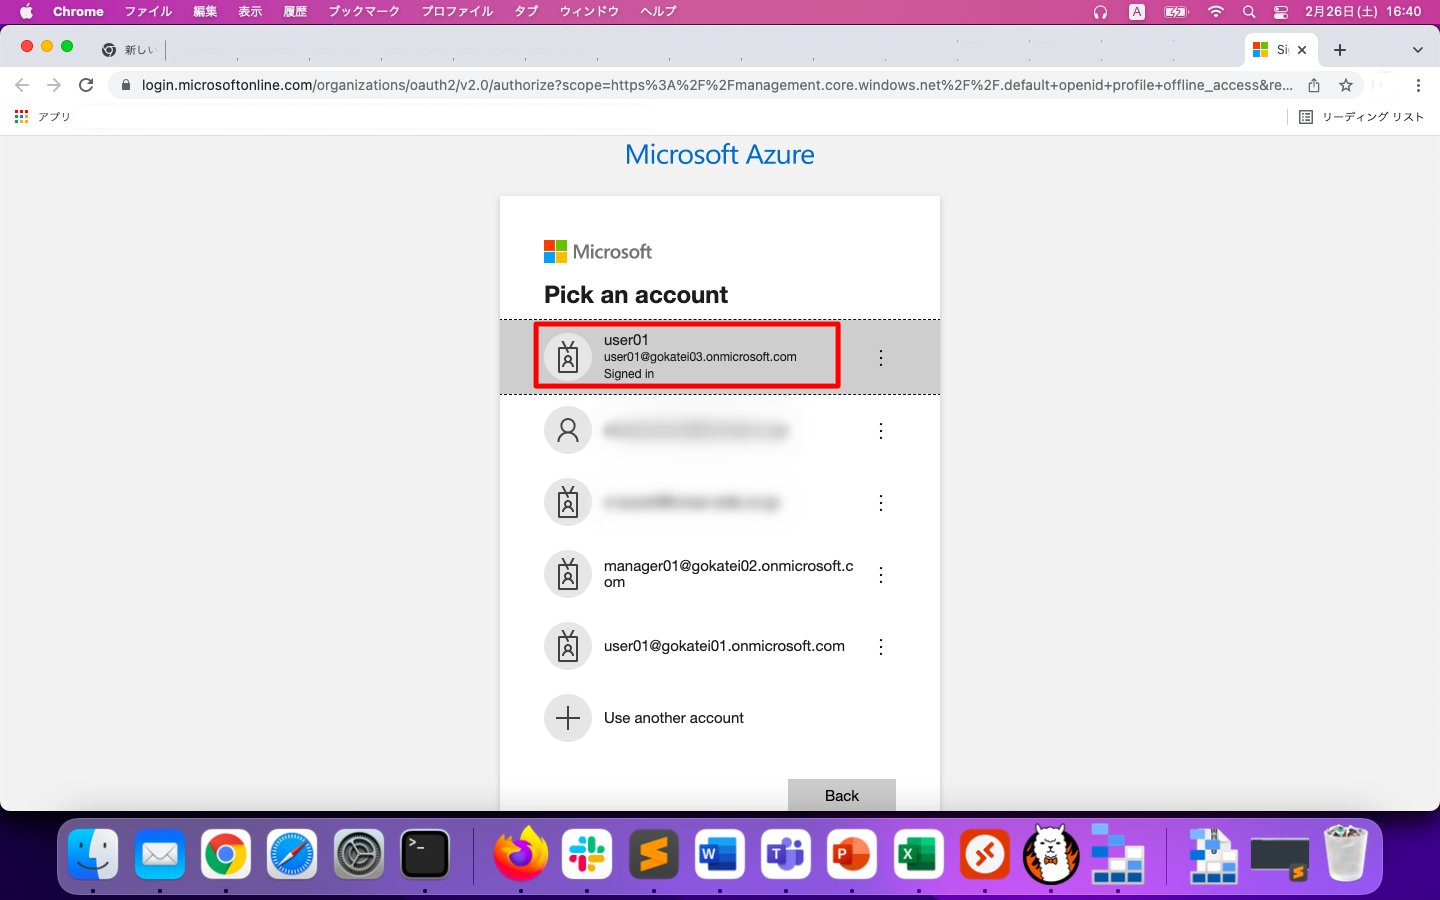
認証に成功すると以下のような画面が表示されます。もし、複数のサブスクリプションがあり全部を表示する必要がないならば、適宜、チェックボックスをOFFにする事で表示が見やすくなります。その後、左上の「エクスプローラー」のようなボタンを押下すると、ストレージ一覧の画面が現れます。
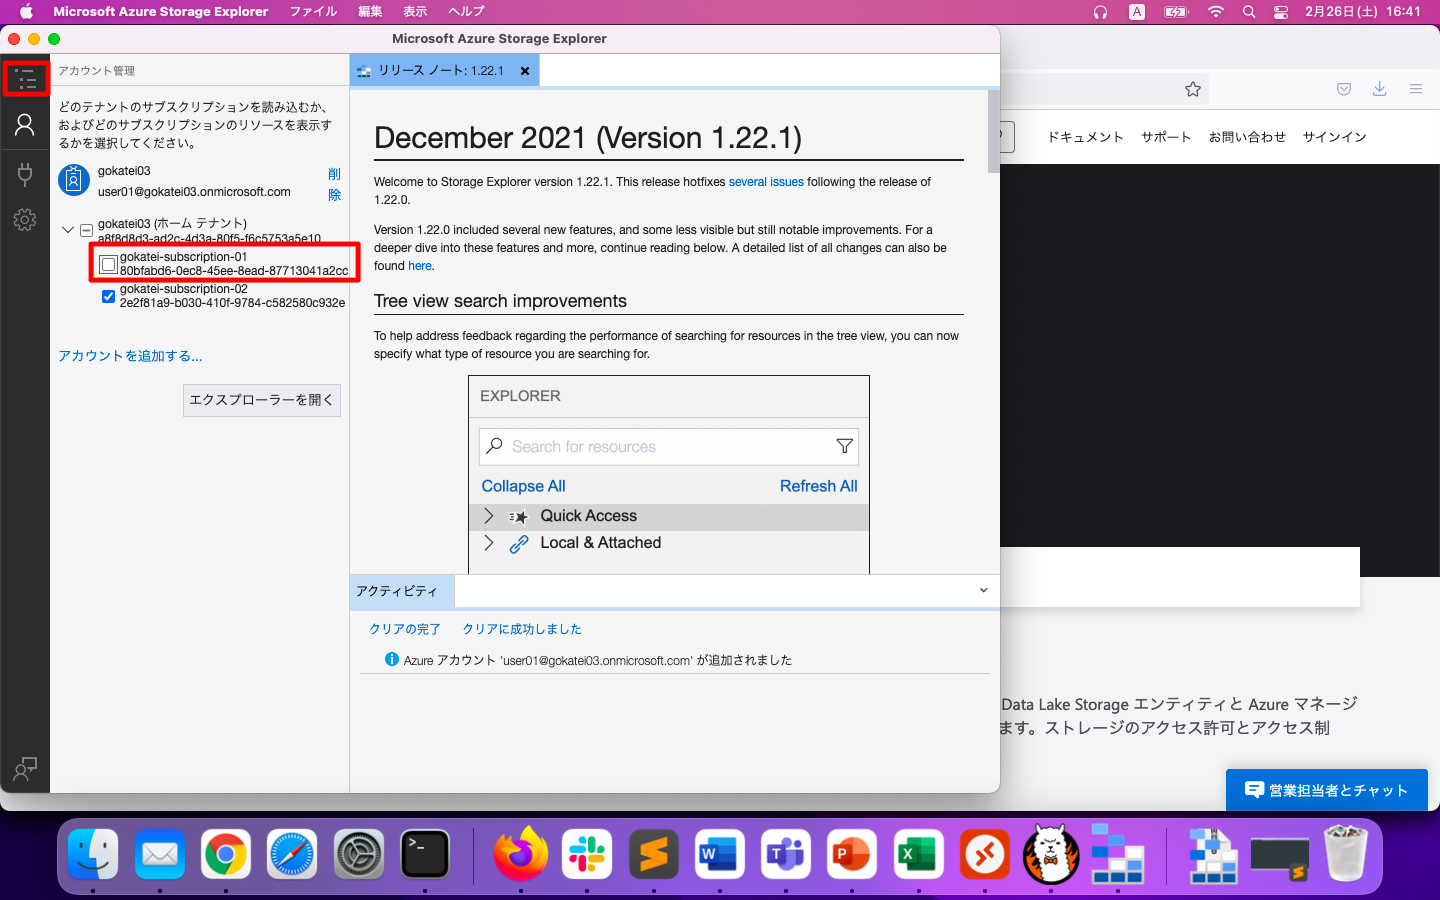
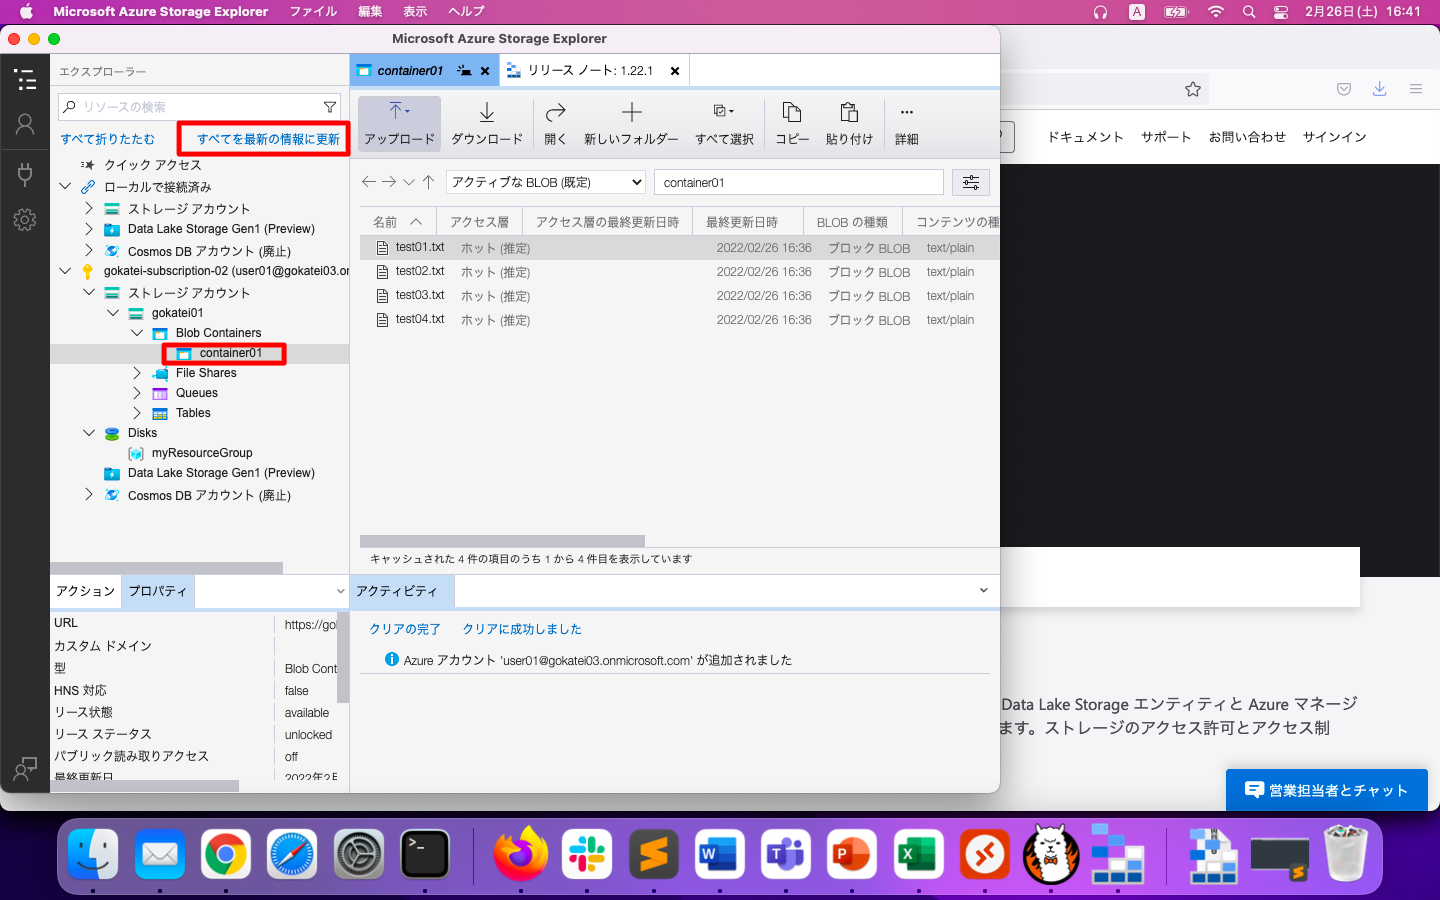
念の為、「すべての情報を最新に更新」を押下します。その後、さきほどのazコマンドで作成したコンテナ名が表示されている事を確認します。
Azure Storage Explorerのアップロード操作例
「コンテナ名(container01)」を選択している状態で、「アップロード」を押下します。
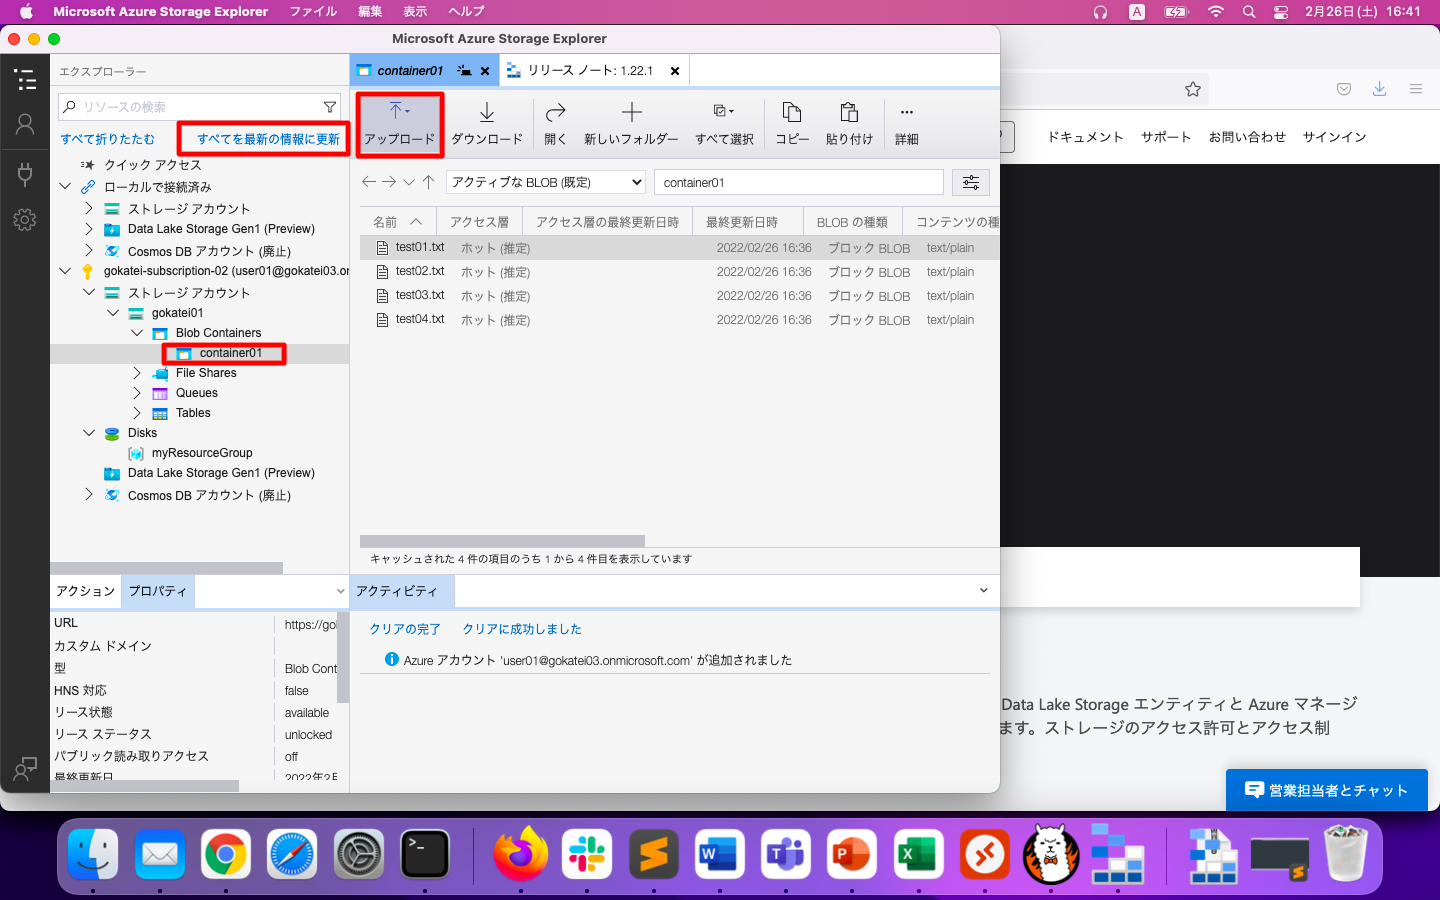
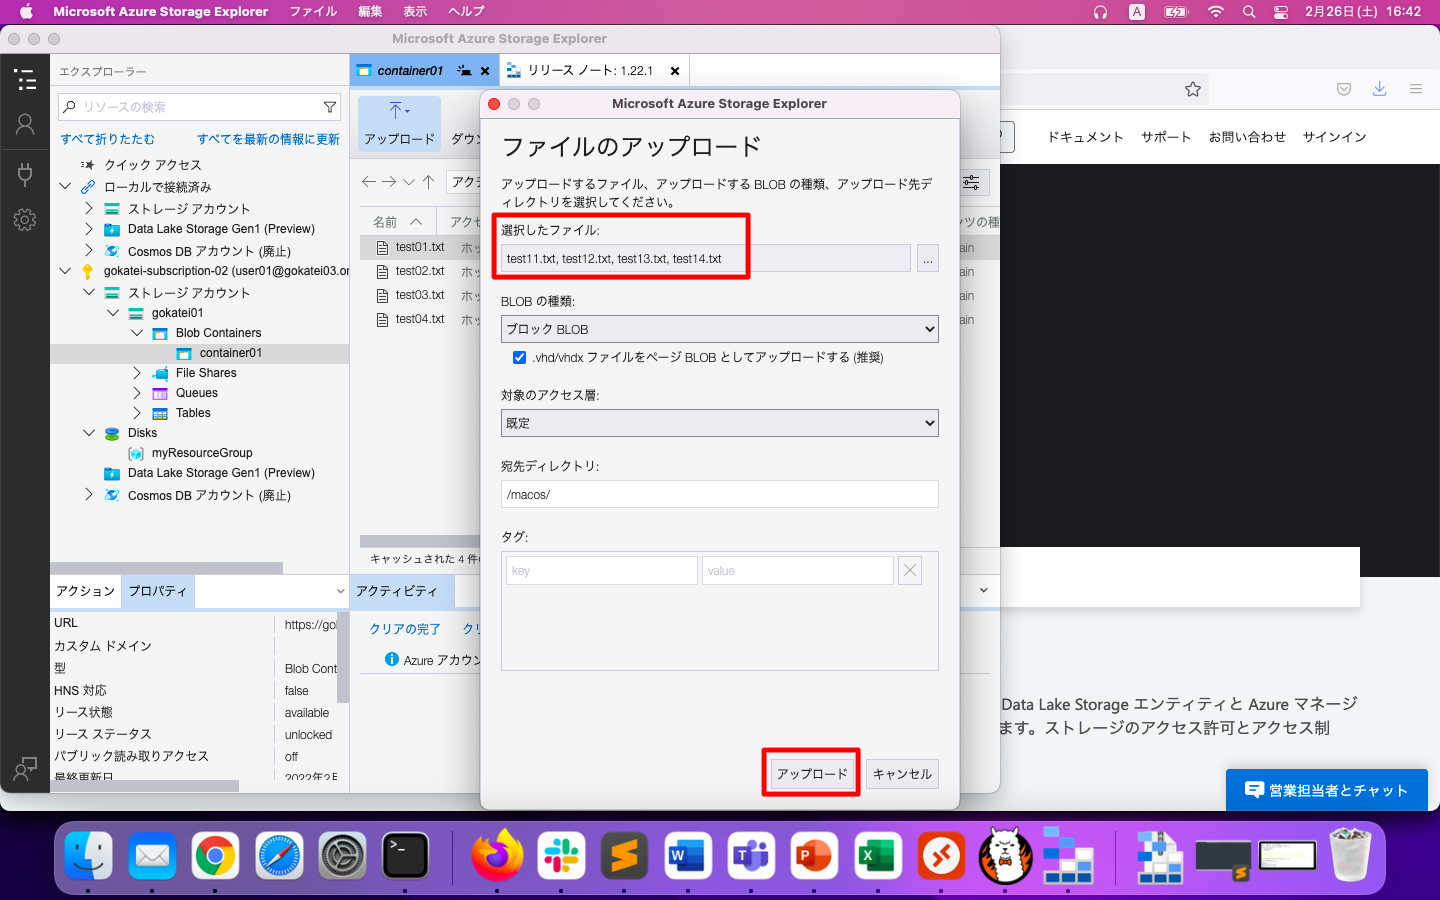
アップロード対象のファイルを選択します。対象ファイルは複数を選ぶ事もできます。選択後、「アップロード」を押下します。
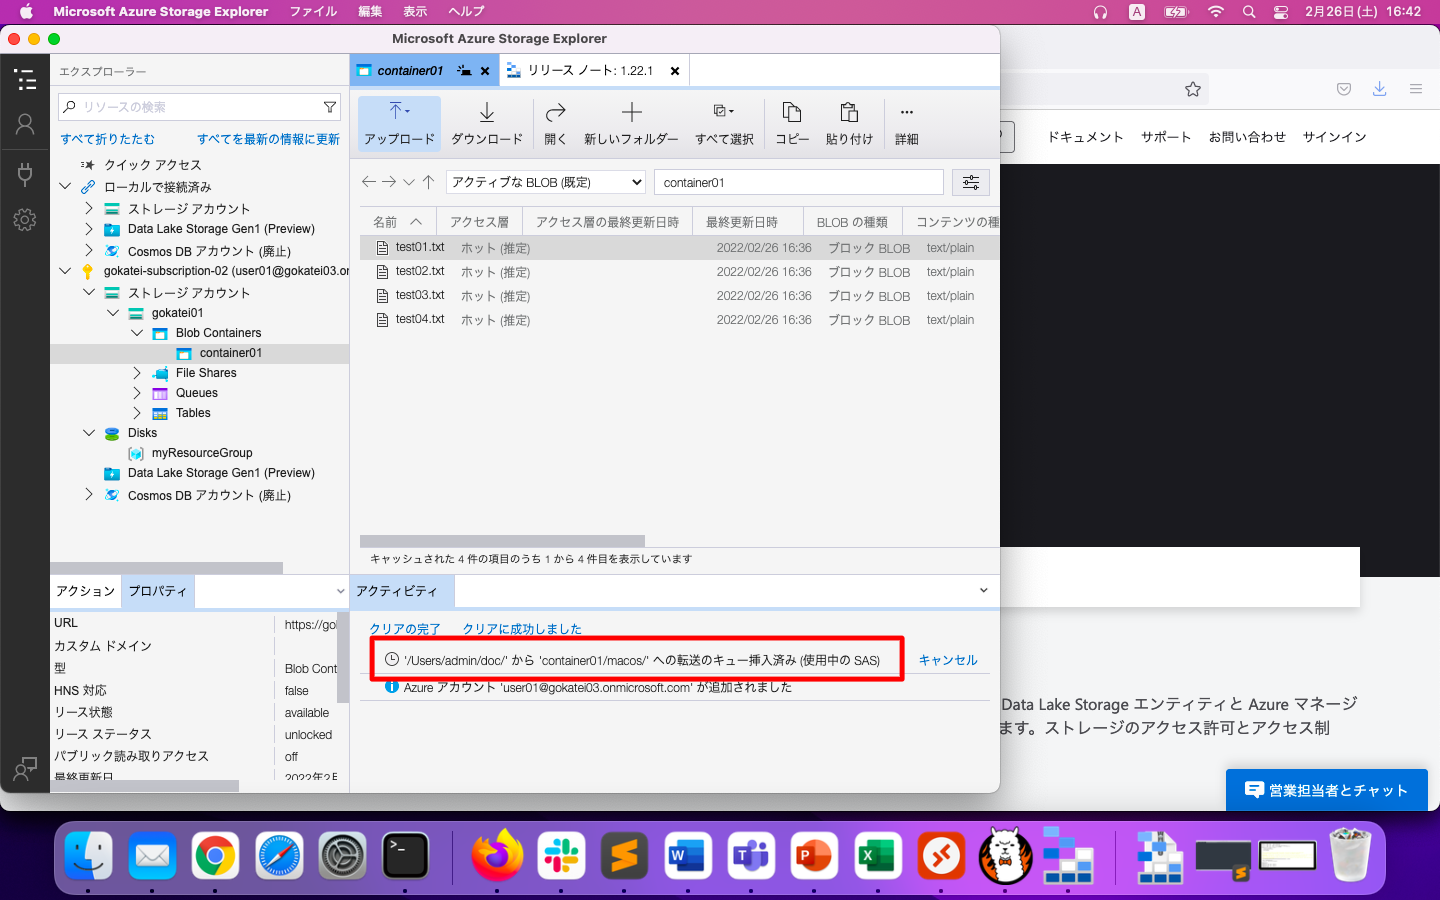
画面下の方に、アップロードの進捗を表すメッセージが表示されます。
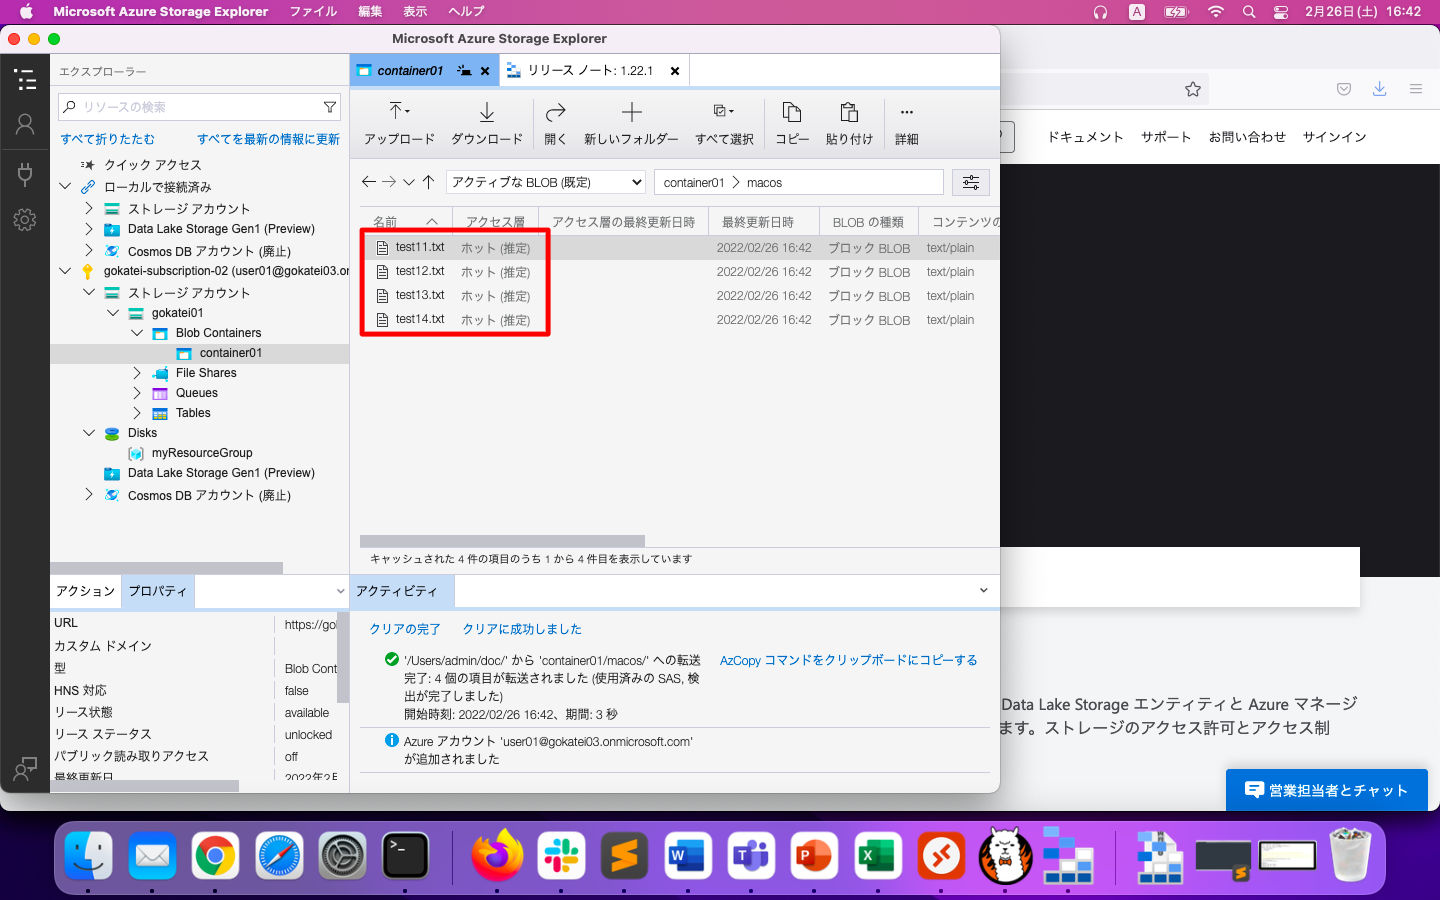
しばらく待ち、以下スクリーンショットの赤枠のようにアップロードが完了した事を確認します。
azコマンドによる操作
az storage blob uploadコマンドで、ファイルをBlobストレージへアップロードできます。
echo "test" > test21.txt

az storage blob upload \
    --account-name gokatei01 \
    --container-name container01 \
    --name cli/test21.txt \
    --file test21.txt
az storage blob listコマンドで、Blobストレージのファイル一覧を取得できます。
az storage blob list \
    --account-name gokatei01 \
    --container-name container01 \
    --output table
az storage blob listコマンドの出力例は以下の通りです。
admin@mac19 ~ % az storage blob list \
    --account-name gokatei01 \
    --container-name container01 \
    --output table

There are no credentials provided in your command and environment, we will query for account key for your storage account.
It is recommended to provide --connection-string, --account-key or --sas-token in your command as credentials.

You also can add `--auth-mode login` in your command to use Azure Active Directory (Azure AD) for authorization if your login account is assigned required RBAC roles.
For more information about RBAC roles in storage, visit https://docs.microsoft.com/azure/storage/common/storage-auth-aad-rbac-cli.

In addition, setting the corresponding environment variables can avoid inputting credentials in your command. Please use --help to get more information about environment variable usage.
Name              Blob Type    Blob Tier    Length    Content Type    Last Modified              Snapshot
----------------  -----------  -----------  --------  --------------  -------------------------  ----------
cli/test21.txt    BlockBlob    Hot          5         text/plain      2022-02-26T08:40:33+00:00
macos/test11.txt  BlockBlob    Hot          5         text/plain      2022-02-26T07:42:20+00:00
macos/test12.txt  BlockBlob    Hot          5         text/plain      2022-02-26T07:42:20+00:00
macos/test13.txt  BlockBlob    Hot          5         text/plain      2022-02-26T07:42:20+00:00
macos/test14.txt  BlockBlob    Hot          5         text/plain      2022-02-26T07:42:20+00:00
test01.txt        BlockBlob    Hot          6         text/plain      2022-02-26T07:36:27+00:00
test02.txt        BlockBlob    Hot          6         text/plain      2022-02-26T07:36:27+00:00
test03.txt        BlockBlob    Hot          6         text/plain      2022-02-26T07:36:27+00:00
test04.txt        BlockBlob    Hot          6         text/plain      2022-02-26T07:36:27+00:00
az storage blob downloadコマンドで、Blobストレージのファイルをダウンロードできます。
az storage blob download \
    --account-name gokatei01 \
    --container-name container01 \
    --name cli/test21.txt \
    --file /tmp/test21.txt
コードによる操作
KEYの調査
前述の操作はazコマンドの操作はAzure ADの認証機能を利用した操作です。その他、KEYによる認証も可能です。Azure AD認証を利用したコードは初学者にはハードルが高いので、まずはKEYを用いた認証操作を例示します。
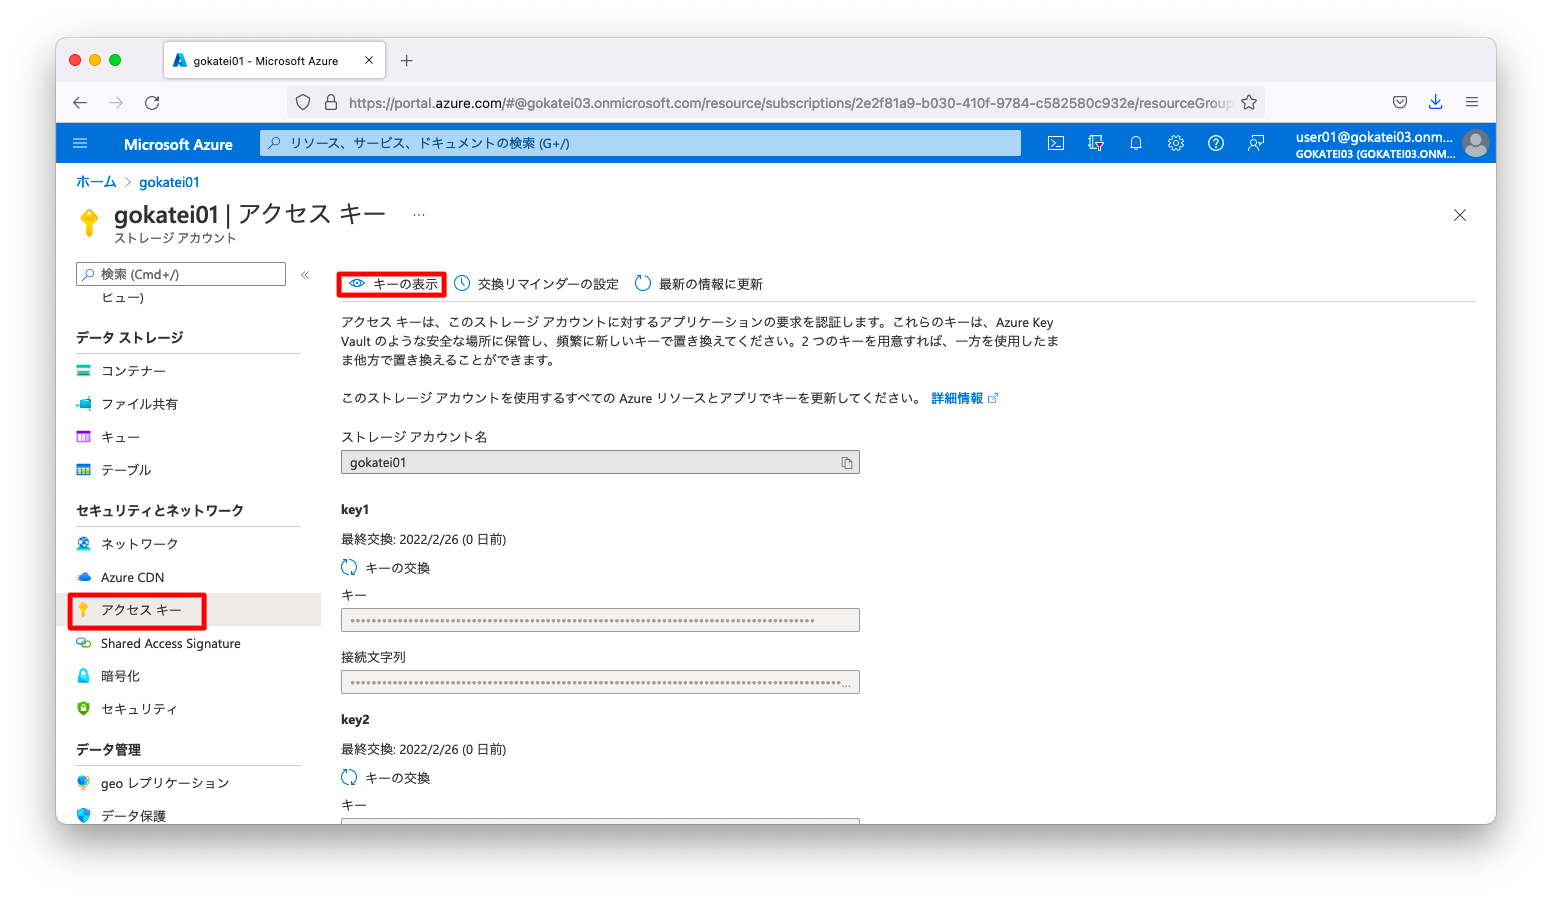
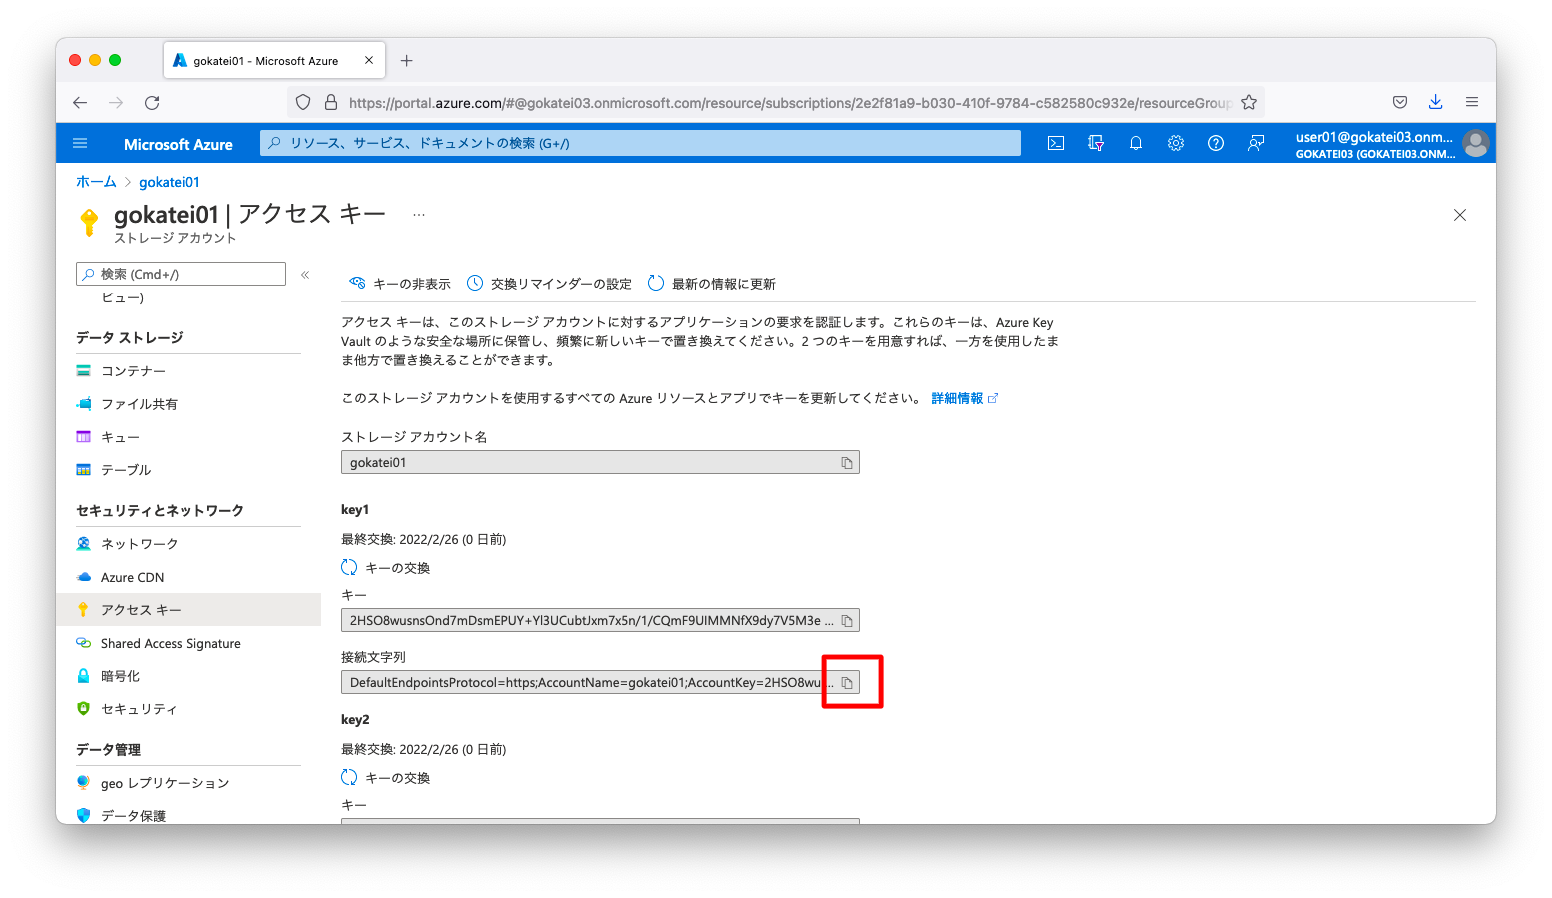
「ストレージアカウント」の「アクセスキー」の画面を開きます。この画面でキーが伏せ字で表示されている場合は、「キーの表示」を押下します。
「接続文字列」をクリップボードにコピーします。
もし、ポータル(GUI)を使用せずにKEYを調べるならば、以下のようにaz storage account keys listコマンドを使用します。
admin@mac19 ~ % az storage account keys list \
    --account-name gokatei01 \
    --resource-group myResourceGroup
[
  {
    "creationTime": "2022-02-26T07:21:13.722998+00:00",
    "keyName": "key1",
    "permissions": "FULL",
    "value": "2HSO8wusnsOnd7mDsmEPUY+Yl3UCubtJxm7x5n/1/CQmF9UIMMNfX9dy7V5M3ewr/eQabKeGeNUtYQ1NdYISDQ=="
  },
  {
    "creationTime": "2022-02-26T06:45:22.265643+00:00",
    "keyName": "key2",
    "permissions": "FULL",
    "value": "9GKzucUMGF7bonPHKqxeAsja8s1u1Gg4PvyxnjpfnhxIpOOnSghQ8TaLVwE2f+mn/bm94daIKRiGv+uGE6psHQ=="
  }
]
Pythonによる実装例
公式ドキュメント「クイックスタート: Python v12 SDK で BLOB を管理する」に記載された方法を噛み砕いて説明します。この分野は仕様変更頻度が高そうですので、必ず公式ドキュメントも併せて参照ください。
python3.6以上の環境にazure-storage-blobをインストールします。操作例は以下の通りです。
python3 -m venv azpy
source azpy/bin/activate
pip install --upgrade pip
pip install azure-storage-blob
アップロードの動作確認用ファイルを作成します。
echo "test" > /tmp/test31.txt
前述の操作でクリップボードにコピーした接続文字列を環境変数AZURE_STORAGE_CONNECTION_STRINGとして定義します。接続文字列は環境に応じて適宜変更ください。
export AZURE_STORAGE_CONNECTION_STRING="DefaultEndpointsProtocol=https;AccountName=gokatei01;AccountKey=2HSO8wusnsOnd7mDsmEPUY+Yl3UCubtJxm7x5n/1/CQmF9UIMMNfX9dy7V5M3ewr/eQabKeGeNUtYQ1NdYISDQ==;EndpointSuffix=core.windows.net"
ファイルアップロードの実装例は以下の通りです。
import os, uuid
from azure.storage.blob import BlobServiceClient, BlobClient, ContainerClient, __version__

CONTAINER_NAME="container01"
LOCAL_FILE_NAME="/tmp/test31.txt"
BLOB_FILE_NAME="py/test31.txt"

connect_str = os.getenv('AZURE_STORAGE_CONNECTION_STRING')
blob_service_client = BlobServiceClient.from_connection_string(connect_str)

blob_client = blob_service_client.get_blob_client(container=CONTAINER_NAME, blob=BLOB_FILE_NAME)

with open(LOCAL_FILE_NAME, "rb") as data:
  blob_client.upload_blob(data)
アップロードに成功した場合は、以下のようなログになります。
(azpy) [root@rocky020 ~]# python3
Python 3.6.8 (default, Nov  9 2021, 14:44:26)
[GCC 8.5.0 20210514 (Red Hat 8.5.0-3)] on linux
Type "help", "copyright", "credits" or "license" for more information.
>>> import os, uuid
>>> from azure.storage.blob import BlobServiceClient, BlobClient, ContainerClient, __version__
>>>
>>> CONTAINER_NAME="container01"
>>> LOCAL_FILE_NAME="/tmp/test31.txt"
>>> BLOB_FILE_NAME="py/test31.txt"
>>> connect_str = os.getenv('AZURE_STORAGE_CONNECTION_STRING')
>>> blob_service_client = BlobServiceClient.from_connection_string(connect_str)
>>>
>>> blob_client = blob_service_client.get_blob_client(container=CONTAINER_NAME, blob=BLOB_FILE_NAME)
>>>
>>> with open(LOCAL_FILE_NAME, "rb") as data:
...   blob_client.upload_blob(data)
...
{'etag': '"0x8D9F91802740012"', 'last_modified': datetime.datetime(2022, 2, 26, 11, 6, 16, tzinfo=datetime.timezone.utc), 'content_md5': bytearray(b'\xd8\xe8\xfc\xa2\xdc\x0f\x89o\xd7\xcbL\xb0\x03\x1b\xa2I'), 'client_request_id': '1e3dc7cc-96f4-11ec-8998-00505690811b', 'request_id': '6047c294-701e-0060-7400-2b2f6a000000', 'version': '2020-10-02', 'version_id': None, 'date': datetime.datetime(2022, 2, 26, 11, 6, 16, tzinfo=datetime.timezone.utc), 'request_server_encrypted': True, 'encryption_key_sha256': None, 'encryption_scope': None}
>>>
想定通りのファイルがBlobストレージに存在する事を確認します。
admin@mac19 doc % az storage blob list \
    --account-name gokatei01 \
    --container-name container01 \
    --output table

There are no credentials provided in your command and environment, we will query for account key for your storage account.
It is recommended to provide --connection-string, --account-key or --sas-token in your command as credentials.

You also can add `--auth-mode login` in your command to use Azure Active Directory (Azure AD) for authorization if your login account is assigned required RBAC roles.
For more information about RBAC roles in storage, visit https://docs.microsoft.com/azure/storage/common/storage-auth-aad-rbac-cli.

In addition, setting the corresponding environment variables can avoid inputting credentials in your command. Please use --help to get more information about environment variable usage.
Name              Blob Type    Blob Tier    Length    Content Type              Last Modified              Snapshot
----------------  -----------  -----------  --------  ------------------------  -------------------------  ----------
cli/test21.txt    BlockBlob    Hot          5         text/plain                2022-02-26T08:40:33+00:00
macos/test11.txt  BlockBlob    Hot          5         text/plain                2022-02-26T07:42:20+00:00
macos/test12.txt  BlockBlob    Hot          5         text/plain                2022-02-26T07:42:20+00:00
macos/test13.txt  BlockBlob    Hot          5         text/plain                2022-02-26T07:42:20+00:00
macos/test14.txt  BlockBlob    Hot          5         text/plain                2022-02-26T07:42:20+00:00
py/test31.txt     BlockBlob    Hot          5         application/octet-stream  2022-02-26T11:06:16+00:00
test01.txt        BlockBlob    Hot          6         text/plain                2022-02-26T07:36:27+00:00
test02.txt        BlockBlob    Hot          6         text/plain                2022-02-26T07:36:27+00:00
test03.txt        BlockBlob    Hot          6         text/plain                2022-02-26T07:36:27+00:00
test04.txt        BlockBlob    Hot          6         text/plain                2022-02-26T07:36:27+00:00
admin@mac19 doc %