
Microsoft Azureで仮想マシンをazコマンドで作成する方法をまとめます。このページで紹介するのは初歩的な設定です。Windowsの設定例については全世界に対してRDPを許可する侵入されてしまう設定ですので、実務では使用しないように注意ください。
もう少し発展的な内容は「仮想マシン クイックスタート azコマンド編 (2/2)」に記載します。
指定可能なパラメタの調査
リージョンの一覧
指定可能なリージョン一覧は以下コマンドを使用します。
az account list-locations
実際に指定可能なのはregionTypeがPhysicalであるもののみです。クエリで絞り込む操作例は以下の通りです。
az account list-locations --query "[? metadata.regionType=='Physical'].name"
イメージ検索
仮想マシン作成時に指定できるOSは、公式資料の「Azure CLI を使用して Azure Marketplace イメージ情報を検索する」を参照ください。以下、公式資料の一部抜粋を載せます。
Azure Marketplaceで使用頻度が高いOSのみを表示するならば、以下のコマンドを使用します。
az vm image list --output table
実行例は以下の通りです。以下に出力されるUrnまたはUrnAliasを仮想マシン作成時に指定します。
$ az vm image list --output table
You are viewing an offline list of images, use --all to retrieve an up-to-date list
Offer                         Publisher               Sku                 Urn                                                             UrnAlias             Version
----------------------------  ----------------------  ------------------  --------------------------------------------------------------  -------------------  ---------
CentOS                        OpenLogic               7.5                 OpenLogic:CentOS:7.5:latest                                     CentOS               latest
debian-10                     Debian                  10                  Debian:debian-10:10:latest                                      Debian               latest
flatcar-container-linux-free  kinvolk                 stable              kinvolk:flatcar-container-linux-free:stable:latest              Flatcar              latest
openSUSE-Leap                 SUSE                    42.3                SUSE:openSUSE-Leap:42.3:latest                                  openSUSE-Leap        latest
RHEL                          RedHat                  7-LVM               RedHat:RHEL:7-LVM:latest                                        RHEL                 latest
SLES                          SUSE                    15                  SUSE:SLES:15:latest                                             SLES                 latest
UbuntuServer                  Canonical               18.04-LTS           Canonical:UbuntuServer:18.04-LTS:latest                         UbuntuLTS            latest
WindowsServer                 MicrosoftWindowsServer  2019-Datacenter     MicrosoftWindowsServer:WindowsServer:2019-Datacenter:latest     Win2019Datacenter    latest
WindowsServer                 MicrosoftWindowsServer  2016-Datacenter     MicrosoftWindowsServer:WindowsServer:2016-Datacenter:latest     Win2016Datacenter    latest
WindowsServer                 MicrosoftWindowsServer  2012-R2-Datacenter  MicrosoftWindowsServer:WindowsServer:2012-R2-Datacenter:latest  Win2012R2Datacenter  latest
WindowsServer                 MicrosoftWindowsServer  2012-Datacenter     MicrosoftWindowsServer:WindowsServer:2012-Datacenter:latest     Win2012Datacenter    latest
WindowsServer                 MicrosoftWindowsServer  2008-R2-SP1         MicrosoftWindowsServer:WindowsServer:2008-R2-SP1:latest         Win2008R2SP1         latest
全てのOSを表示させるには–allを指定します。ただし、これでは表示される量が多くなりますので、ディストリビューションやロケーションで絞り込みます。以下は、使用可能なCentOSのイメージ一覧を表示する例です。
az vm image list --location japaneast \
  --offer CentOS \
  --all --output table
実行例は以下の通りです。以下に出力されるUrnまたはUrnAliasを仮想マシン作成時に指定します。
$ az vm image list --location japaneast \
  --offer CentOS \
  --all --output table
Offer                                            Publisher                           Sku                                                 Urn                                                                                                                                  Version
-----------------------------------------------  ----------------------------------  --------------------------------------------------  -----------------------------------------------------------------------------------------------------------------------------------  ---------------
centos-solvers194                                ansys                               74-hpc                                              ansys:centos-solvers194:74-hpc:1.20.14                                                                                               1.20.14
centos-solvers194                                ansys                               76-hc                                               ansys:centos-solvers194:76-hc:1.20.14                                                                                                1.20.14
centos-solvers195                                ansys                               74-hpc                                              ansys:centos-solvers195:74-hpc:1.20.14                                                                                               1.20.14
centos-solvers195                                ansys                               76-hc                                               ansys:centos-solvers195:76-hc:1.20.14                                                                                                1.20.14
centos-solvers201                                ansys                               74-hpc                                              ansys:centos-solvers201:74-hpc:1.20.13                                                                                               1.20.13
centos-solvers201                                ansys                               76-hc                                               ansys:centos-solvers201:76-hc:1.20.14                                                                                                1.20.14
codiad-on-centos-75                              apps-4-rent                         codiad-on-centos-75                                 apps-4-rent:codiad-on-centos-75:codiad-on-centos-75:1.0.1                                                                            1.0.1

 <omitted>
利用規約の同意
仮想マシンを使用するためには、利用規約に同意する必要があります。同意には、az vm image terms acceptコマンドを使用します。
az vm image terms accept --urn <URN>
実行例は以下の通りです。
$ az vm image terms accept --urn procomputers:centos-8-5:centos-8-5:8.5.20211117
{
  "accepted": true,
  "id": "/subscriptions/2e2f81a9-b030-410f-9784-c582580c932e/providers/Microsoft.MarketplaceOrdering/offerTypes/Microsoft.MarketplaceOrdering/offertypes/publishers/procomputers/offers/centos-8-5/plans/centos-8-5/agreements/current",
  "licenseTextLink": "https://mpcprodsa.blob.core.windows.net/legalterms/3E5ED_legalterms_PROCOMPUTERS%253a24CENTOS%253a2D8%253a2D5%253a24CENTOS%253a2D8%253a2D5%253a24T622IBUBKL6J3MHL5NUAWG2XNZ5H5FVSJGLCOC54LB63AGIONYH5CDZVDEYDONEFK2NHKCZROAP7ZU5PLZHXJ5ZNBFEUCBOWWMC4DSY.txt",
  "marketplaceTermsLink": "https://mpcprodsa.blob.core.windows.net/marketplaceterms/3EDEF_marketplaceterms_VIRTUALMACHINE%253a24AAK2OAIZEAWW5H4MSP5KSTVB6NDKKRTUBAU23BRFTWN4YC2MQLJUB5ZEYUOUJBVF3YK34CIVPZL2HWYASPGDUY5O2FWEGRBYOXWZE5Y.txt",
  "name": "centos-8-5",
  "plan": "centos-8-5",
  "privacyPolicyLink": "https://www.procomputers.com/privacy-policy.html",
  "product": "centos-8-5",
  "publisher": "procomputers",
  "retrieveDatetime": "2022-02-15T14:25:40.0488469Z",
  "signature": "2SGZJ4N6T4QINMYRP3CCJ5AHXCI3YWG6UAOS6CIUYQEOPHPFQLBB5WZXVBUXTIHSR5E523CNZNGVZOFRZCSCHC5AL7NGE2ZA3HWZ3QQ",
  "systemData": {
    "createdAt": "2022-02-15T14:25:41.521356+00:00",
    "createdBy": "2e2f81a9-b030-410f-9784-c582580c932e",
    "createdByType": "ManagedIdentity",
    "lastModifiedAt": "2022-02-15T14:25:41.521356+00:00",
    "lastModifiedBy": "2e2f81a9-b030-410f-9784-c582580c932e",
    "lastModifiedByType": "ManagedIdentity"
  },
  "type": "Microsoft.MarketplaceOrdering/offertypes"
}
指定可能なサイズ一覧の調査
東日本リージョンで仮想マシンのサイズとして指定可能な一覧は以下のコマンドで調査できます。
az vm list-sizes \
  --location japaneast \
  --output table
実行例は以下の通りです。
$ az vm list-sizes \
  --location japaneast \
  --output table
MaxDataDiskCount    MemoryInMb    Name                    NumberOfCores    OsDiskSizeInMb    ResourceDiskSizeInMb
------------------  ------------  ----------------------  ---------------  ----------------  ----------------------
24                  57344         Standard_NV6            6                1047552           389120
48                  114688        Standard_NV12           12               1047552           696320
64                  229376        Standard_NV24           24               1047552           1474560
24                  57344         Standard_NV6_Promo      6                1047552           389120
48                  114688        Standard_NV12_Promo     12               1047552           696320
64                  229376        Standard_NV24_Promo     24               1047552           1474560
1                   768           Standard_A0             1                1047552           20480
2                   1792          Standard_A1             1                1047552           71680
4                   3584          Standard_A2             2                1047552           138240
8                   7168          Standard_A3             4                1047552           291840
4                   14336         Standard_A5             2                1047552           138240

  <omitted>
比較的廉価なBシリーズに絞り込んで検索するならば、以下のようにqueryにstarts_with句を指定して検索します。
az vm list-sizes \
  --location japaneast \
  --query "[?starts_with(name,'Standard_B')]" \
  --output table
実行例は以下の通りです。
$ az vm list-sizes \
  --location japaneast \
  --query "[?starts_with(name,'Standard_B')]" \
  --output table
Name            NumberOfCores    OsDiskSizeInMb    ResourceDiskSizeInMb    MemoryInMb    MaxDataDiskCount
--------------  ---------------  ----------------  ----------------------  ------------  ------------------
Standard_B1ls   1                1047552           4096                    512           2
Standard_B1ms   1                1047552           4096                    2048          2
Standard_B1s    1                1047552           4096                    1024          2
Standard_B2ms   2                1047552           16384                   8192          4
Standard_B2s    2                1047552           8192                    4096          4
Standard_B4ms   4                1047552           32768                   16384         8
Standard_B8ms   8                1047552           65536                   32768         16
Standard_B12ms  12               1047552           98304                   49152         16
Standard_B16ms  16               1047552           131072                  65536         32
Standard_B20ms  20               1047552           163840                  81920         32
CentOSの構築例
リソースグループの作成
以下のコマンドでリソースグループを作成します。
az group create --name MyResourceGroup --location japaneast
利用規約の同意
使用する仮想マシンイメージの利用規約に同意します。CentOS8.5に同意する操作例は以下の通りです。
az vm image terms accept --urn procomputers:centos-8-5:centos-8-5:8.5.20211117
仮想マシンの作成
az vm createコマンドで仮想マシンを作成します。指定可能なオプションは-hでヘルプ表示できます。
$ az vm create -h

Command
    az vm create : Create an Azure Virtual Machine.
        For an end-to-end tutorial, see https://docs.microsoft.com/azure/virtual-
        machines/linux/quick-create-cli.

Arguments
    --name -n                                          [Required] : Name of the virtual machine.
    --resource-group -g                                [Required] : Name of resource group. You can

 <omitted>
公開鍵と秘密鍵を作成しつつ、仮想マシンを作成する操作例は以下の通りです。なお、この操作は公開鍵と秘密鍵が未作成である事を前提としており、~/.sshディレクトリが存在しない事が前提条件になっています。
az vm create \
  --resource-group MyResourceGroup \
  --name myCentOS \
  --image procomputers:centos-8-5:centos-8-5:8.5.20211117 \
  --size Standard_B2s \
  --admin-username azureuser \
  --authentication-type ssh \
  --generate-ssh-keys
公開鍵が作成済の場合は–ssh-key-valuesで公開鍵のファイルパスを指定します。
az vm create \
  --resource-group MyResourceGroup \
  --name myCentOS \
  --image procomputers:centos-8-5:centos-8-5:8.5.20211117 \
  --size Standard_B2s \
  --admin-username azureuser \
  --authentication-type ssh \
  --ssh-key-values ~/.ssh/authorized_keys
実行例は以下の通りです。仮想マシンに割り当てられたグローバルIPアドレスは後の操作で使用しますので、メモに控えましょう。
admin@mac19 ~ % az vm create \
  --resource-group MyResourceGroup \
  --name myCentOS \
  --image procomputers:centos-8-5:centos-8-5:8.5.20211117 \
  --size Standard_B2s \
  --admin-username azureuser \
  --authentication-type ssh \
  --ssh-key-values ~/.ssh/authorized_keys
It is recommended to use parameter "--public-ip-sku Standard" to create new VM with Standard public IP. Please note that the default public IP used for VM creation will be changed from Basic to Standard in the future.
{
  "fqdns": "",
  "id": "/subscriptions/2e2f81a9-b030-410f-9784-c582580c932e/resourceGroups/myResourceGroup/providers/Microsoft.Compute/virtualMachines/myCentOS",
  "location": "japaneast",
  "macAddress": "00-0D-3A-50-2D-CB",
  "powerState": "VM running",
  "privateIpAddress": "10.0.0.4",
  "publicIpAddress": "20.89.145.20",
  "resourceGroup": "MyResourceGroup",
  "zones": ""
}
ログイン確認
公開鍵認証を用いて、Azureに構築されたCentOSへログイン可能である事を確認します。
admin@mac19 ~ % ssh 20.89.145.20 -l azureuser
The authenticity of host '20.89.145.20 (20.89.145.20)' can't be established.
ED25519 key fingerprint is SHA256:Egb5oodG+QwrqpsbJBGEETqMB6A6PxIEd9cR1KqxPFc.
This key is not known by any other names
Are you sure you want to continue connecting (yes/no/[fingerprint])? yes
Warning: Permanently added '20.89.145.20' (ED25519) to the list of known hosts.

  Welcome to CentOS-8.5-x86_64-Minimal-30GiB-VHD-20211117_174155.

  * Use "sudo su -" command in order to become root.

  For your convenience, this image is provided by ProComputers.com.
  Visit https://www.procomputers.com for more information.

  If you don't want to see this message anymore, please remove
  the content of the /etc/motd text file.

[azureuser@myCentOS ~]$
リソースグループの削除
リソースグループを削除します。
az group delete --name MyResourceGroup --no-wait
Windowsの構築例
リソースグループの作成
以下のコマンドでリソースグループを作成します。
az group create --name MyResourceGroup --location japaneast
利用規約の同意
利用規約の同意は不要です。
仮想マシンの作成
仮想マシンを作成する操作例は以下の通りです。–admin-passwordでパスワードを指定できますが、この操作はヒストリにパスワードが残るためセキュアではない事を理解ください(自宅専用操作です)。–admin-passwordを省略した場合は、対話形式でパスワードを問われます。対話形式ならばヒストリにパスワードは残りません。
az vm create \
  --resource-group MyResourceGroup \
  --name Windows \
  --image Win2019Datacenter \
  --size Standard_B2s \
  --public-ip-sku Standard \
  --admin-username azureuser \
  --admin-password P@ssw0rd1234
実行例は以下の通りです。仮想マシンに割り当てられたグローバルIPアドレスは後の操作で使用しますので、メモに控えましょう。
admin@mac19 ~ % az vm create \
  --resource-group MyResourceGroup \
  --name Windows \
  --image Win2019Datacenter \
  --size Standard_B2s \
  --public-ip-sku Standard \
  --admin-username azureuser \
  --admin-password P@ssw0rd1234
{
  "fqdns": "",
  "id": "/subscriptions/2e2f81a9-b030-410f-9784-c582580c932e/resourceGroups/myResourceGroup/providers/Microsoft.Compute/virtualMachines/Windows",
  "location": "japaneast",
  "macAddress": "00-0D-3A-50-9B-05",
  "powerState": "VM running",
  "privateIpAddress": "10.0.0.5",
  "publicIpAddress": "20.210.80.31",
  "resourceGroup": "MyResourceGroup",
  "zones": ""
}
admin@mac19 ~ %
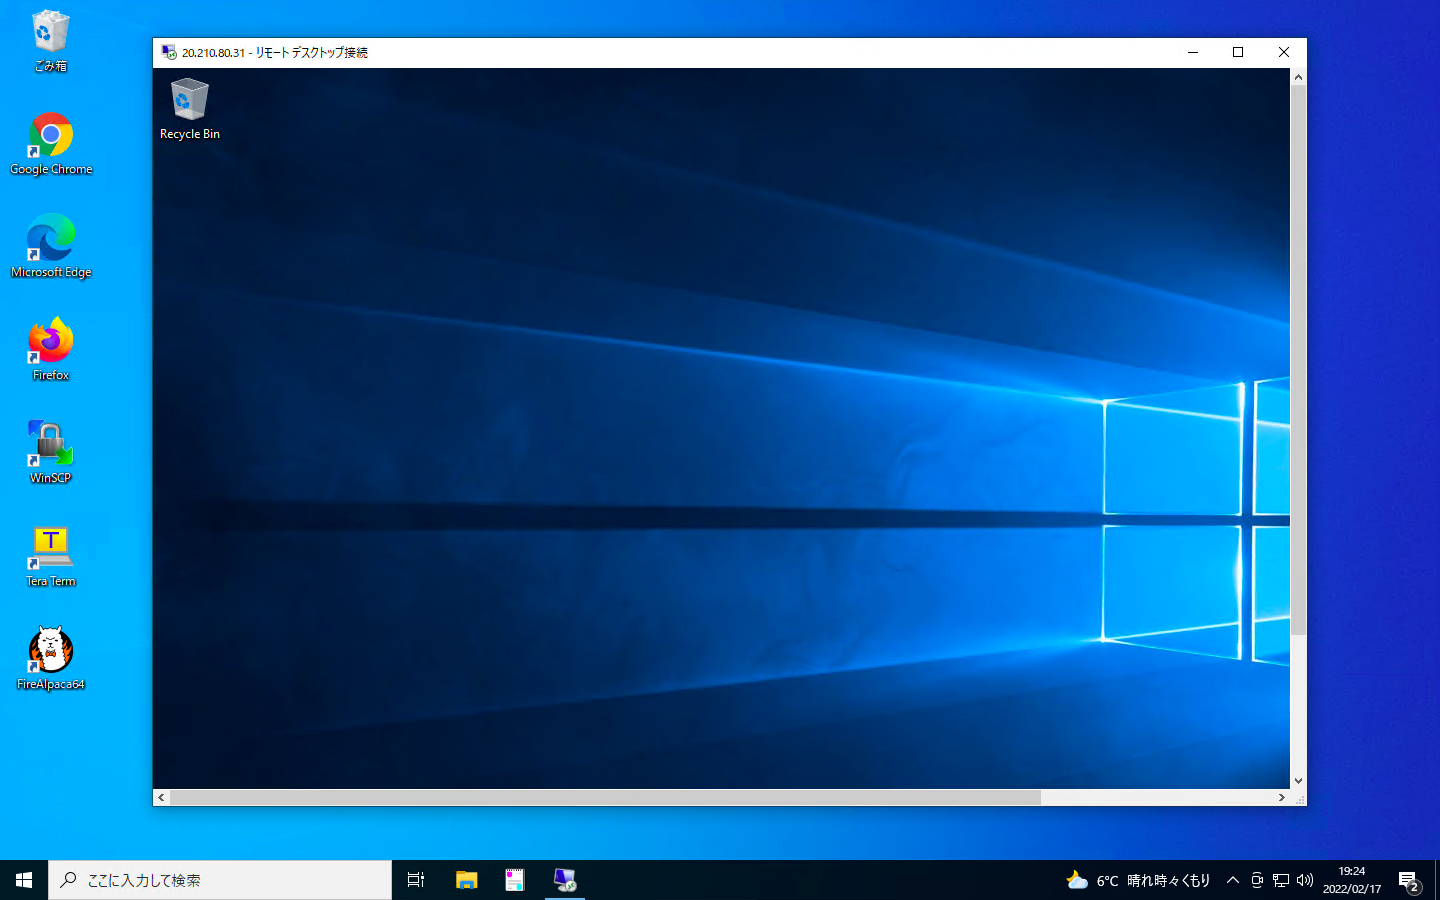
ログイン確認
リモートデスクトップを起動し「グローバルIPアドレス」「ユーザー名」「パスワード」を入力します。
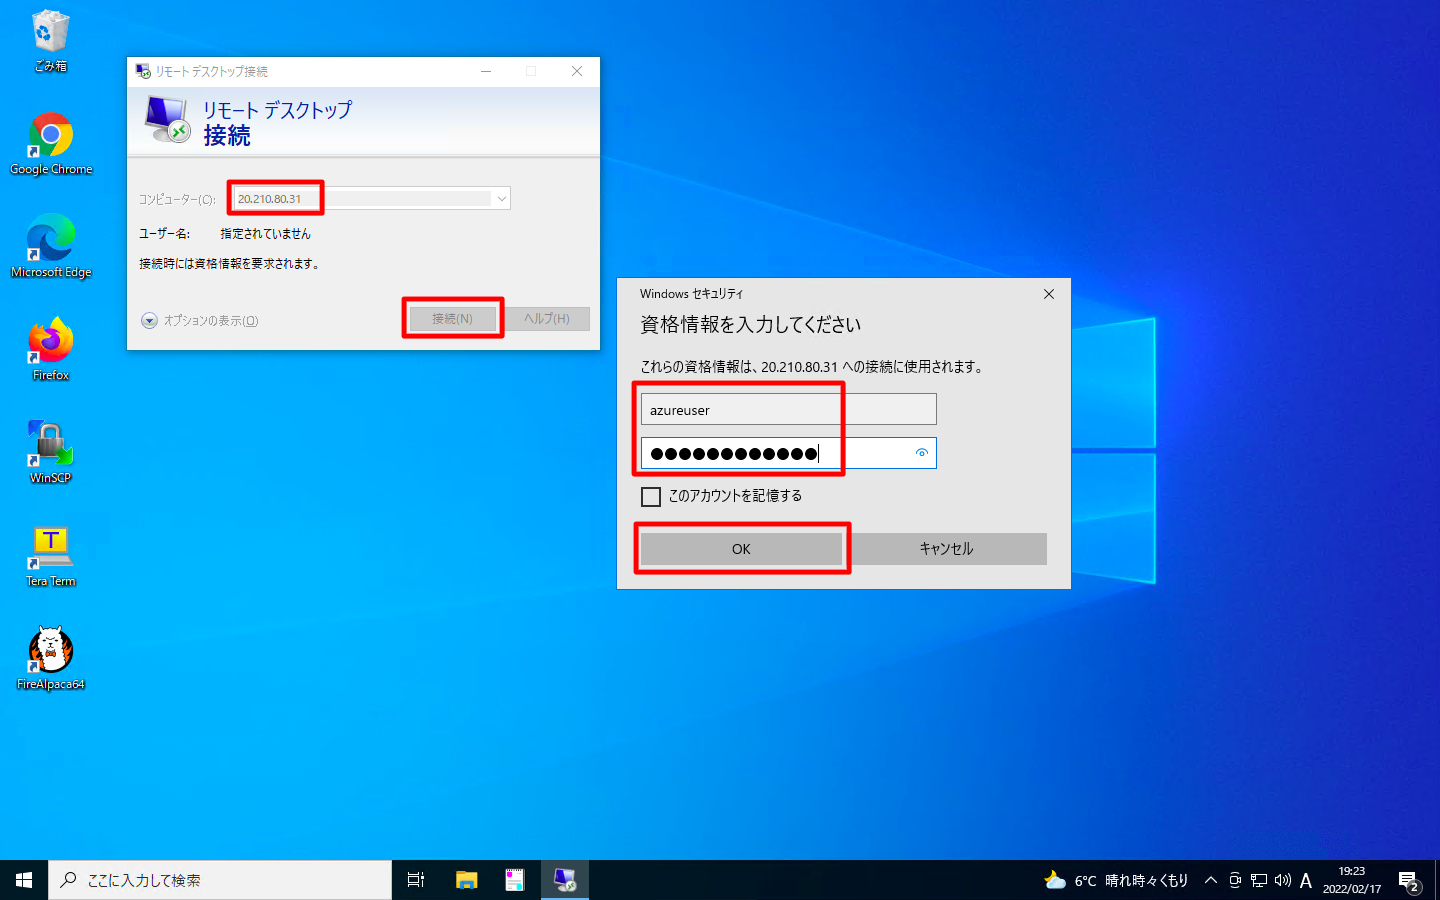
パスワード認証に成功し、リモートデスクトップ接続できた事を確認します。
リソースグループの削除
リソースグループを削除します。
az group delete --name MyResourceGroup --no-wait