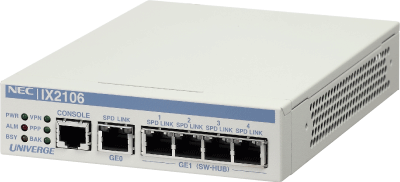
NEC UNIVERGE IX ルータにおけるDHCPの設定例を紹介します。NEX IXに限らず多くのルータは、DHCPやDNS等のサーバ機能も備えております。小規模な会社ならば、サーバを立てるよりもルータにDHCP等のサーバ機能を持たせた方が管理しやすい事もあるでしょう。
設定まとめ
コマンド一覧
DHCPに関するコマンド一覧は以下の通りです。
Router(config)# ip dhcp enable
Router(config)# ip dhcp profile <profile>
Router(config-dhcp-<profile>)# assignable-range <low_addr> <high_addr>
Router(config-dhcp-<profile>)# default-gateway <address>
Router(config-dhcp-<profile>)# domain-name <domain_name>
Router(config-dhcp-<profile>)# dns-server <address>
Router(config-dhcp-<profile>)# lease-time <second>

Router(config)# ip dhcp binding <profile>
Router(config)# interface GigaEthernet1.0
Router(config-GigaEthernet1.0)# ip dhcp binding <profile>
DHCPの有効化
NEC UNIVERGE IXルータでDHCPを使用するにはまずDHCPを有効にする必要があります。以下のコマンドでDHCPを有効にする事ができます。
Router(config)# ip dhcp enable
DHCPプロファイルの作成
DHCPプロファイルとは、どのようなパラメータをDHCPクライアントに割り当てるかの設定です。まず、”ip dhcp profile”コマンドでDHCPプロファイル編集モードへ遷移します。
Router(config)# ip dhcp profile <profile>
Router(config-dhcp-<profile>)#
以下のようなコマンドを用いてDHCPプロファイルを設定する事ができます。理論上の最低限必要な設定は”assignable-range”のみですが、企業ネットワークを作るならば、IPアドレス, デフォルトゲートウェイ, ドメイン名, DNSサーバ, リース期間は明示的に定義する事をお勧めします。
Router(config-dhcp-<profile>)# assignable-range <low_addr> <high_addr>
Router(config-dhcp-<profile>)# default-gateway <address>
Router(config-dhcp-<profile>)# domain-name <domain_name>
Router(config-dhcp-<profile>)# dns-server <address>
Router(config-dhcp-<profile>)# lease-time <second>
プロファイルの紐付
上記コマンドで作成したプロファイルを”ip dhcp binding”コマンドでルータに割り当てます。プロファイルは複数作成する事ができますが、”ip dhcp bindin”コマンドで割り当てられた設定のみが実際にクライアントに割り当てる設定になります。
なお、プロファイルの割り当てはグローバルコンフィグレーションモードで全体に割り当てる事もできれば、インターフェースコンフィグレーションモードでインターフェース単位で割り当てる事もできます。
Router(config)# ip dhcp binding <profile>
Router(config)# interface GigaEthernet1.0
Router(config-GigaEthernet1.0)# ip dhcp binding <profile>
発展的な設定の例
DHCPプロファイルにIPアドレス設定以外の特殊用途の設定も定義できます。。例えば、PXE bootを行いたいならば、”bootfile”, “next-server”を定義する事もできます。
Router(config-dhcp-<profile>)# bootfile <file_name>
Router(config-dhcp-<profile>)# next-server <address>
DHCP optionにも対応しております。dhcp relay時にoptionを付与したい場合やDHCP snooping環境に対応したい場合はこのコマンドを利用して下さい。
Router(config-dhcp-<profile>)# option <decimal_num> {[ ascii | hex | ip ]} <value>
動作確認
動作確認の構成
以下の環境で動作確認を行います。
+-----------------+
|     Internet    |
|    (ISP:Jcom)   |
+-------+---------+
        |
        |
        |
        |
  Gi0.0 | .dhcp
+-------+---------+
|   NEC IX 2015   |
|       R1        |
+-------+---------+
  Gi1.0 | .254
        |
        | 192.168.1.0/24
        |
 ens192 | .dhcp
+-------+---------+
| Rocky Linux 8.4 |
|      host100    |
+-----------------+
初期設定
IX2015の初期設定は以下の通りとします。設定はIPアドレスとインターネットに接続するためのNATしか投入していません。
動作確認 (1) DHCPの有効化
以下のようなDHCPプロファイルを作成します。
[R1:IX2015]
ip dhcp profile vlan1
 assignable-range 192.168.1.100 192.168.1.110
 default-gateway 192.168.1.1
 dns-server 8.8.8.8
 domain-name gokatei.go
 lease-time 7200
DHCPを有効にし、プロファイル”vlan1″を紐づけます。
[R1:IX2015]
ip dhcp enable
!
interface GigaEthernet1.0
  ip dhcp binding vlan1
DHCPによってクライアントOS(host100)に割り当てられたIPアドレスを確認します。
[host010:RockyLinux8.4]
[root@host100 ~]# ifconfig ens192
ens192: flags=4163<UP,BROADCAST,RUNNING,MULTICAST>  mtu 1500
        inet 192.168.1.100  netmask 255.255.255.0  broadcast 192.168.1.255
        inet6 fe80::250:56ff:fe90:ed4a  prefixlen 64  scopeid 0x20<link>
        ether 00:50:56:90:ed:4a  txqueuelen 1000  (Ethernet)
        RX packets 2240  bytes 168253 (164.3 KiB)
        RX errors 0  dropped 1  overruns 0  frame 0
        TX packets 1343  bytes 116675 (113.9 KiB)
        TX errors 0  dropped 0 overruns 0  carrier 0  collisions 0
DHCPによってどのようなアドレスが割り当てられたかは、NEC IXルータ R1でも確認可能です。。確認には”show ip dhcp profile”コマンドか”show ip dhcp lease”コマンドを使用します。
[R1:IX2015]
Router(config)# show ip dhcp profile
DHCP profile vlan1
  Assignable range is 192.168.1.100 - 192.168.1.110
  Default gateway is 192.168.1.1
  Primary DNS server is 8.8.8.8
  Domain name is gokatei.go
  Lease time is 7200 seconds
  Leased to 1 clients
  Interface GigaEthernet1.0
    Subnet mask is 255.255.255.0
    Dynamic assignments
      IP Address      MAC Address        State       BoundTime   LeaseTime
      192.168.1.100   00:50:56:90:ed:4a  Bound       177         7200
Router(config)#
Router(config)#
Router(config)#
Router(config)# show ip dhcp lease
Leased to 1 clients
Codes : D - Dynamic assignments, F - Fixed assignments
  IP Address      MAC Address       BoundTime LeaseTime State     Profile
D 192.168.1.100   00:50:56:90:ed:4a 179       7200      Bound     vlan1
Router(config)#

