PrometheusはExporterと呼ばれるメトリック情報を公開するコンポーネントから情報を収集します。Exporterは前述の説明で紹介した「Node Exporter」以外にも様々なメトリックを公開するものがあります。もし、監視したいソフトウェアのExporterが存在しないならば、容易に自作する事もできます。ここでは、既存のExporterの使用感を掴むために、OfficialなExporterであるmysqld_exporterの使い方を説明します。
前提
参照資料
動作確認済環境
- Rocky Linux 8.6
- Prometheus 2.36.2
- mysqld 8.0.26
- mysqld_exporte 0.14.0
構成図
2台の仮想マシンに対して、以下のコンポーネントをインストールします。prometheusのインストール方法は説明を省略します。
+----------------+ +-----------------+
| linux010       | | linux020        |
| 172.16.1.10/24 | | 172.16.1.20/24  |
|                | |                 |
| prometheus     | | mysqld_exporter |
|                | | mysqld          |
+----------------+ +-----------------+
mysqld(MySQL Server)のインストール
インストールとユーザ作成
linux020へMySQLをインストールします。
dnf install mysql-server
mysqldを起動します。
systemctl enable mysqld.service --now
prometheusが使用するMySQLユーザを定義します。GitHubのREADME.mdに記された最小限の権限設定は以下の通りです。「172.16.1.%」や「password」の部分は環境に応じて適宜の変更をお願いします。
mysql -uroot << EOF
CREATE USER 'exporter'@'localhost' IDENTIFIED BY 'password' WITH MAX_USER_CONNECTIONS 3;
GRANT PROCESS, REPLICATION CLIENT, SELECT ON *.* TO 'exporter'@'localhost';
EOF
疎通確認
前述の操作で作成したユーザで接続可能である事を確認します。
[root@linux020 ~]# mysql -uexporter -ppassword --host=localhost
mysql: [Warning] Using a password on the command line interface can be insecure.
Welcome to the MySQL monitor.  Commands end with ; or \g.
Your MySQL connection id is 9
Server version: 8.0.26 Source distribution

Copyright (c) 2000, 2021, Oracle and/or its affiliates.

Oracle is a registered trademark of Oracle Corporation and/or its
affiliates. Other names may be trademarks of their respective
owners.

Type 'help;' or '\h' for help. Type '\c' to clear the current input statement.

mysql> exit
Bye
[root@linux020 ~]#
mysqld_exporterのインストール
インストールと起動
mysqld_exporterのインストール方法はいくつかあります。このページでは「公式サイト」や「GitHub」で紹介されていないパッケージを用いた手法を紹介します。
Prometheusのリポジトリを登録します。
cat << 'EOF' > /etc/yum.repos.d/prometheus.repo
[prometheus]
name=prometheus
baseurl=https://packagecloud.io/prometheus-rpm/release/el/$releasever/$basearch
repo_gpgcheck=1
enabled=1
gpgkey=https://packagecloud.io/prometheus-rpm/release/gpgkey
       https://raw.githubusercontent.com/lest/prometheus-rpm/master/RPM-GPG-KEY-prometheus-rpm
gpgcheck=1
metadata_expire=300
EOF
mysqld_exporterをインストールします。
dnf install mysqld_exporter
パッケージ版の場合は、systemdのお作法に基づいて起動引数が設定されています。/usr/lib/systemd/system/mysqld_exporter.serviceを確認すると、環境変数は/etc/default/mysqld_exporterに定義できる事が分かります。
また、起動引数は環境変数MYSQLD_EXPORTER_OPTSで指定できる事も頭の片隅に置いてください。後続の操作で環境変数を変更します。
[root@linux020 ~]# cat /usr/lib/systemd/system/mysqld_exporter.service
# -*- mode: conf -*-

[Unit]
Description=Prometheus exporter for MySQL server metrics.
Documentation=https://github.com/prometheus/mysqld_exporter
After=network.target

[Service]
EnvironmentFile=-/etc/default/mysqld_exporter
User=prometheus
ExecStart=/usr/bin/mysqld_exporter $MYSQLD_EXPORTER_OPTS
ExecReload=/bin/kill -HUP $MAINPID
Restart=on-failure
RestartSec=5s


[Install]
WantedBy=multi-user.target
[root@linux020 ~]#
環境変数を指定するファイル/etc/default/mysqld_exporterにMySQLへの接続情報を定義します。設定例は以下の通りです。
cat << 'EOF' > /etc/default/mysqld_exporter
MYSQLD_EXPORTER_OPTS=""
DATA_SOURCE_NAME='exporter:password@(localhost:3306)/'
EOF
mysqld_exporterを起動します。
systemctl enable mysqld_exporter.service --now
「http://localhost:9104/metrics」にてmysqld_exporterからmysqldへ接続可能である事を確認します。接続可能な場合は「mysql_up 1」になります。
[root@linux020 ~]# curl -s http://localhost:9104/metrics | grep mysql_up
# HELP mysql_up Whether the MySQL server is up.
# TYPE mysql_up gauge
mysql_up 1
[root@linux020 ~]#
起動引数の変更
GitHubのREADME.mdのCollector Flagsの説明を見ると、取得対象メトリックの取捨選択ができる事が分かります。
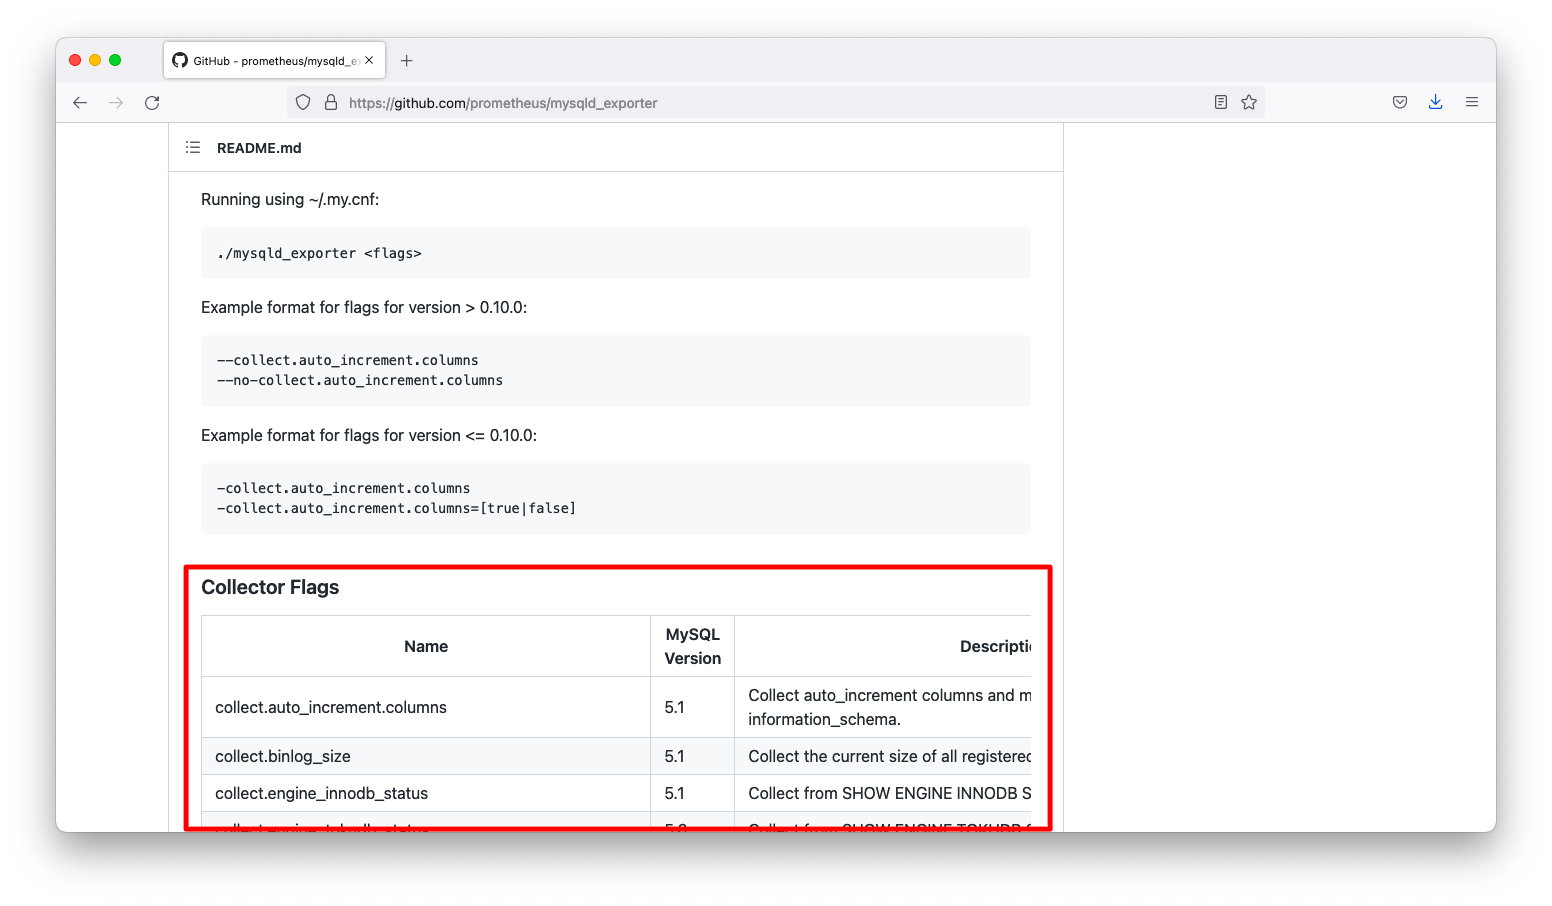
mysqld_exporter 0.10.0より大きいバージョンの場合、以下のような引数を与えると取得対象を増やす事ができます。
--collect.auto_increment.columns
--collect.binlog_size
逆に取得対象を減らし軽量化を図りたい場合は、以下のようにnoを付与した引数を否定します。
--no-collect.auto_increment.columns
--no-collect.binlog_size
例えば、mysqld_exporter 0.14.0の場合は、以下grep出力が示す通りデフォルト設定ではbinlog_sizeの取得は無効化されています。
[root@linux020 ~]# curl -s http://localhost:9104/metrics | grep mysql_binlog_size_bytes
[root@linux020 ~]#
起動引数に以下を追加し、binlog_sizeを取得できるようにします。
cat << EOF > /etc/default/mysqld_exporter
MYSQLD_EXPORTER_OPTS="--collect.binlog_size"
DATA_SOURCE_NAME='exporter:password@(localhost:3306)/'
EOF

systemctl restart mysqld_exporter.service
確かに、binlog_sizeを取得できる事を確認します。
[root@linux020 ~]# curl -s http://localhost:9104/metrics | grep mysql_binlog_size_bytes
# HELP mysql_binlog_size_bytes Combined size of all registered binlog files.
# TYPE mysql_binlog_size_bytes gauge
mysql_binlog_size_bytes 729
[root@linux020 ~]#
Prometheusの設定例
/etc/prometheus/prometheus.ymlの設定例は以下の通りです。
cat << EOF > /etc/prometheus/prometheus.yml
scrape_configs:
  - job_name: mysqld
    static_configs:
      - targets:
        - 172.16.1.20:9104
EOF

systemctl restart prometheus.service
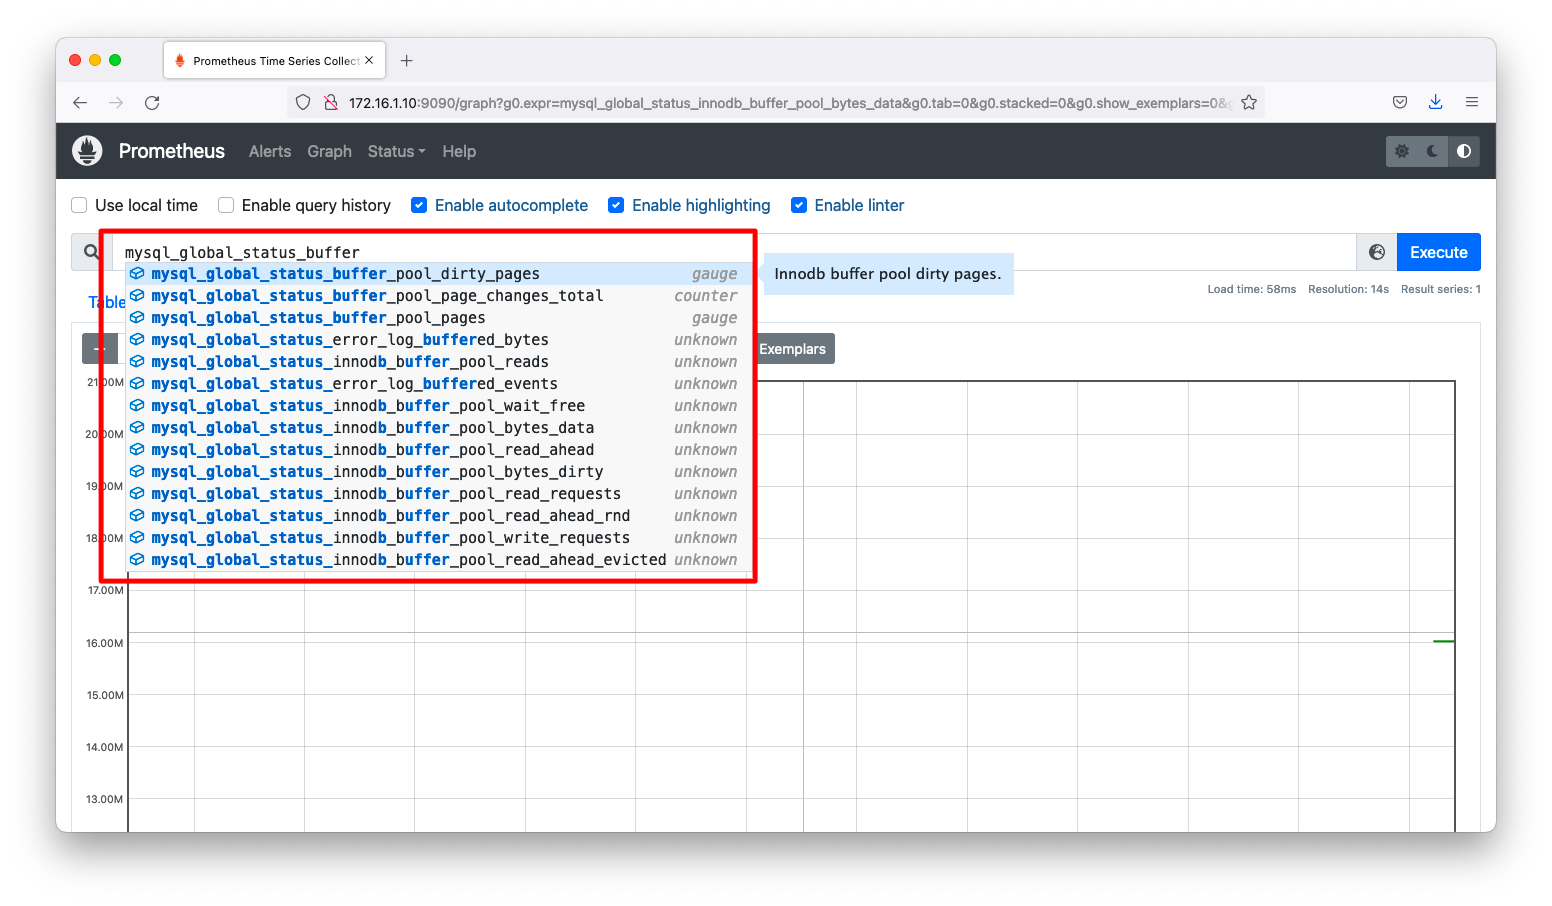
設定後、MySQLの情報が取得できる事を確認します。